|
|
Post by HRHpenfold on Jan 13, 2015 9:26:12 GMT
as you can see in the pictures there has been some paintwork already done, though it's in cellulose and whilst it is reasonable, its not to my standard, and in order to fit a normal V7 seat needs modified at the rear, it's already had a nice monza cap grafted onto the tank, but though the colour is nice, it's not really in keeping with the older V7sport look, 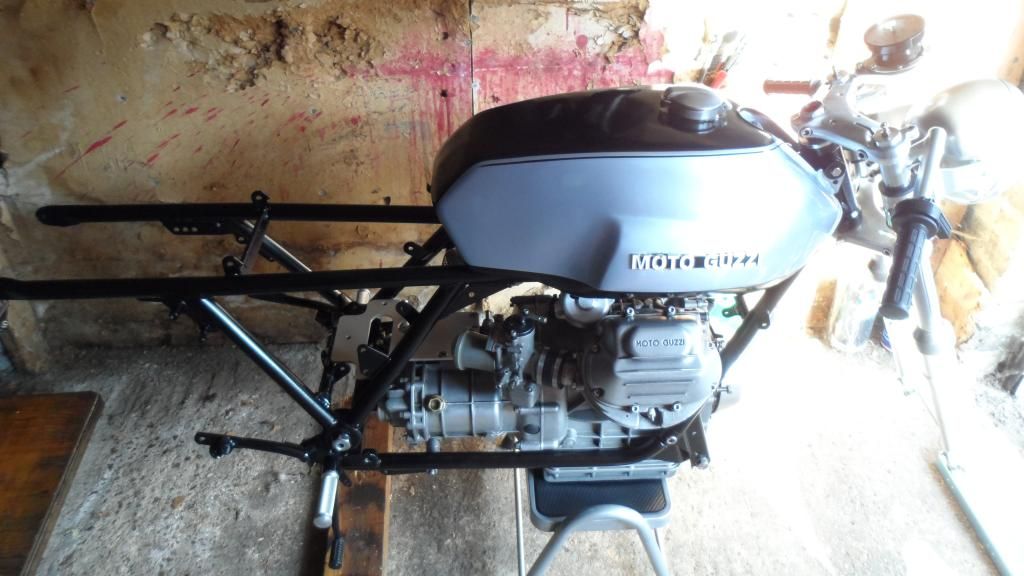 So rather than ruining this one I started searching for a rougher damaged tank, that I could modify without ruining the one I already had, so I put a wanted add on the moto guzzi forum, I did get a few offers, but thought the price wanted to be prohibitive £200 plus for a tank that I was intending to cut up and maybe even fook up, was a little to rich for me, so having resigned to cut up the perfectly good original, life went on, then someone contacted me asking if I was still looking for a tank, half expecting a rough tank with the owner wanting £200+ for it, the owner sent me these pictures 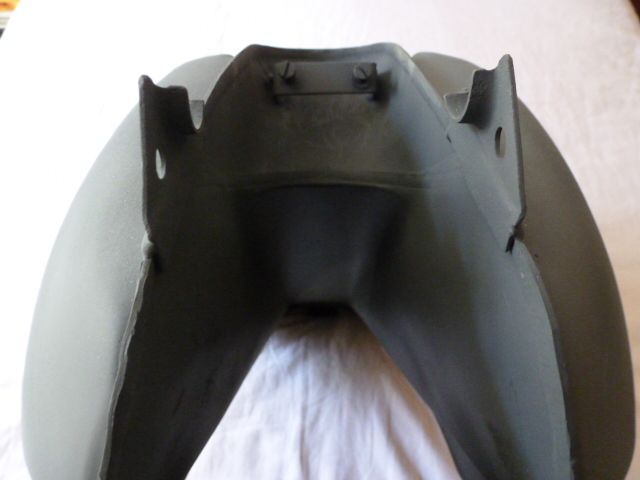 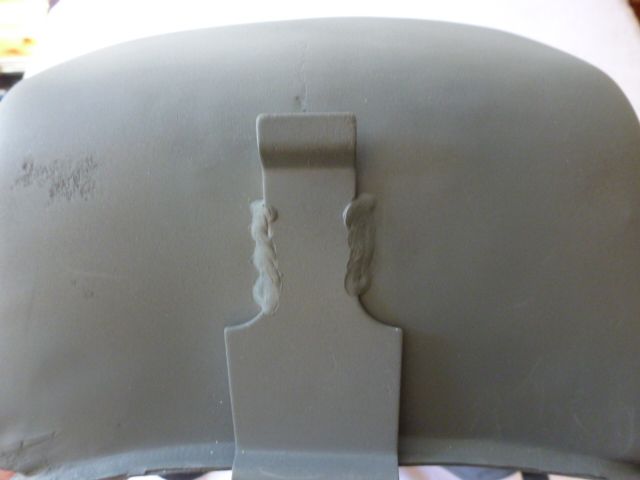 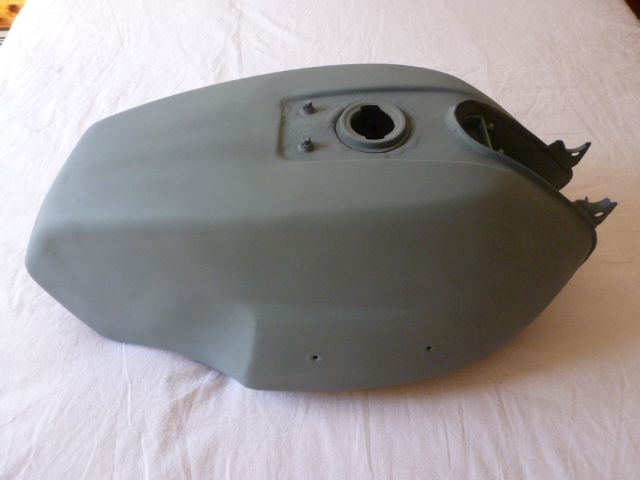 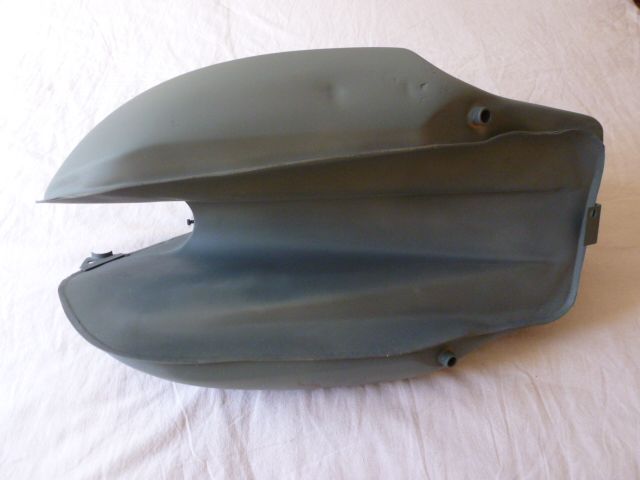 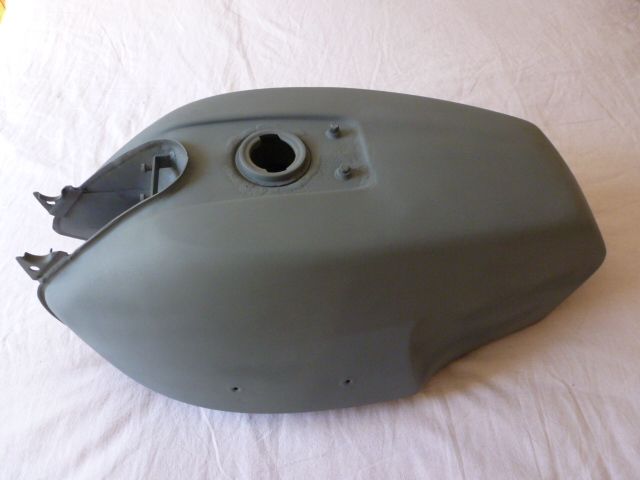 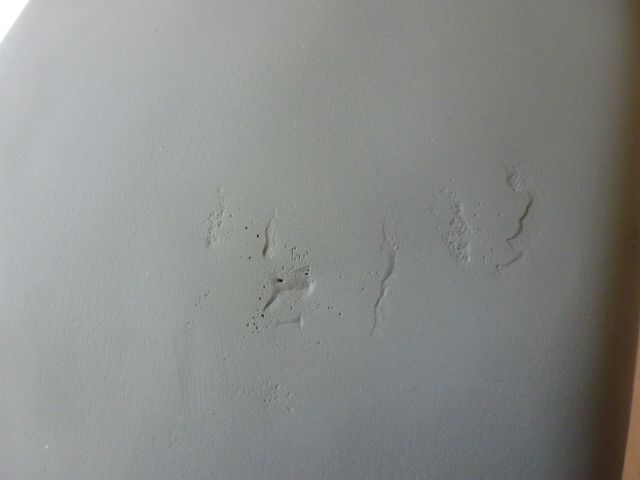 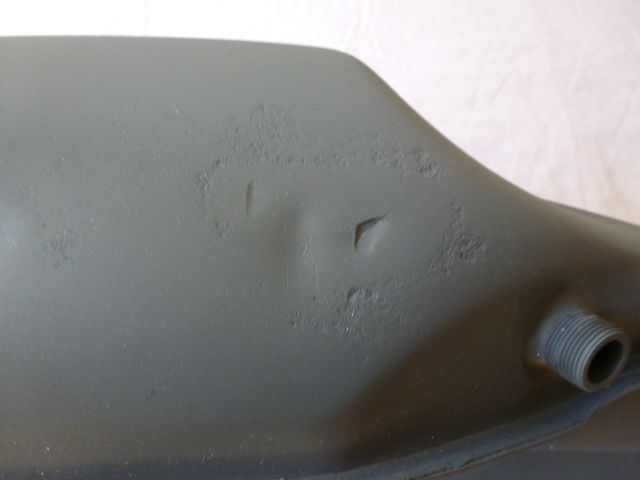 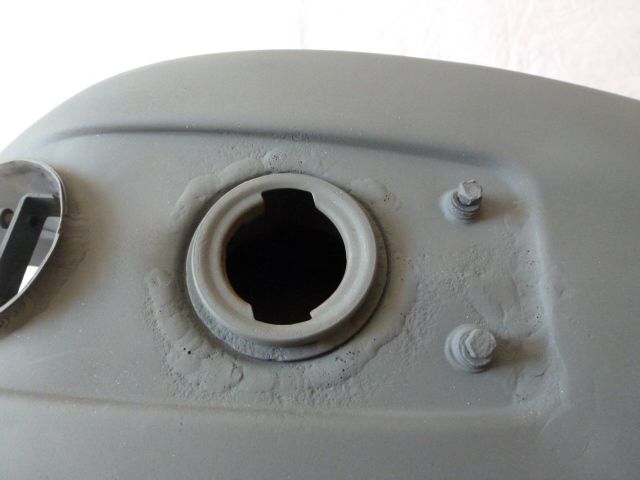 so I was half right, but he wanted £100 so I bought it! the top will be converted to monza cap type, same as the tank that came with the bike, but I am thinking of fitting a fuel sender to it, and I need to square the back of the tank to suit the V7 seat! |
|
|
|
Post by HRHpenfold on Jan 13, 2015 9:37:27 GMT
Here is the seat unit I bought 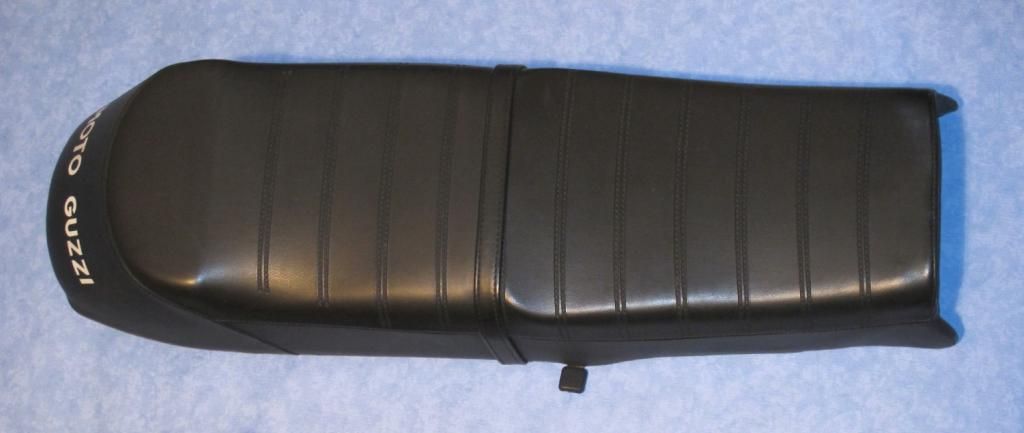 you can see the squarer front end that fits against the tank, that on a LM tank is curved, the V7 had the same shape tank, without the curve on the back of the tank! more pictures, 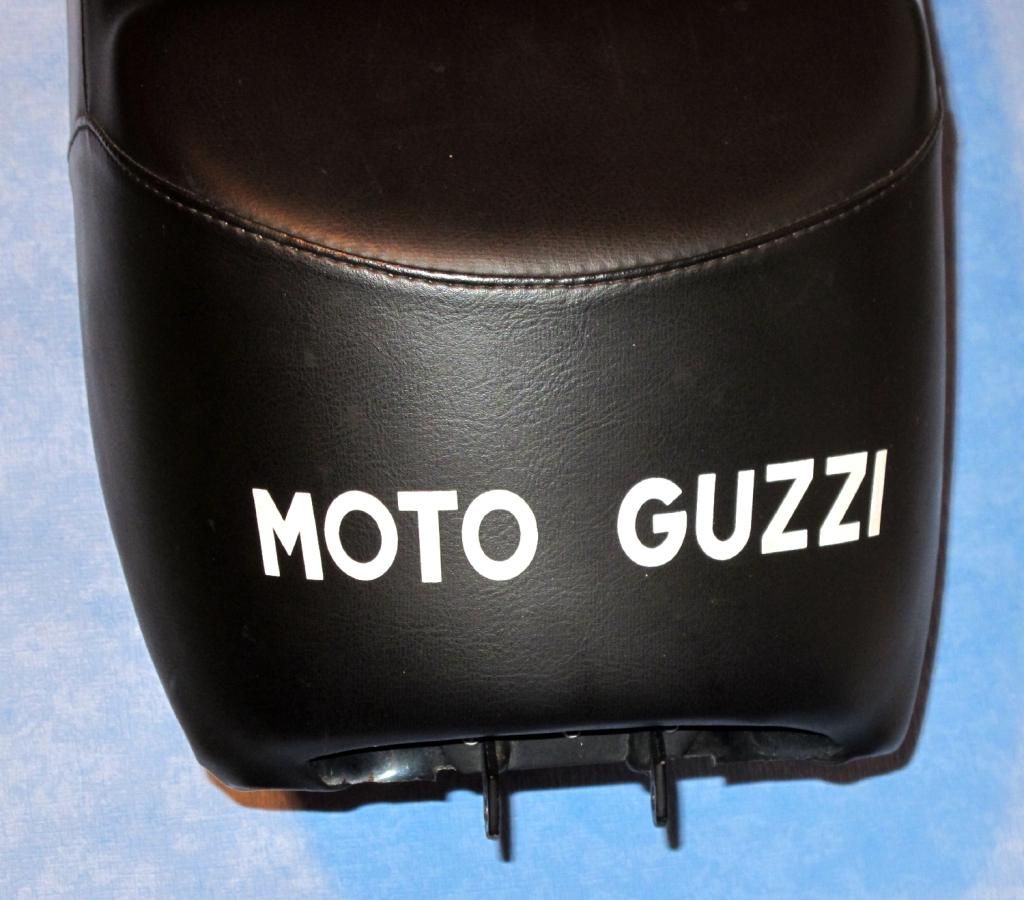 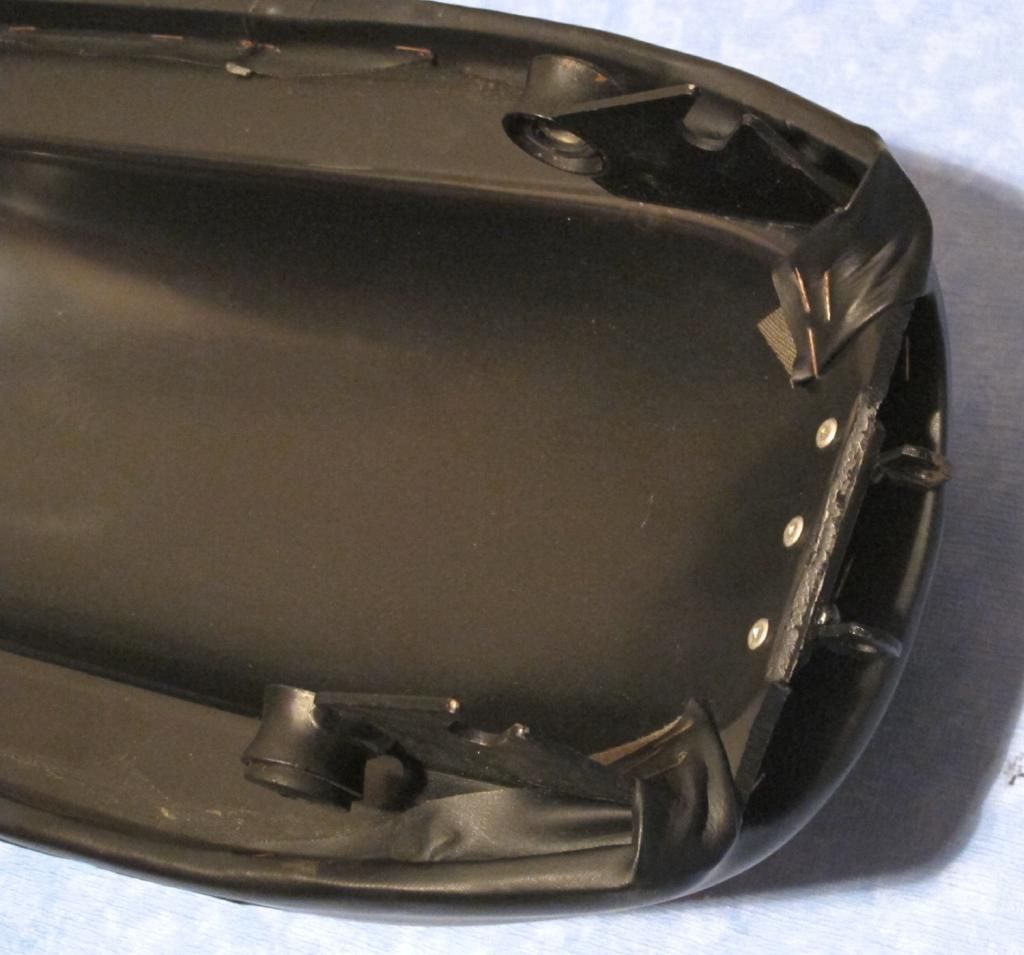 other than the tank issue the V7 seat fits, as the V7 and most Moto Guzzi's right up until recently used the same Tonti designed frame! |
|
|
|
Post by HRHpenfold on Jan 13, 2015 11:41:25 GMT
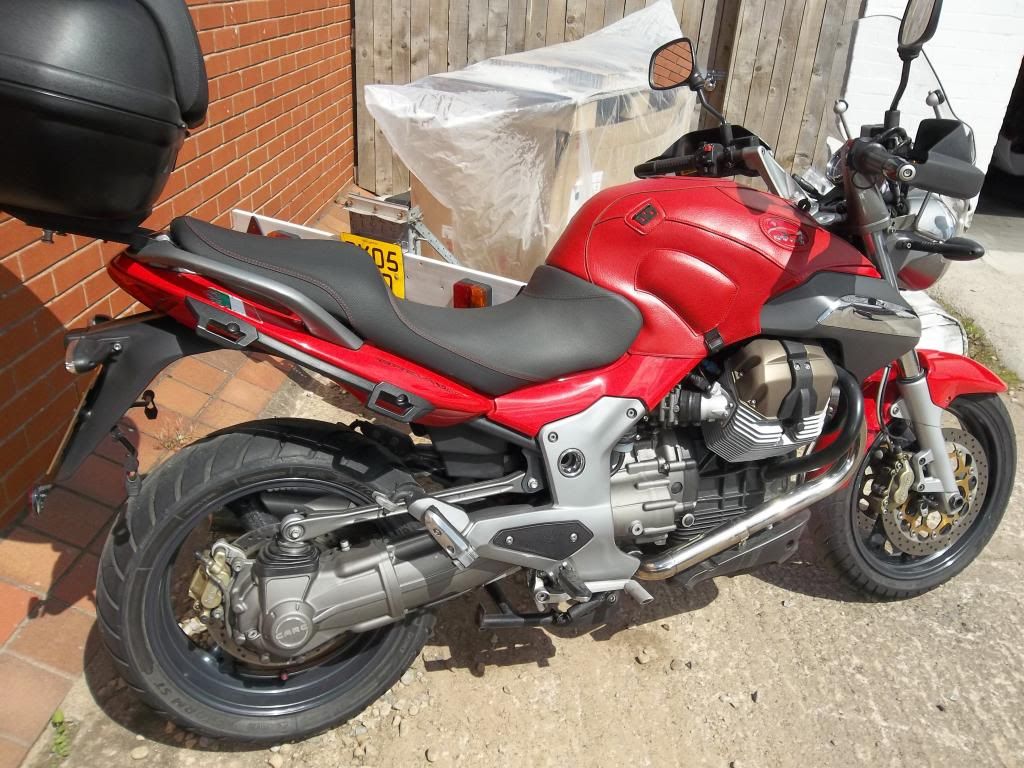
This is undoubtedly the best thread on this forum. I'd have started a new thread for the le Mans though, just in case you return to working on the BMW or some other project. You don't want us senile old gits to get confused  'That Penfold bloke's a genius, took a BMW and turned it into a Guzzi.'  A BMW is just a Guzzi with droopy boobs anyhow! I did get a couple of crash pads for the Gs's for christmas  Iphones should be called Iareshitphones!  the only chrome framed R80G/s in existence! 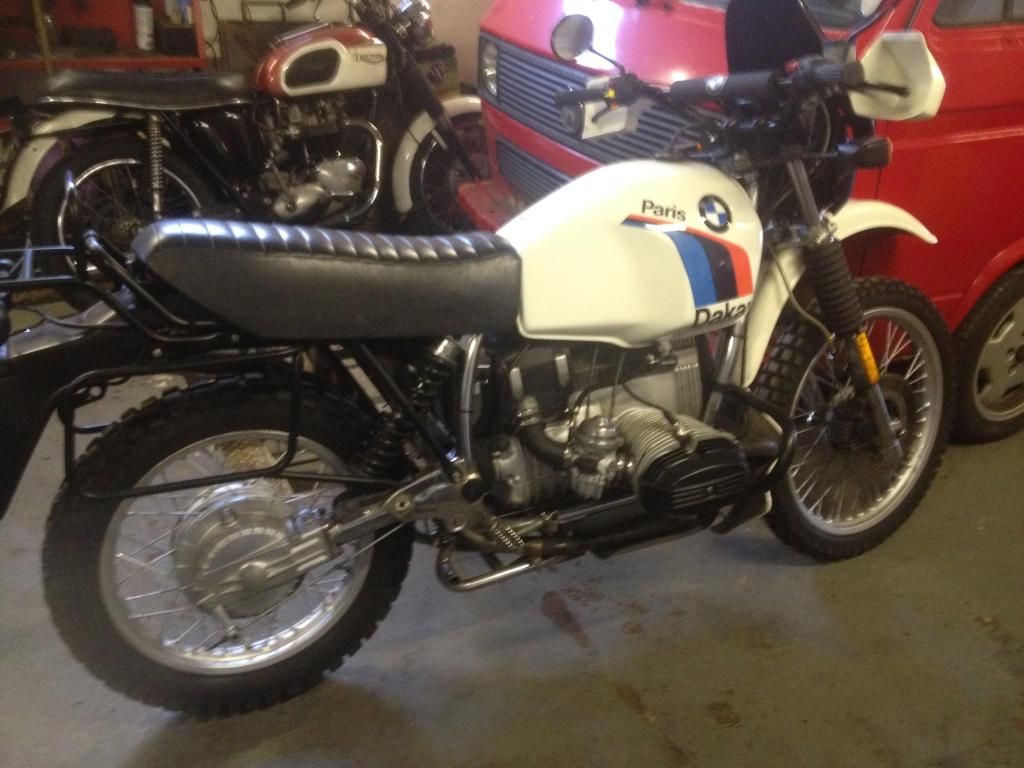 |
|
|
|
Post by HRHpenfold on Jan 13, 2015 12:23:15 GMT
This is how she looked when the last owner bought her, she originally was a pair of bikes that went to Dubai to be used by the police, strangely the police never ordered any as they lacked air conditioning, it was then sold to an airline pilot, who hardly used it, which if you have been to Dubai is understandable, he got it chromed everywhere, and made it look awful, the other bike was destroyed and the bike came with wheels, drive system tank, and a few other hard to source bits, he sold it to another pilot who again never used it, who then sold it to the shop where the owner that sold it to me bought it! 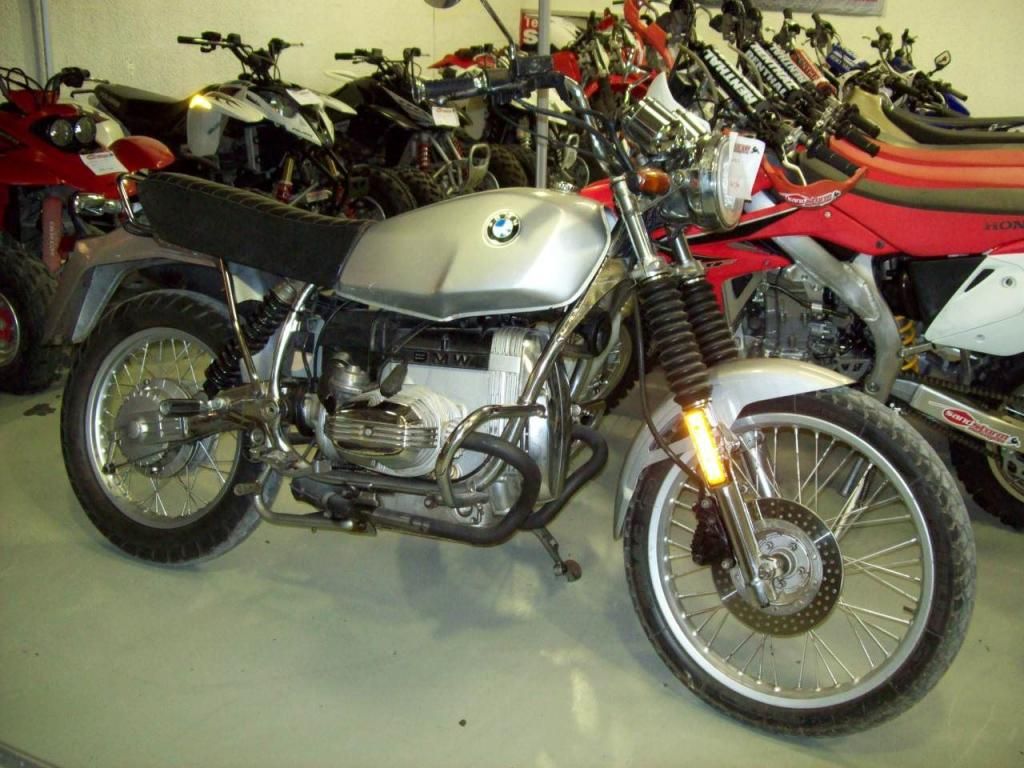  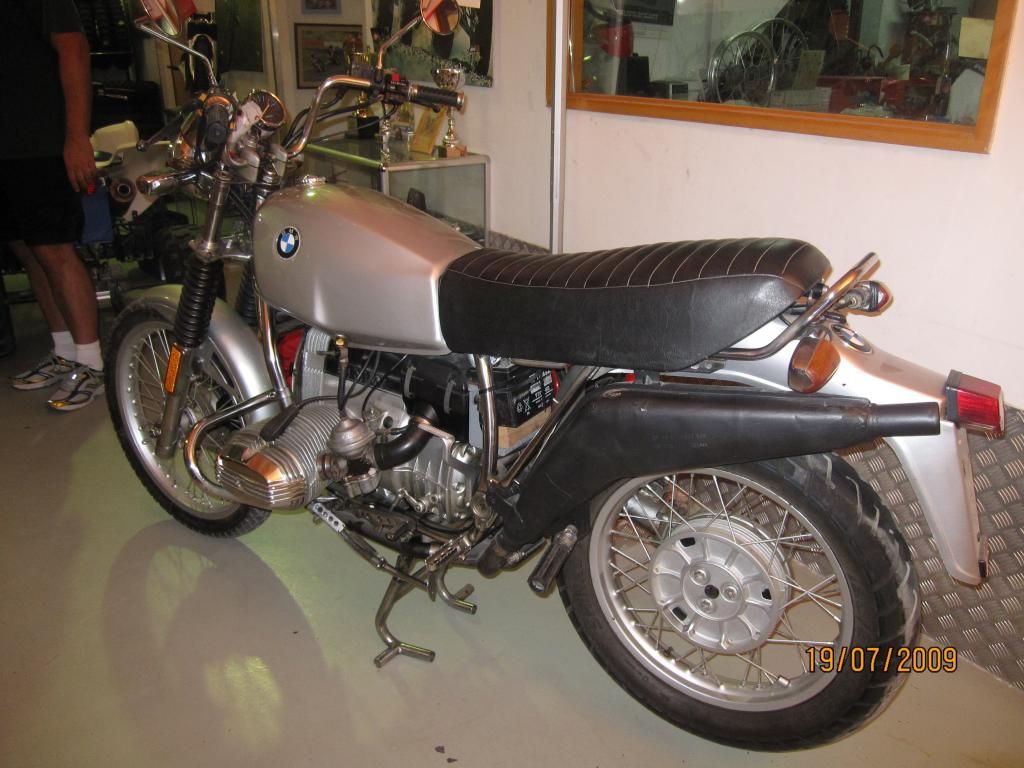 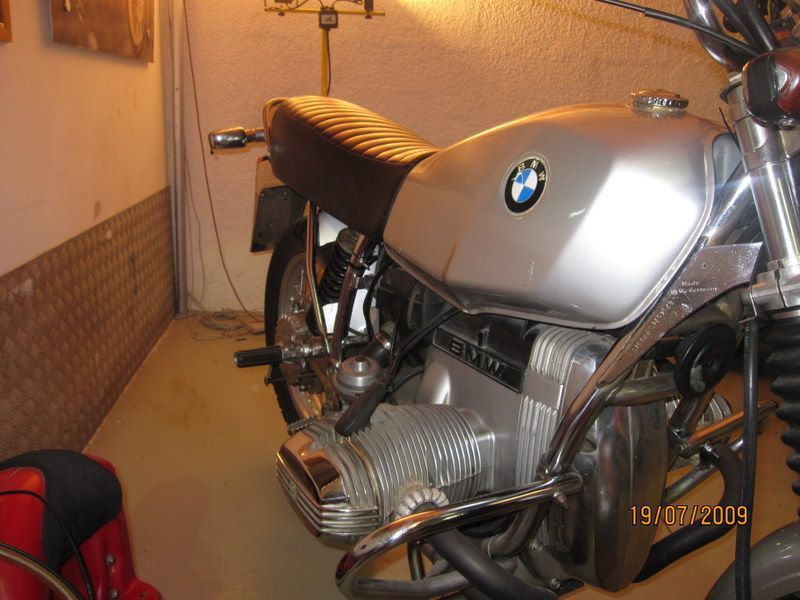 The original clock and headlamp unit had long since gone and a replacement fitted, the speedo's are unobtanium now, this is it in Dubai 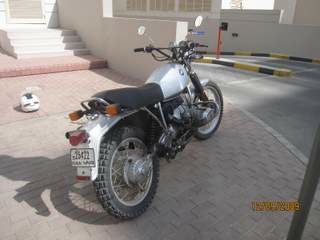 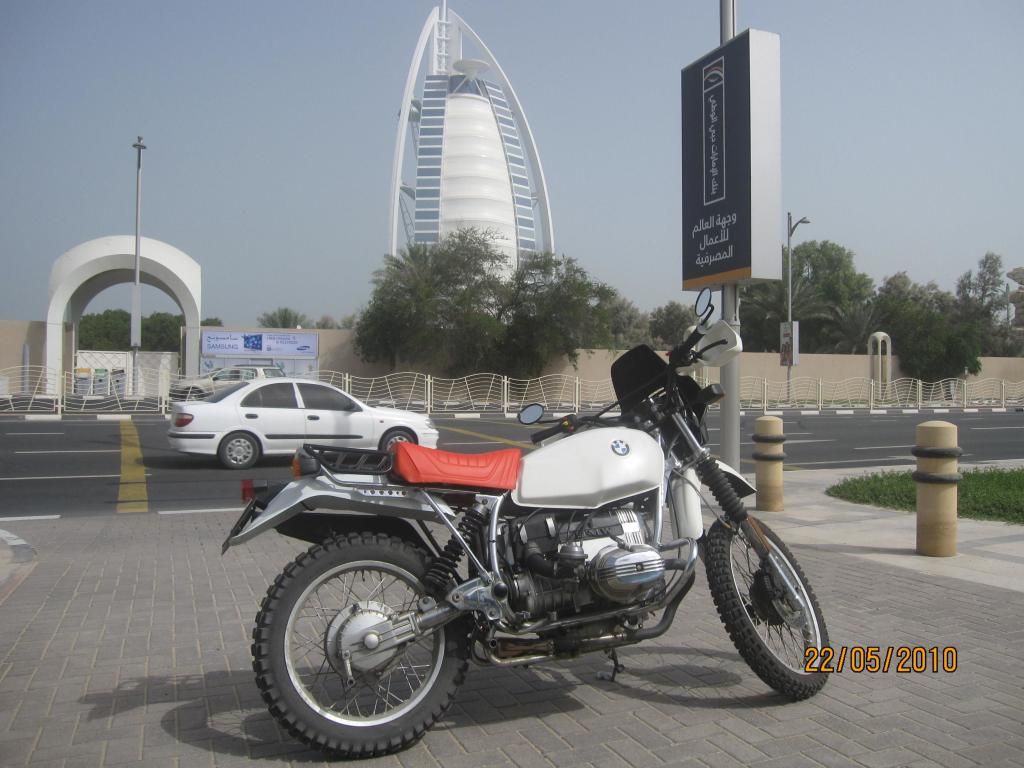 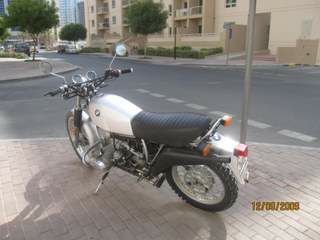 eventually it was shipped to the UK, and registered, though mistakenly registered as a 1986 model, it was actually manufactured in June 1981, which I am now in discussion with DVLA about,  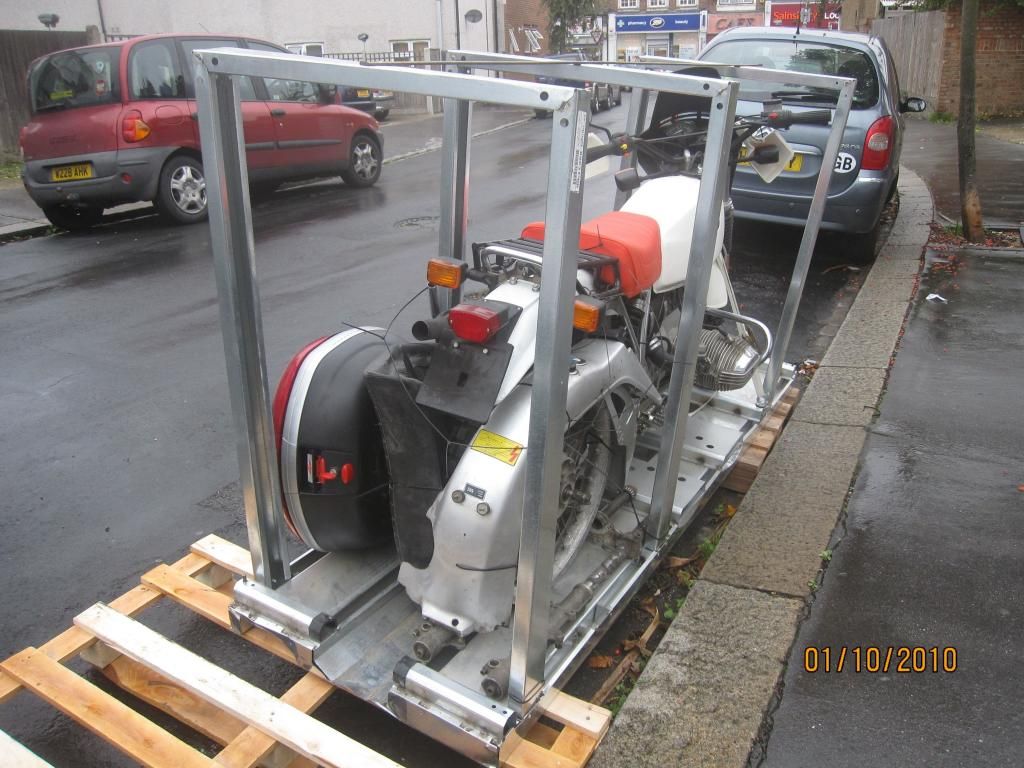 its very strange that it has a chrome frame, forks, swingarm, etc, 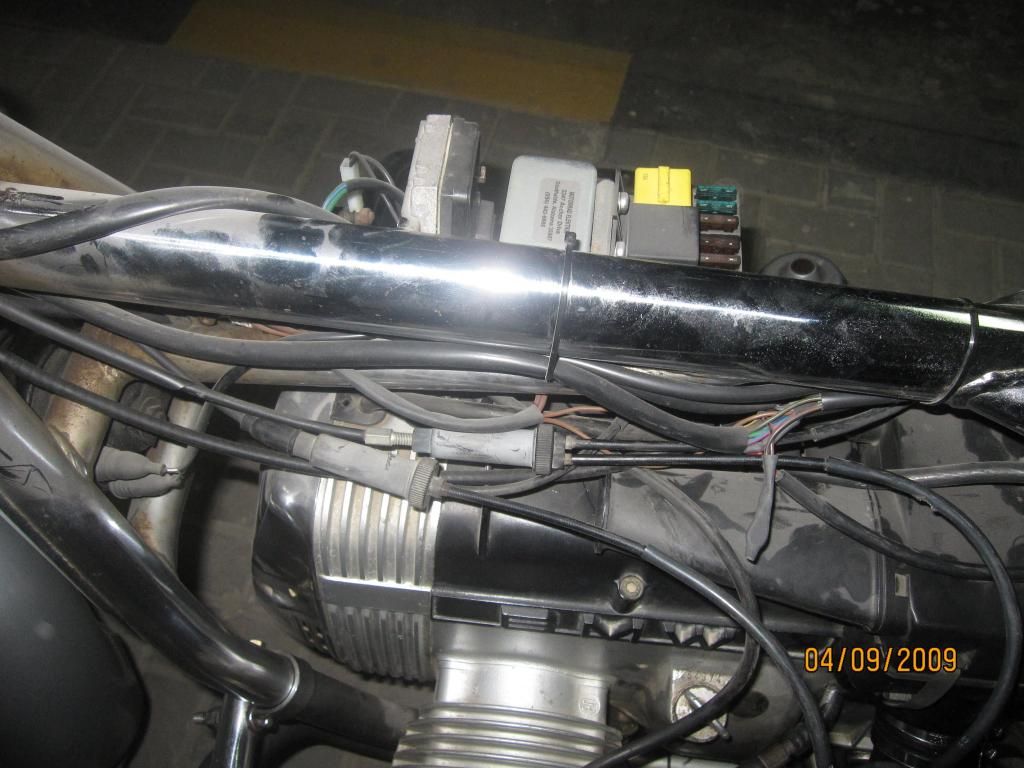 a second hand speedo was fitted which shows just short of 60k miles, but the bike is a very low milage bike though, you can generally tell, though there was no confirmation of the milage, and a lot of rubber parts have been replaced, destroyed due to the arabian heat, and including the loom! |
|
|
|
Post by HRHpenfold on Jan 14, 2015 9:32:25 GMT
I suppose I should post pictures of the finished red one, finished though I still need to do a couple of things to improve it! 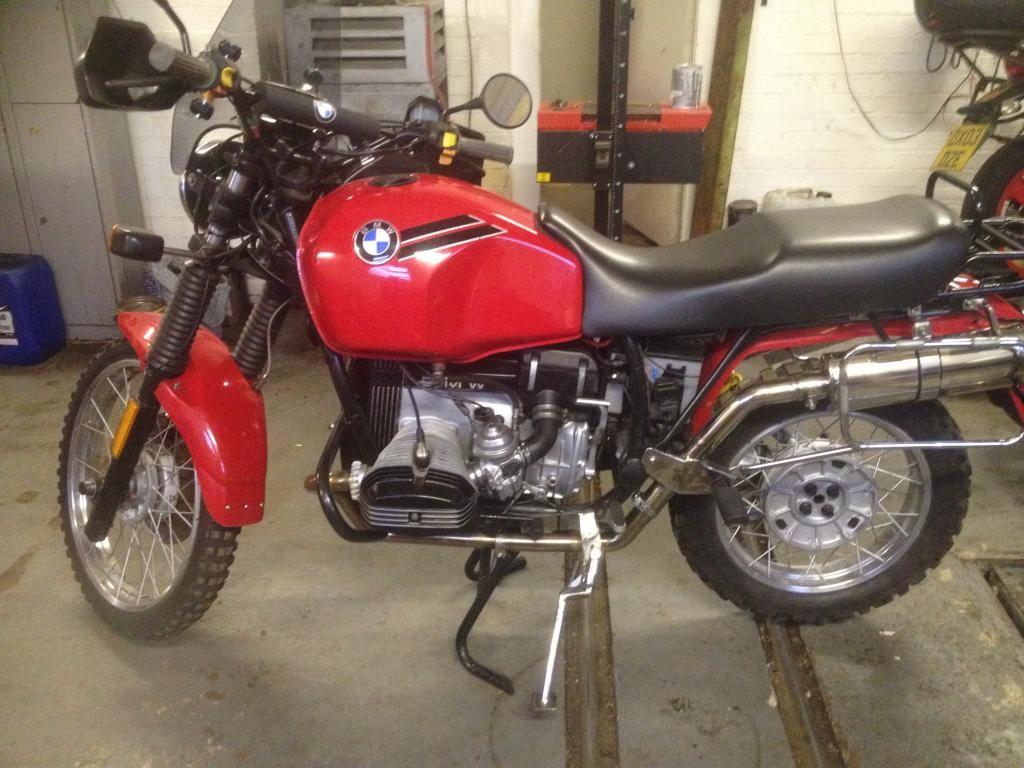 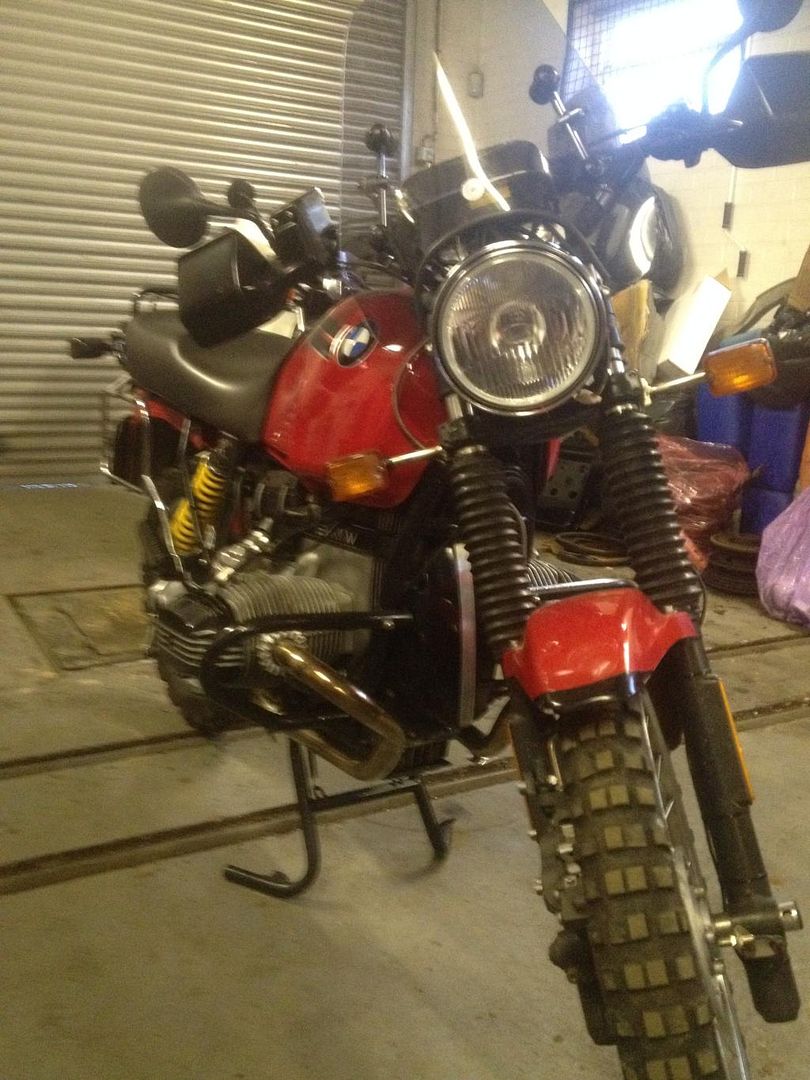 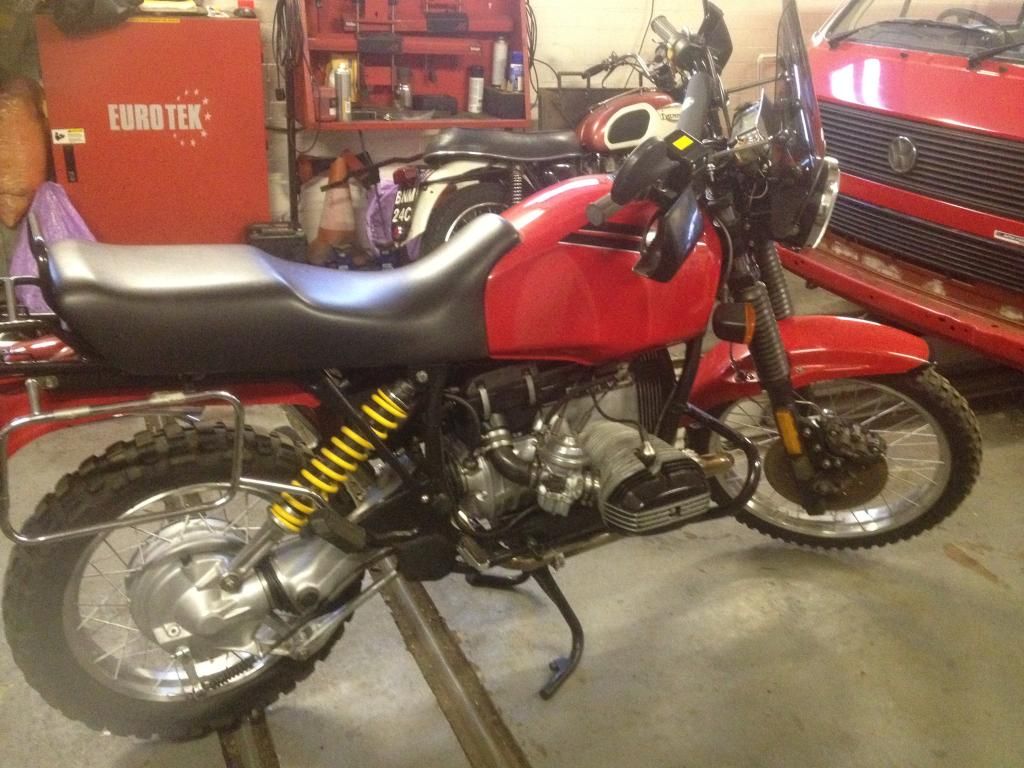 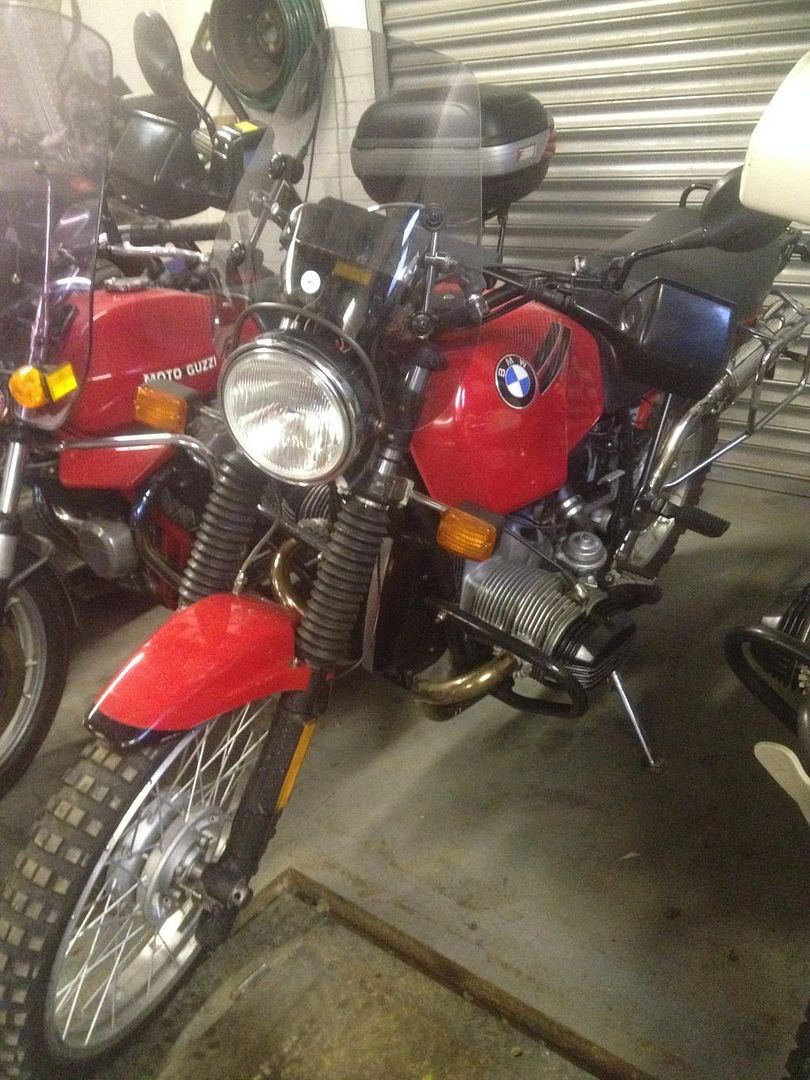 Things I need to re visit at some time are, the clocks I just don't like them, so at sometime I will be changing it, possibly to a round clock, I need to make a exhaust guard, in order to protect the passengers leg, I was thinking of using the stamped mesh type in stainless steel, theres still the feed to the rev counter to temporary seal, it needs to be temporary because it will feed any new clock fitted, the pipe to the gearbox breather needs changed to the silicon type and fed under the seat, and the bung in the gearbox sealed with a dab of black silicon sealant, it has a O ring, but needs a belt and braces approach to stop rain water flowing into the gearbox! a MOT, and the tyres need changed to less off road type, but i figure they will wear out quickly once on the road |
|
|
|
Post by HRHpenfold on Jan 14, 2015 16:08:08 GMT
pair of conti Go tyres for the LM project arrived today, new rim tapes and inner tubes as well, I chose the Go, because of the grip, they seem rather good on the R100Rt, and they were over £10 cheaper for the pair than the BT45's if they last 3,000 miles, then I will be happy, that will take a few years on a summer toy that the LM2 will be! 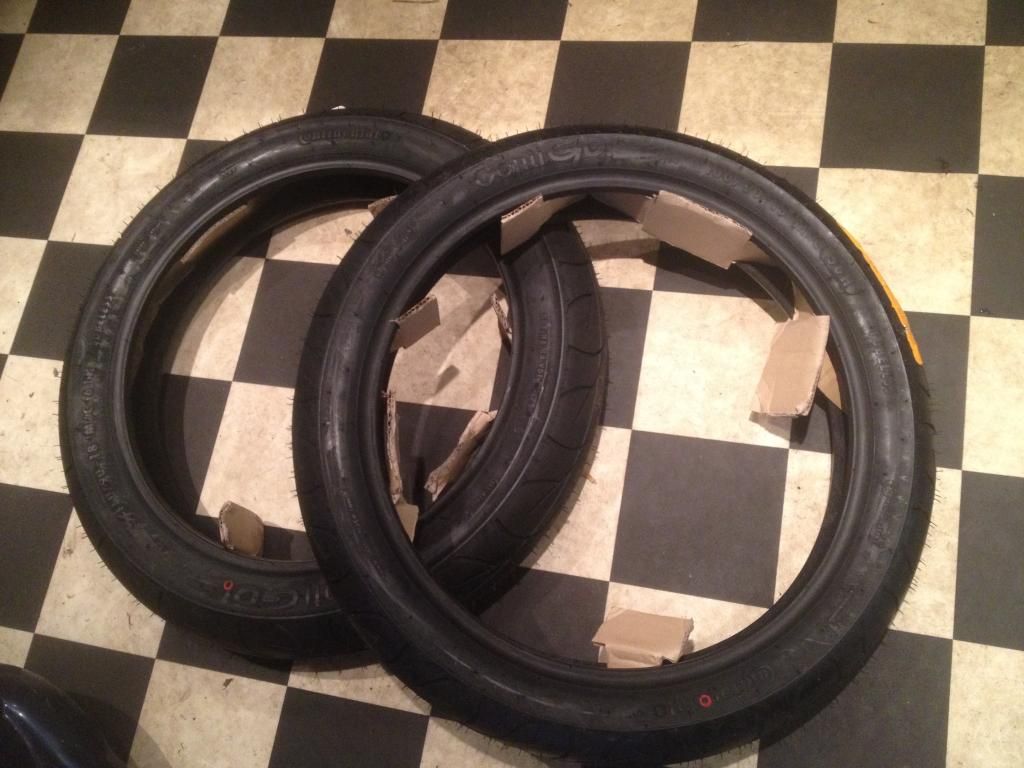 |
|
|
|
Post by HRHpenfold on Jan 14, 2015 16:37:37 GMT
A slightly caffee'd version of the one on the right is what I am looking to do, and a different colour! 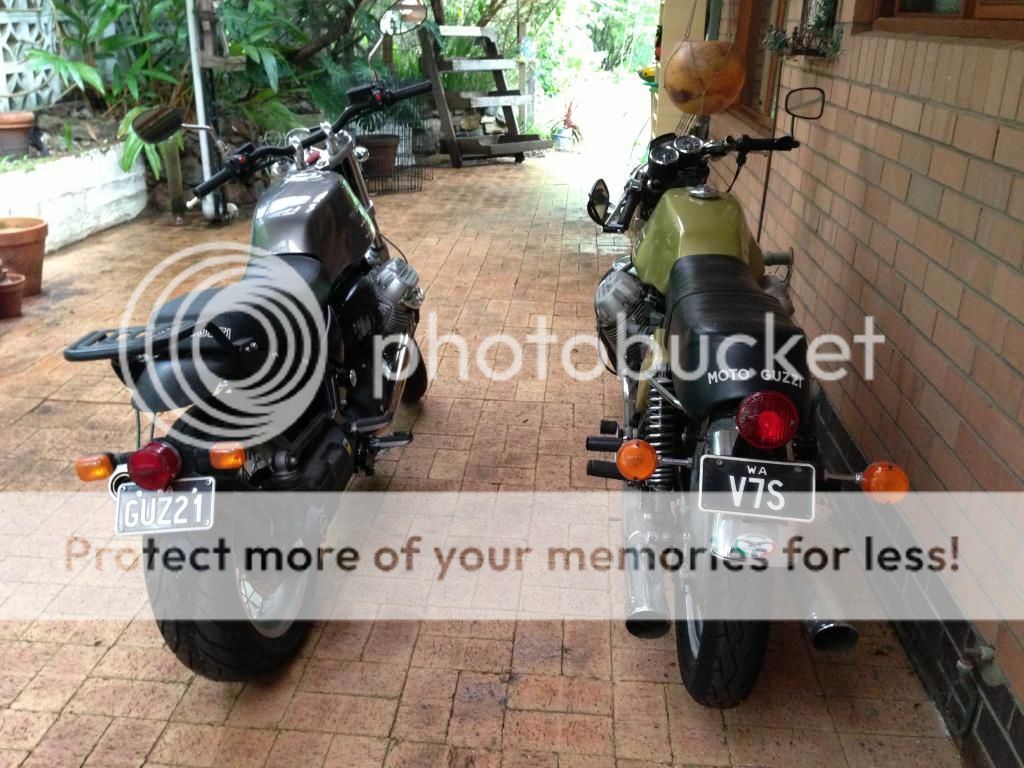 |
|
|
|
Post by HRHpenfold on Jan 21, 2015 11:25:59 GMT
|
|
|
|
Post by HRHpenfold on Jan 23, 2015 8:43:26 GMT
The disc carriers in the last post are to fit these discs, the discs are two piece, so these are just the pieces together, the original have to much dish to fit the spoke wheels, 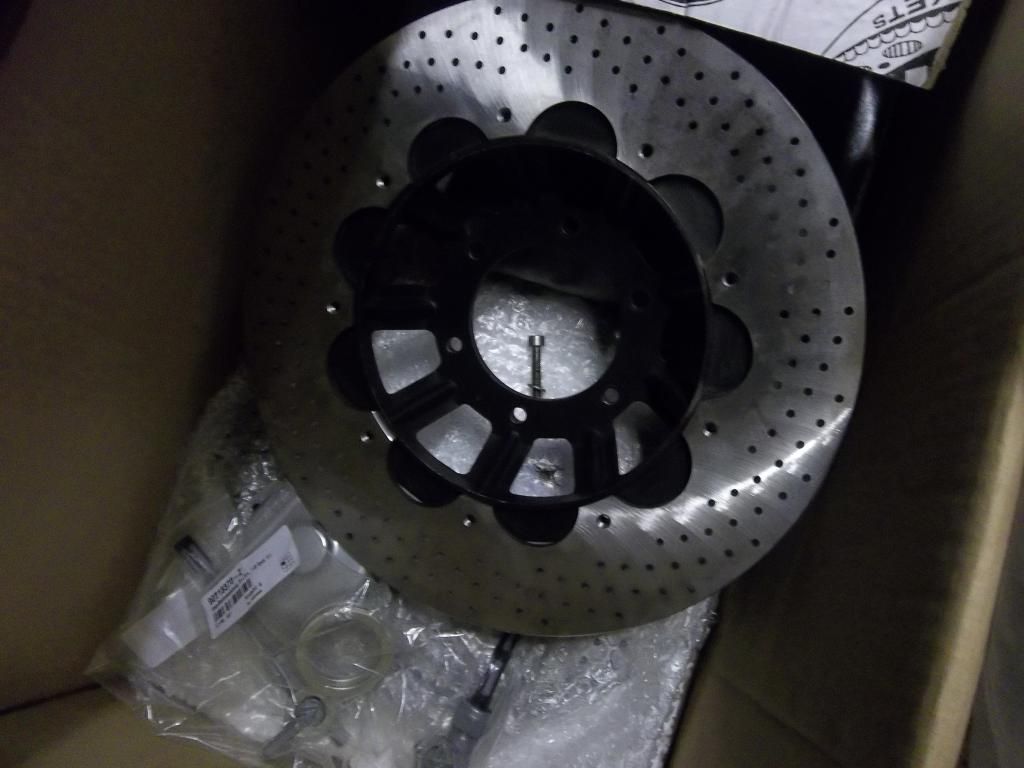 The rear disc is a bit worn, so I am considering buying a new one, though I would like it to be a non cast iron one, unlike the original, 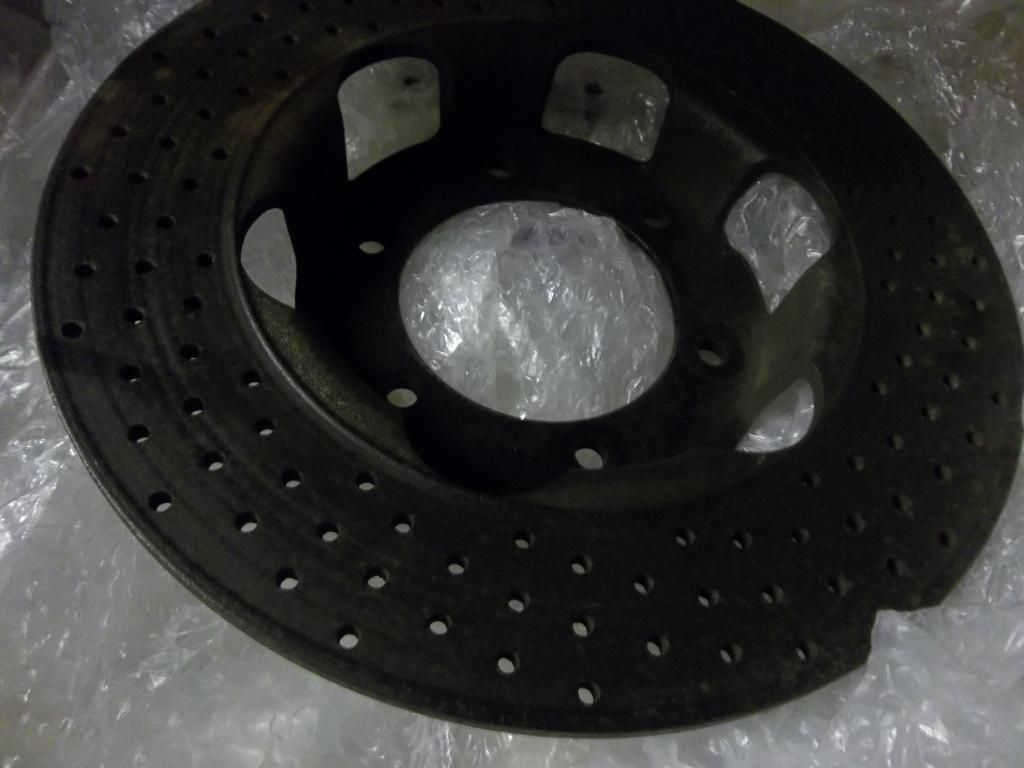 the headlamp that came with the bike, has wear to the chrome, you can see the nickel plating through the chrome, I considered re chroming, or painting, but in the end, it will be put to one side and fitted to a unrestored bike (1)I have bought a quality new one! 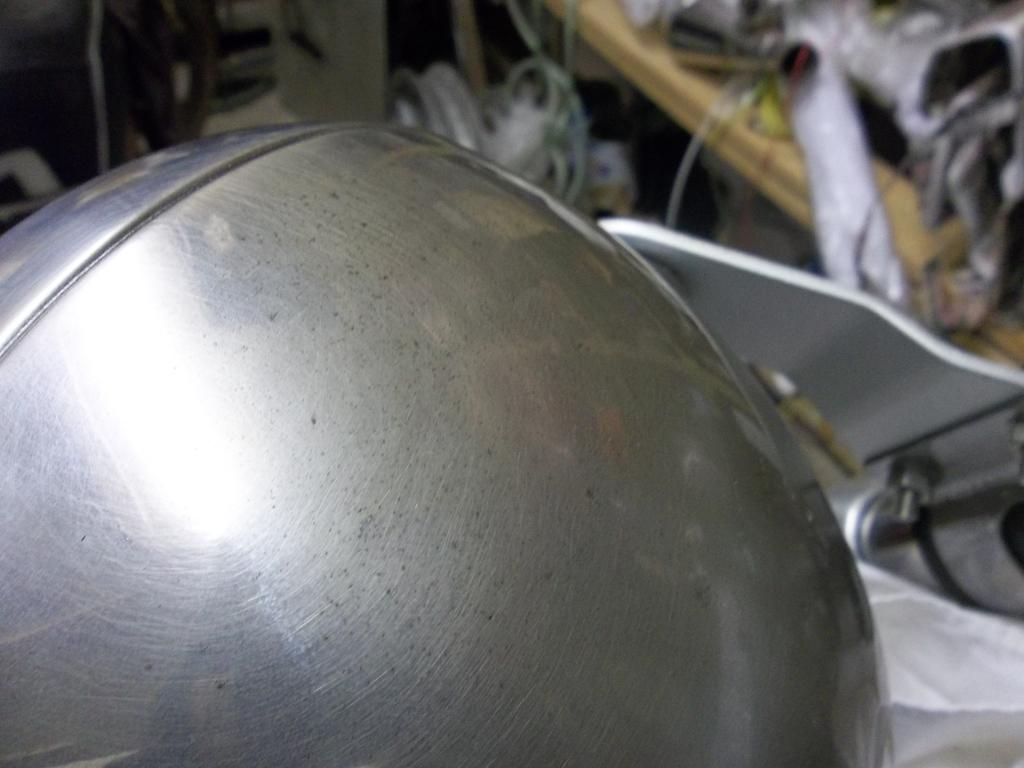 the new one,which is metric threaded, unlike the british bike ones, 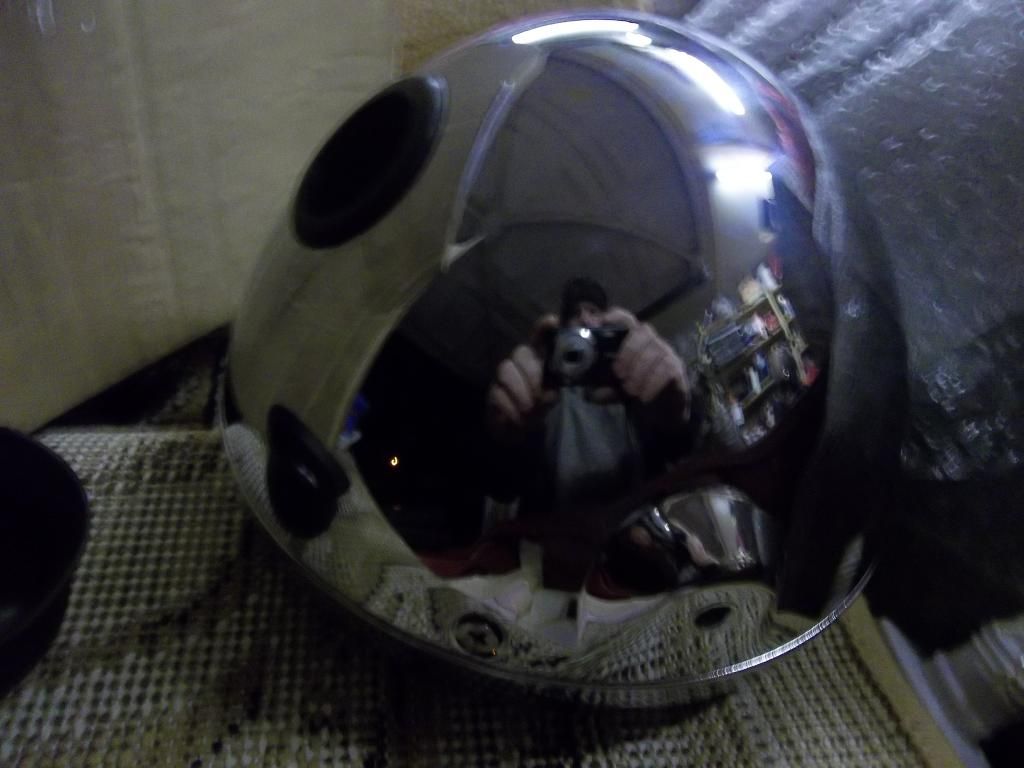 |
|
|
|
Post by DahDit on Jan 23, 2015 9:02:47 GMT
Nice updates Ian, a thoroughly enjoyable read.  Love the history of the R80.  |
|
|
|
Post by HRHpenfold on Jan 23, 2015 13:04:59 GMT
well it's time I fitted the tyres to the wheels, 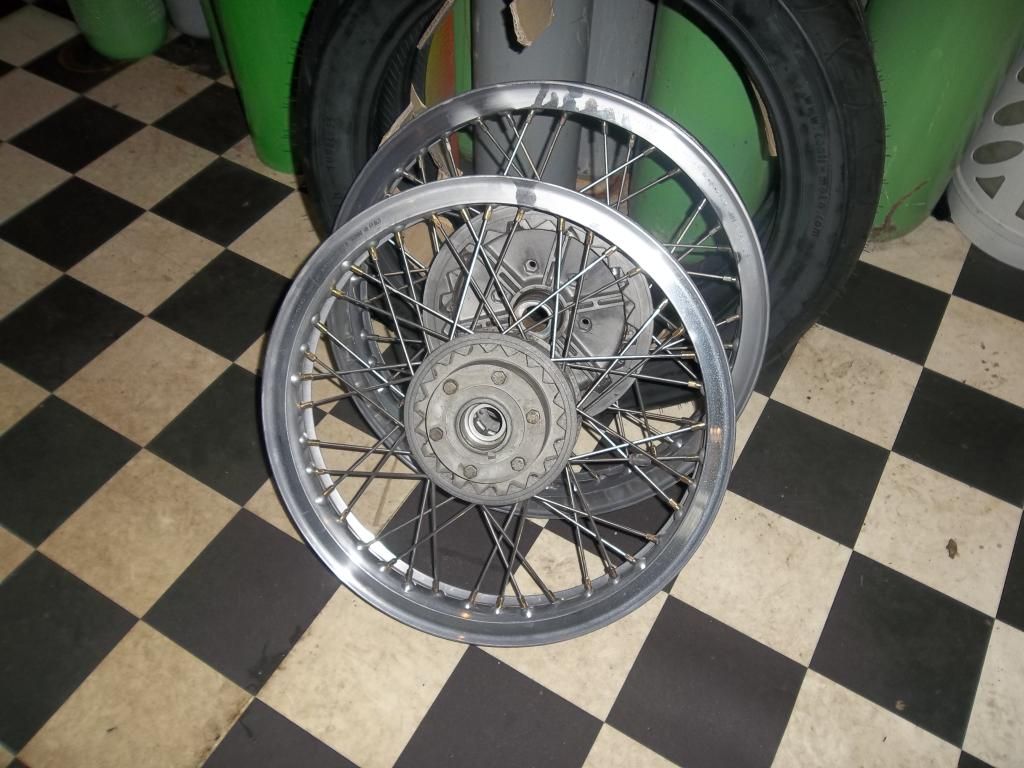 on the tyre machine, notice the new rim tape! 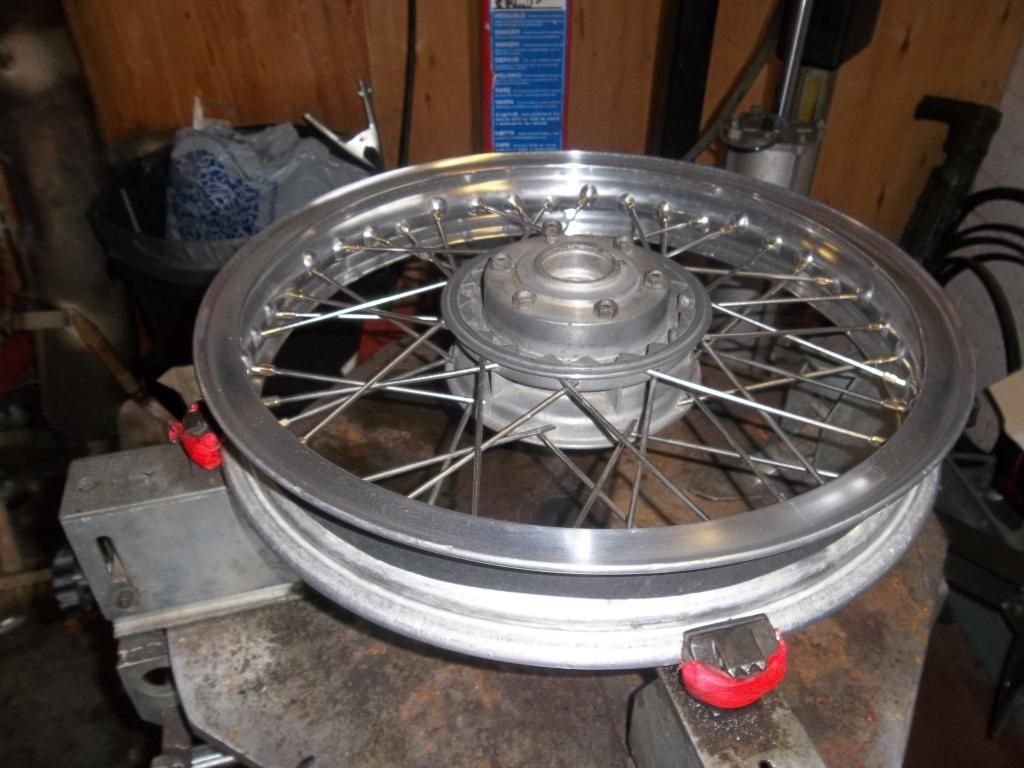 Fit the first bead onto the rim, then get a new continental innertube, 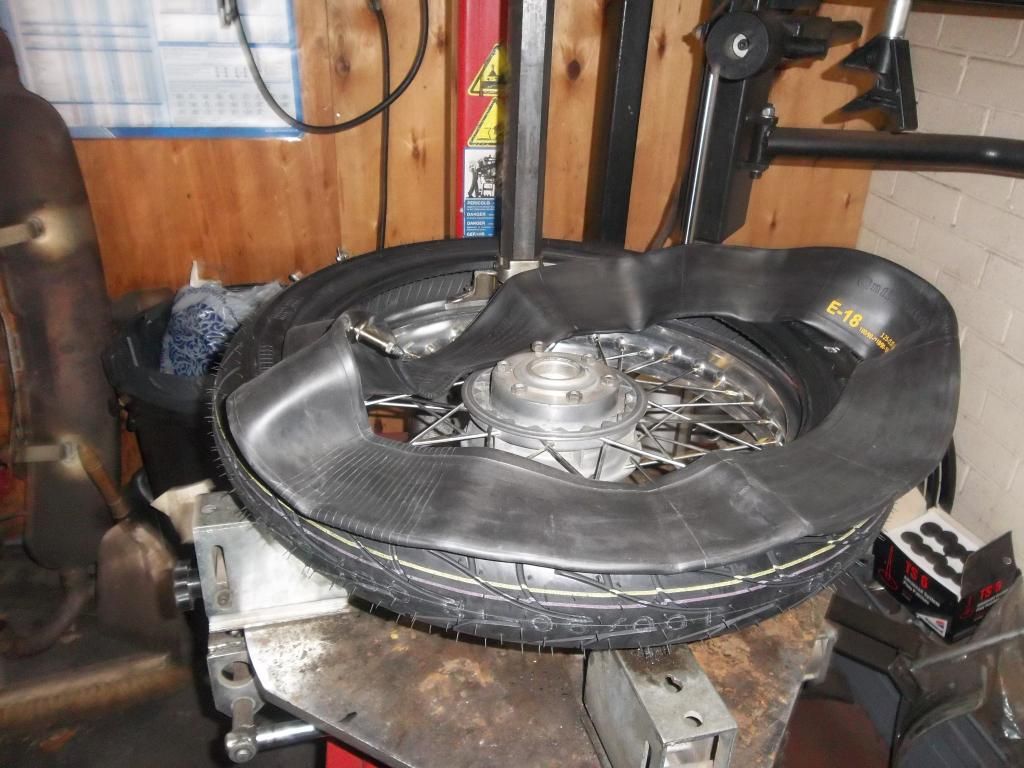 Struggle to get the valve through the rim, then tuck the inner tube in, put in a little air so the tube holds it's shape, 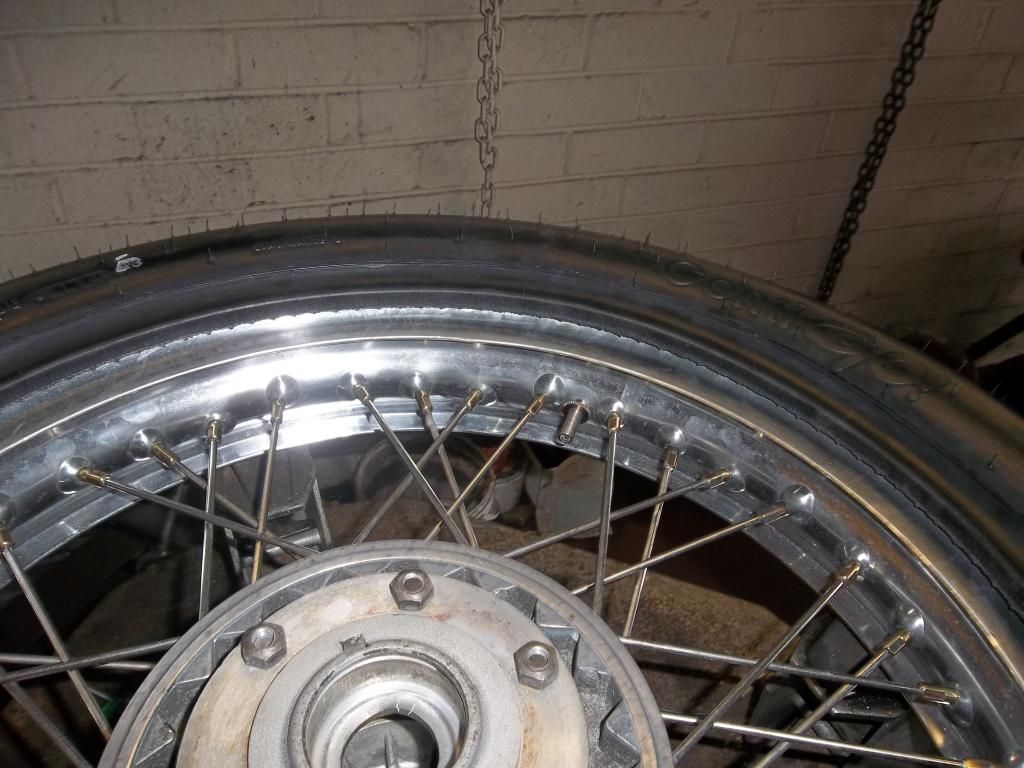 fit the second bead to the tyre, 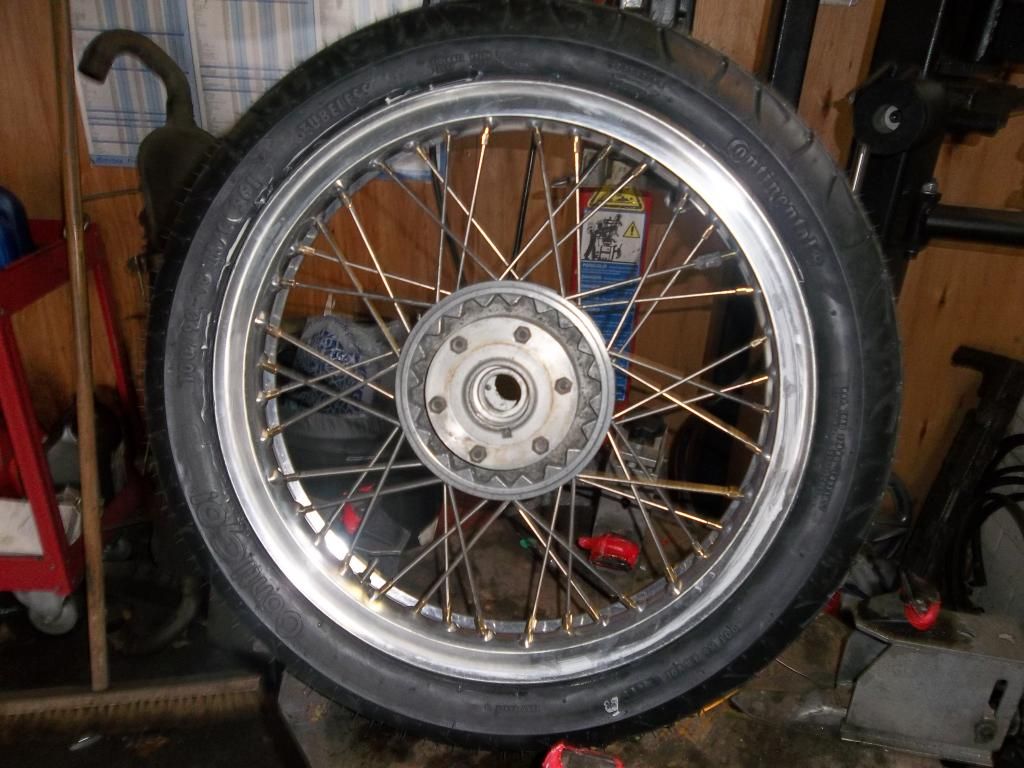 and pump up to a mind blowing 90 psi, 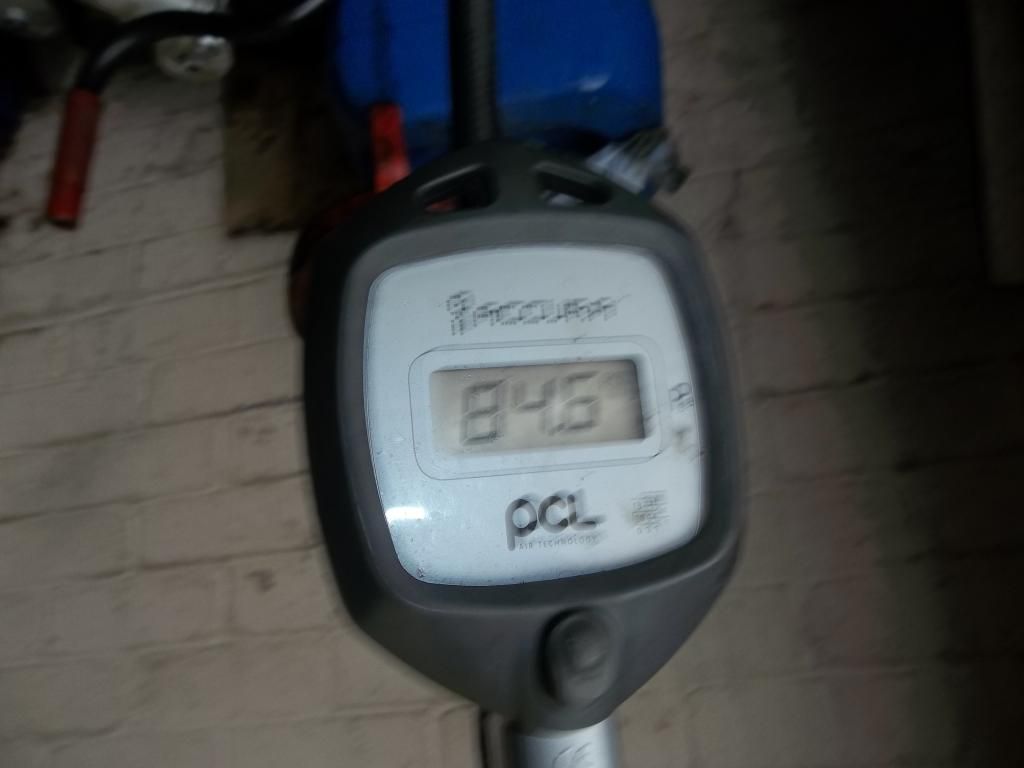 They always need a huge amount of air to seat the beads on guzzi wheels, then repeat with the rear tyre, making sure the tyre direction is observed, the front doesn't matter, as the wheel is the same either side, of course I put the rear on backwards initially, found out after putting the inner tube in, but not the second bead, Doh, the wheels have not been balanced, because there are no bearings and discs fitted, plus I want to use old skewl spoke weights, which I need to order! |
|
|
|
Post by HRHpenfold on Jan 23, 2015 15:48:34 GMT
The V7 reproduction rear light and carrier,in lurvely chrome, 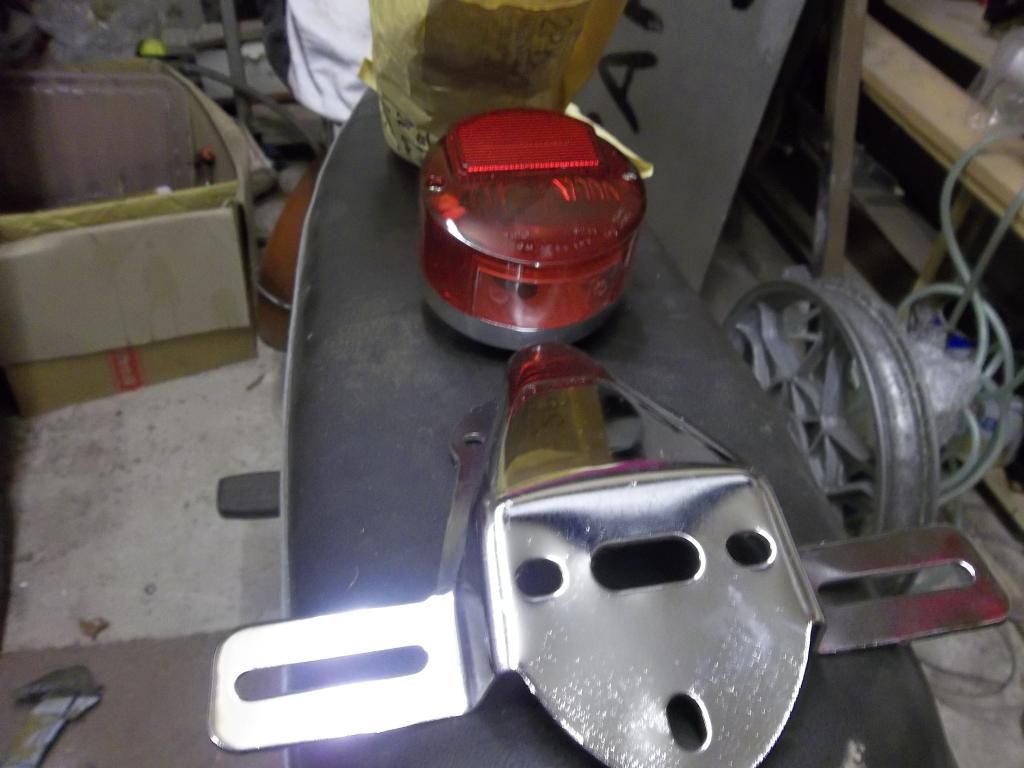 and the stainless mudguards, they are just generic mudguards, so will need made to fit! 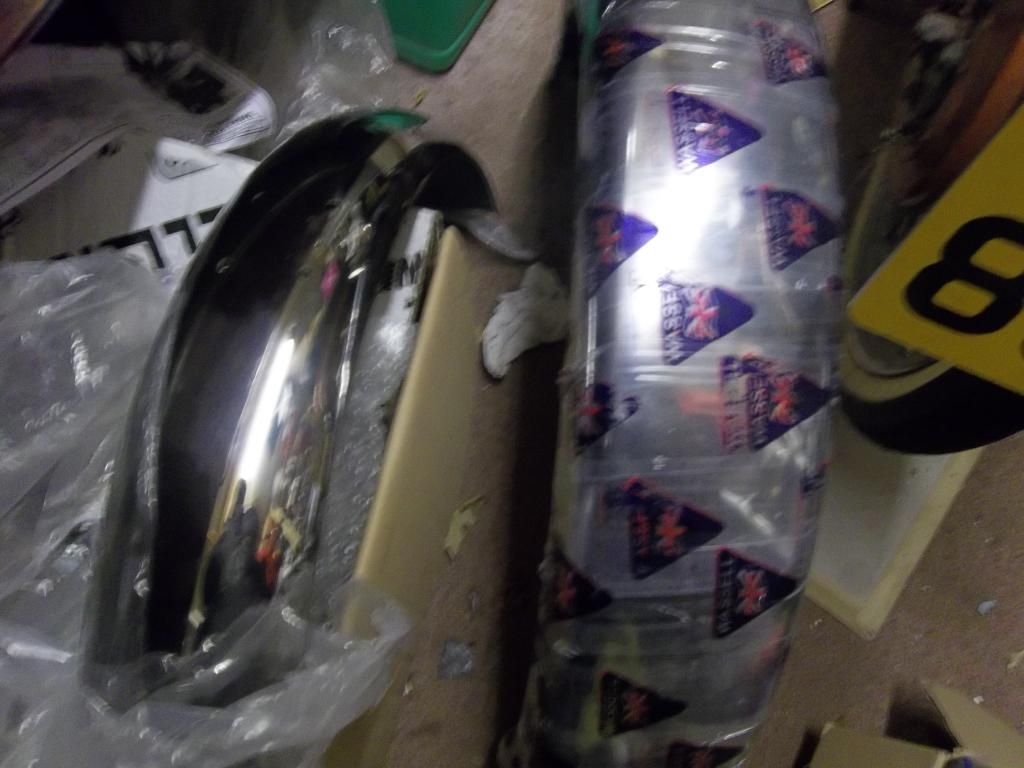 the left hand switch gear set, brand new yamaha product, anyone guess what bike it's off? 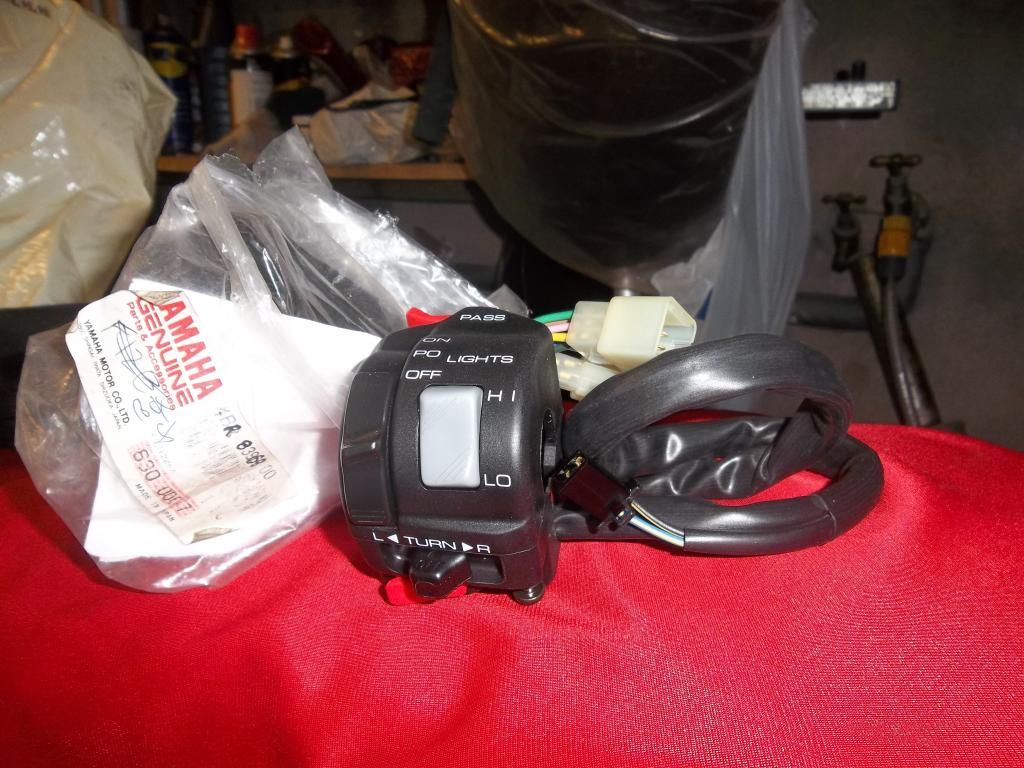 and the starter kill switch, to match, 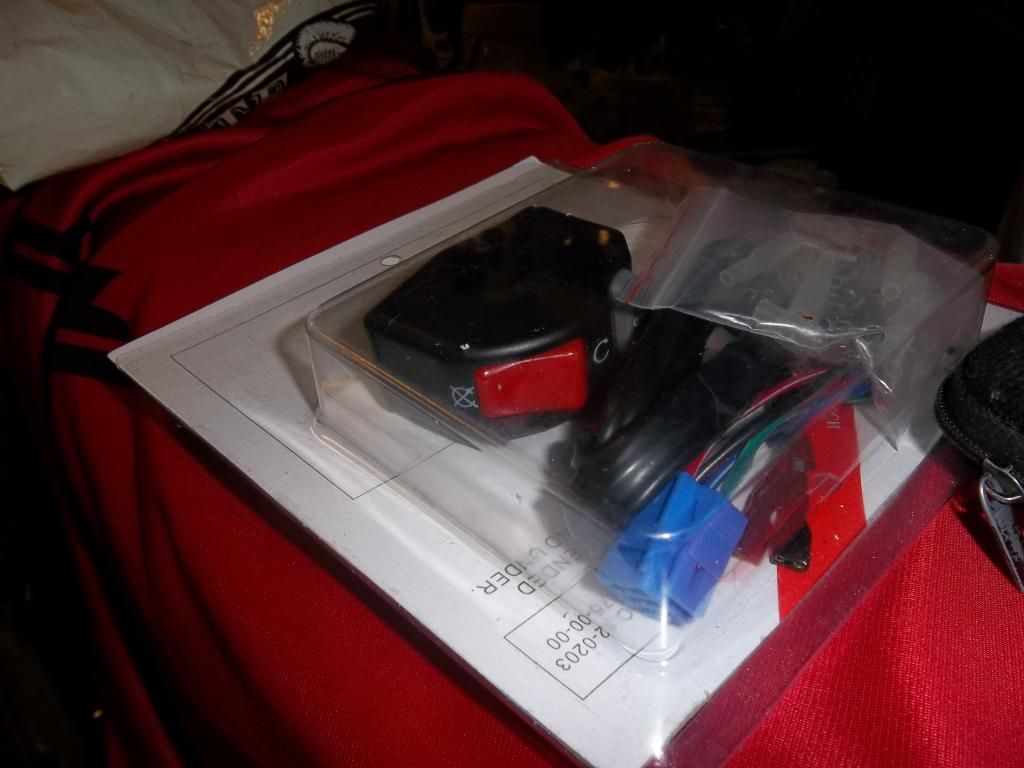 |
|
|
|
Post by HRHpenfold on Jan 25, 2015 17:17:30 GMT
Monza style cap with steel filler neck, the filler neck needs fitted to the tank, but I am unsure whether to mig weld it, or braze it using Tig, 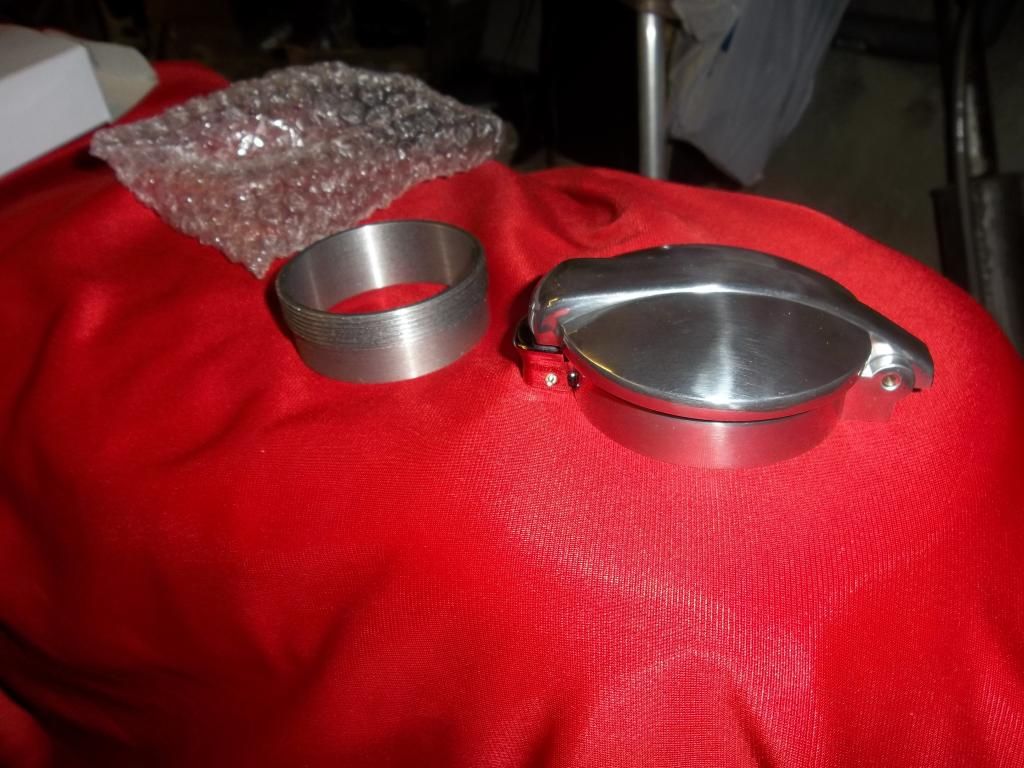 The cap and neck were bought from Germany, there are much cheaper on eBay, but it needed to be decent quality! I chose a set of these indicators 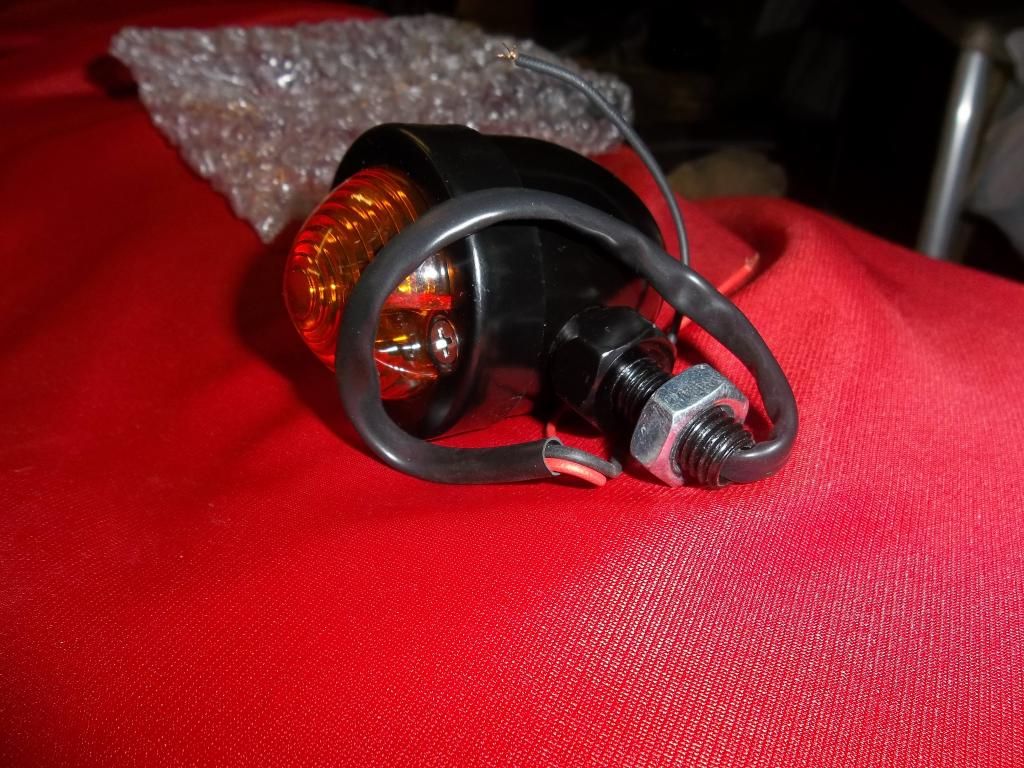 I made the mistake of buying cheap on my last lemans project, they were made of plastic, and would break easily, so I found these metal ones, which are heavy, these are for the rear, I have other ideas on the front, they were still cheap though! A few other necessities, I don't care to much for horns, so looked for a simple one, in stainless though! 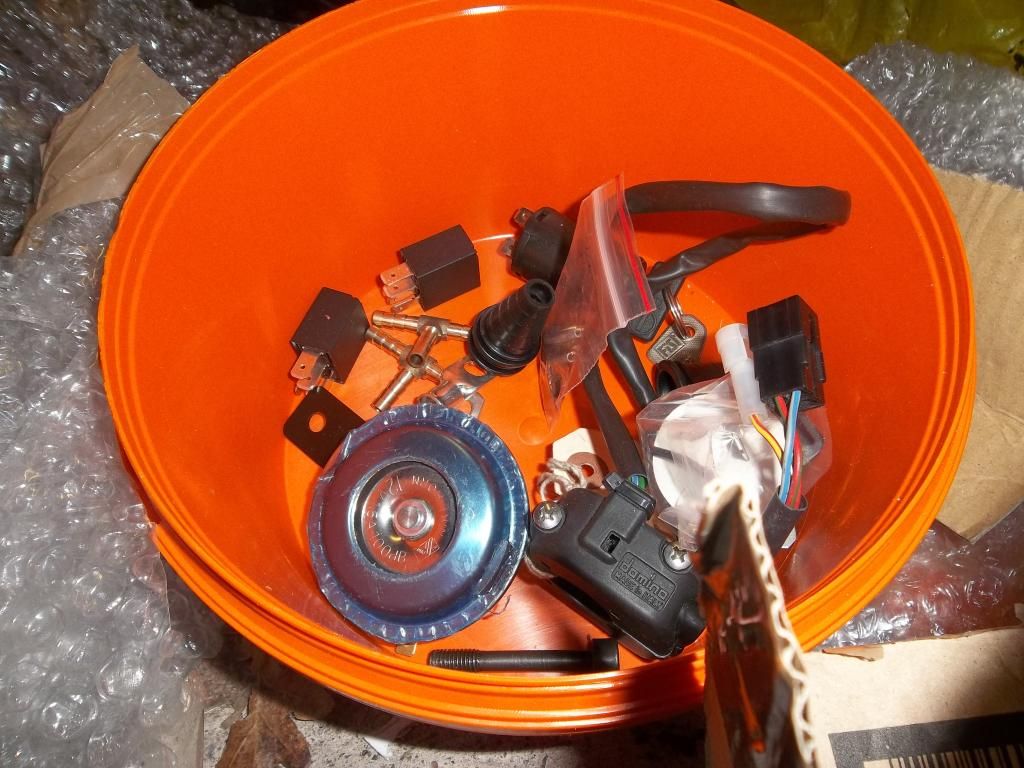 |
|
|
|
Post by HRHpenfold on Jan 26, 2015 13:11:27 GMT
Pillion footrests will need some modification, they were meant for a R1, 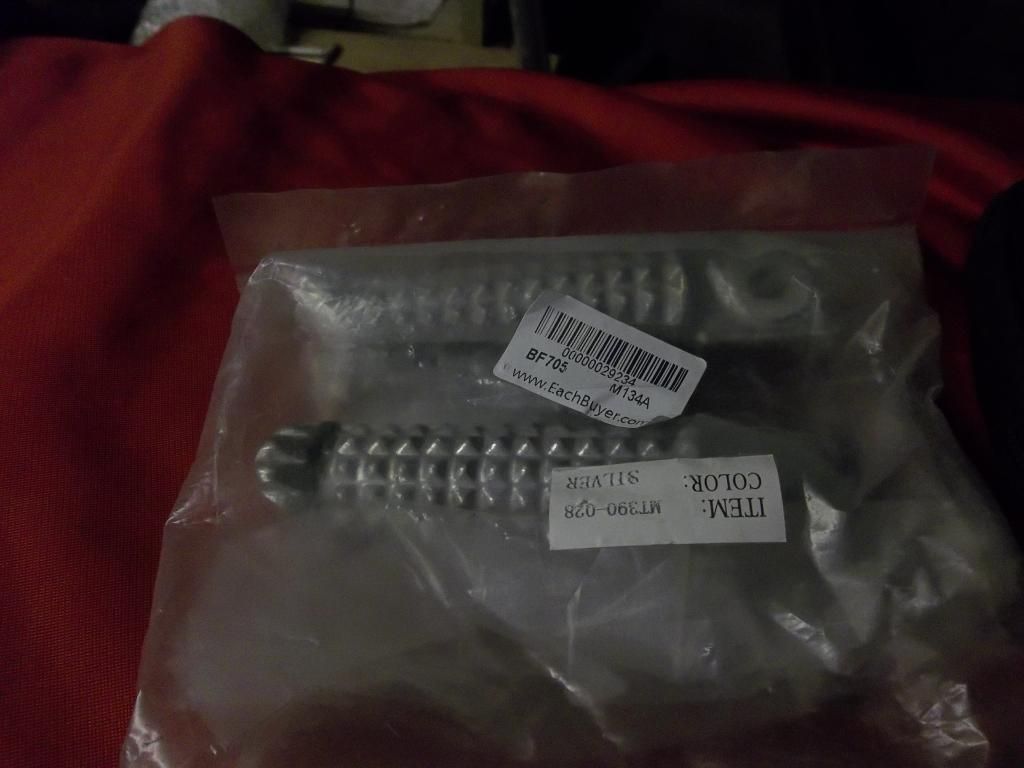 You can just see where they are to be mounted, also note the expensive Agostini's rear sets already fitted, 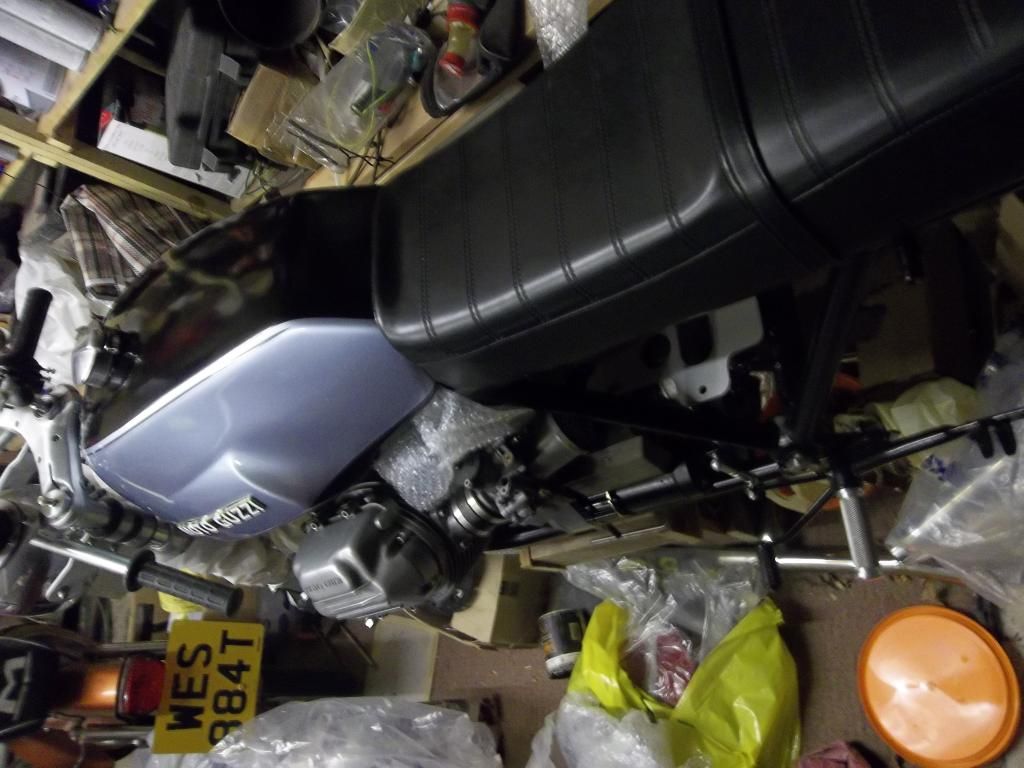 a closer view of the rear sets,  I may move the Tommaselli clip ons to above the yoke, so as to be less stretched out, the veglia rev counter won't be used, 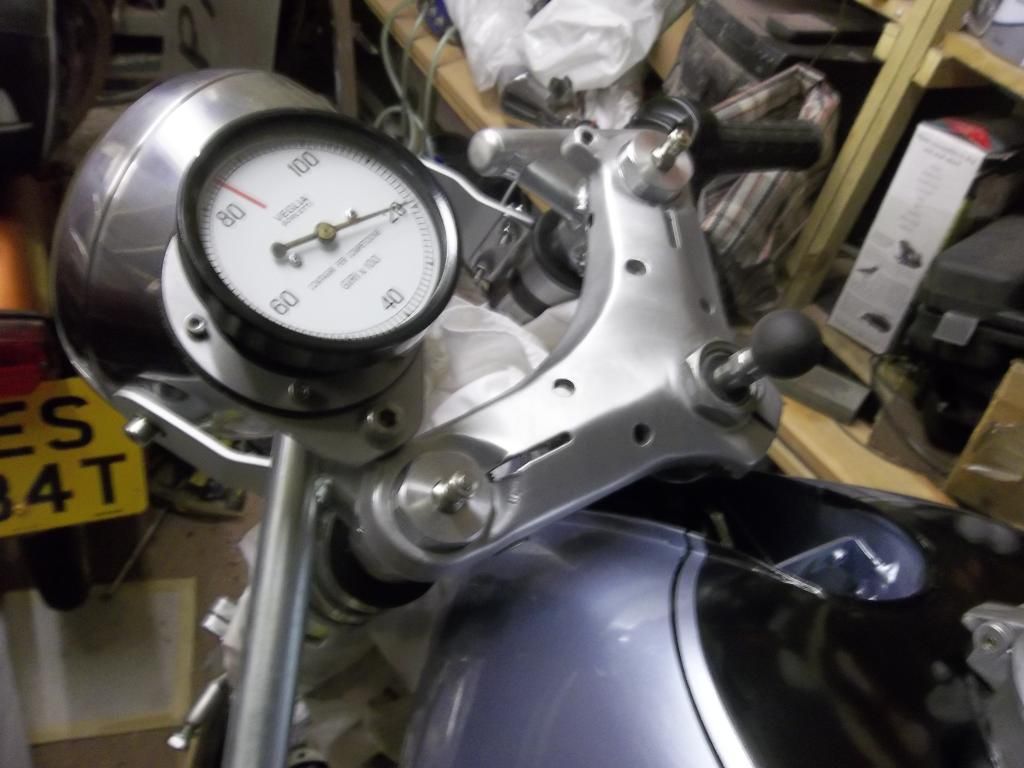 This is the part that does the linked brakes, and houses the rear brake switch, 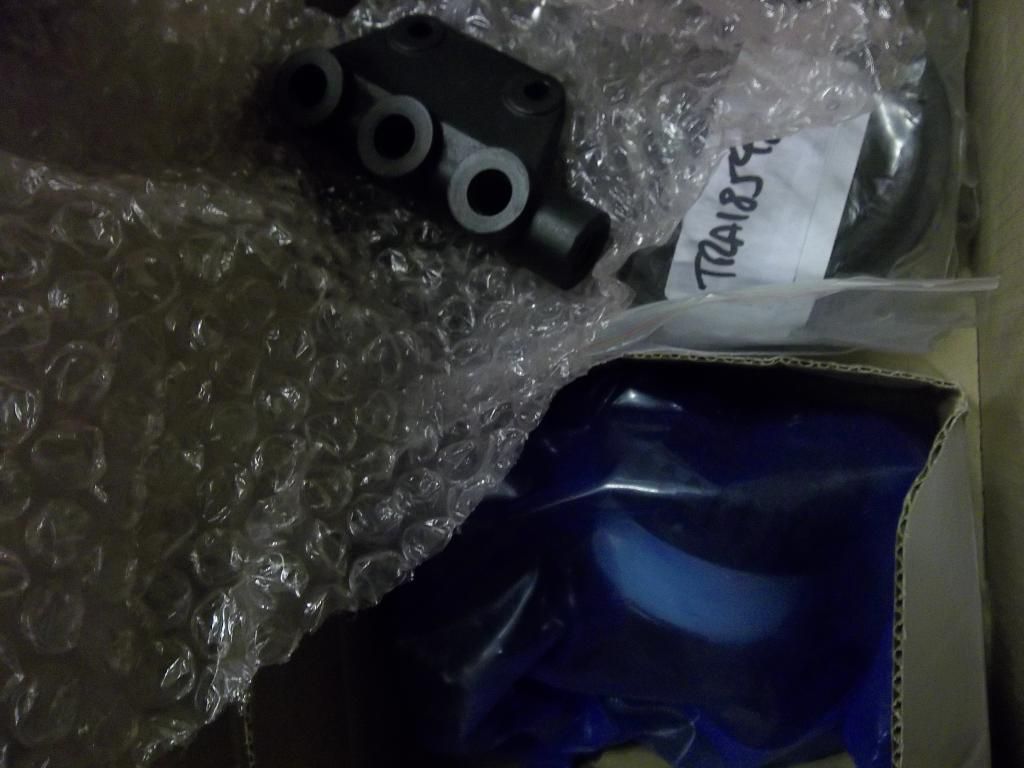 The newly resprayed tank has a few issues, and is not my colour, though usable, I want a 70's colour, possibly a metallic, here is one of it's issues,  There is still a remarkably long list (1)of parts still to purchase, things like, rear shocks, speedo unit, sump extension, and wiring products, and possibly a 100 things not yet sourced! (1)no actual list, all in my head. |
|
|
|
Post by HRHpenfold on Jan 27, 2015 11:01:43 GMT
Been doing some work on the Madass, 70cc over bored from the original 50cc, was not enough, so 140cc engine purchased! 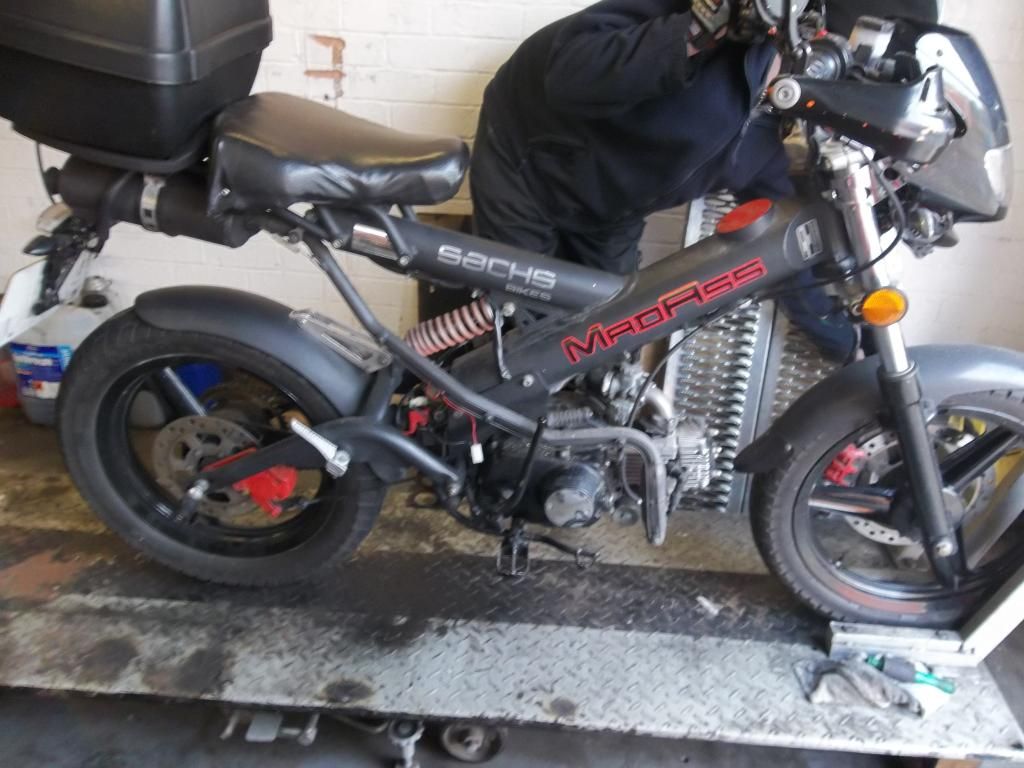 |
|
|
|
Post by HRHpenfold on Jan 27, 2015 11:03:36 GMT
The convert is still here, nothing planned to do on this other than at some stage replace the dash bulbs with LED ones, 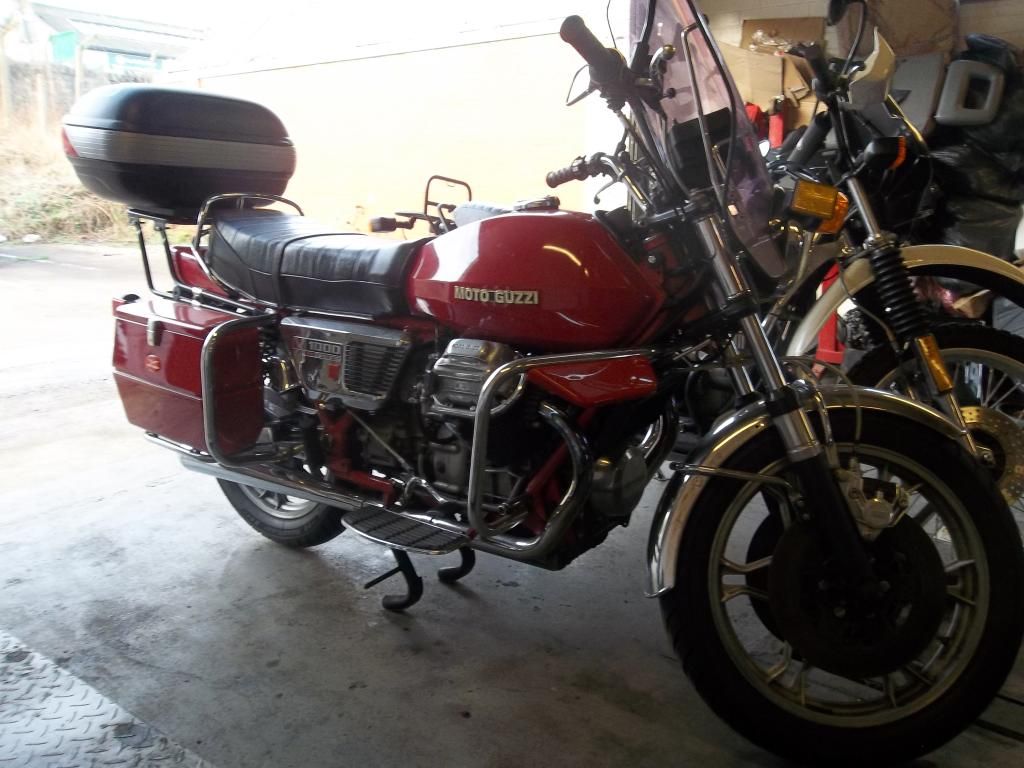 |
|
|
|
Post by HRHpenfold on Jan 27, 2015 11:32:13 GMT
But back to the LM, I am going to have to do something regarding spacers for the wheels, and the spindle, the le mans cast front wheels are thinner than the spoked wheels, and even thinner than the normal 850/1000 models which in cast wheel fitment are the same width as the spoked wheels, I think that the rear spindle 's are the same, based on nothing more than looks and that the spindle is listed for the LM and T3 models, there is of course a OE solution, buy new spacer, and new axle bolt, readily available, the front bolt is around £50, pictures of the LM and Convert front spindle's the LM is stepped, which acts as the spacer, but the stepped portion is waisted 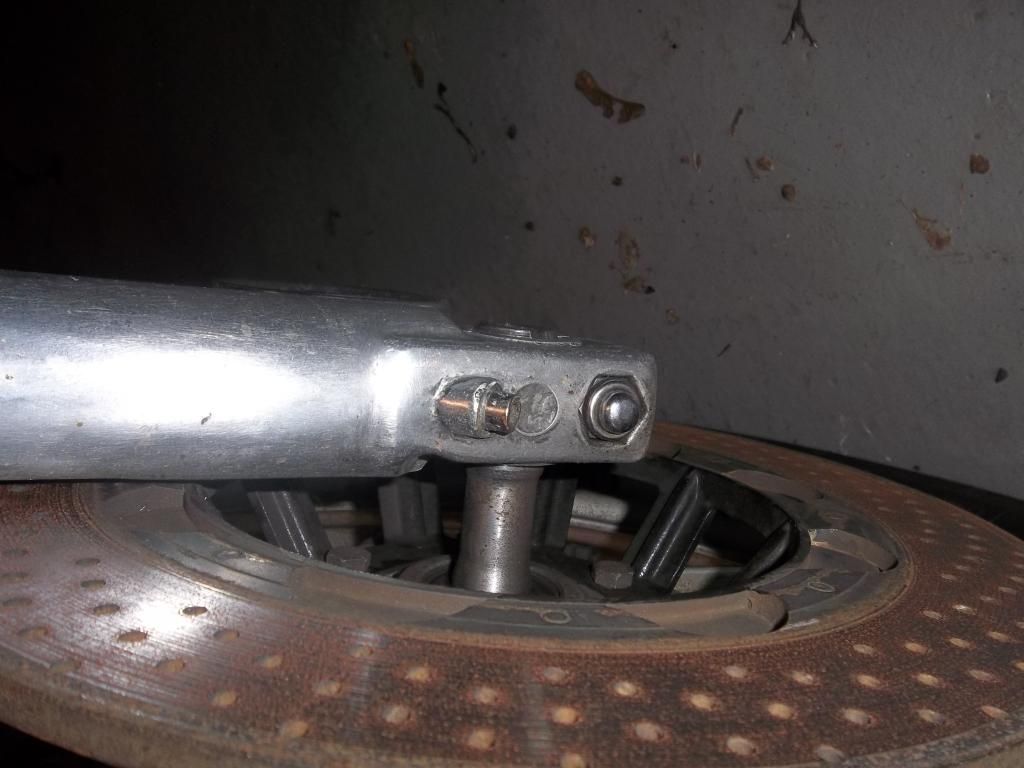 the convert is stepped also, but not waisted, you can see that their is less space between bearing and stanchion on the convert  as it's the convert type that I need, I have 3 choices, the cheapest being machine the original LM spindle, to remove the stepped area, then make a spacer the same length that the convert spindle is stepped, or make a complete new spindle, to match the convert one, out of stainless, or buy a new spindle. |
|
|
|
Post by HRHpenfold on Jan 27, 2015 20:03:25 GMT
Ok I have had the convert front spindle out to measure, These are the measurements of the spindle, 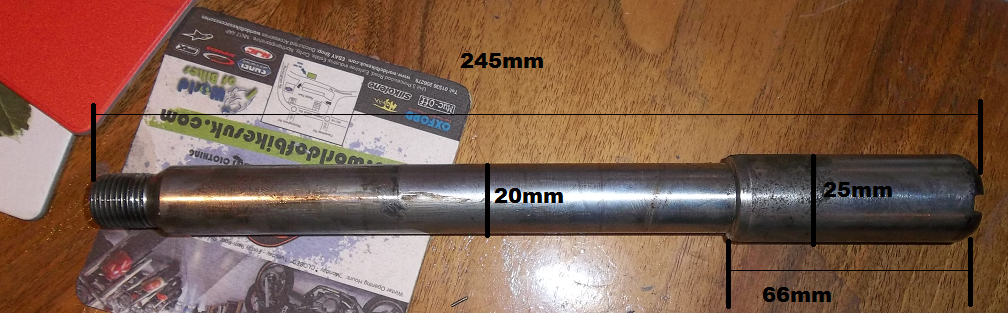 , And the spacer, 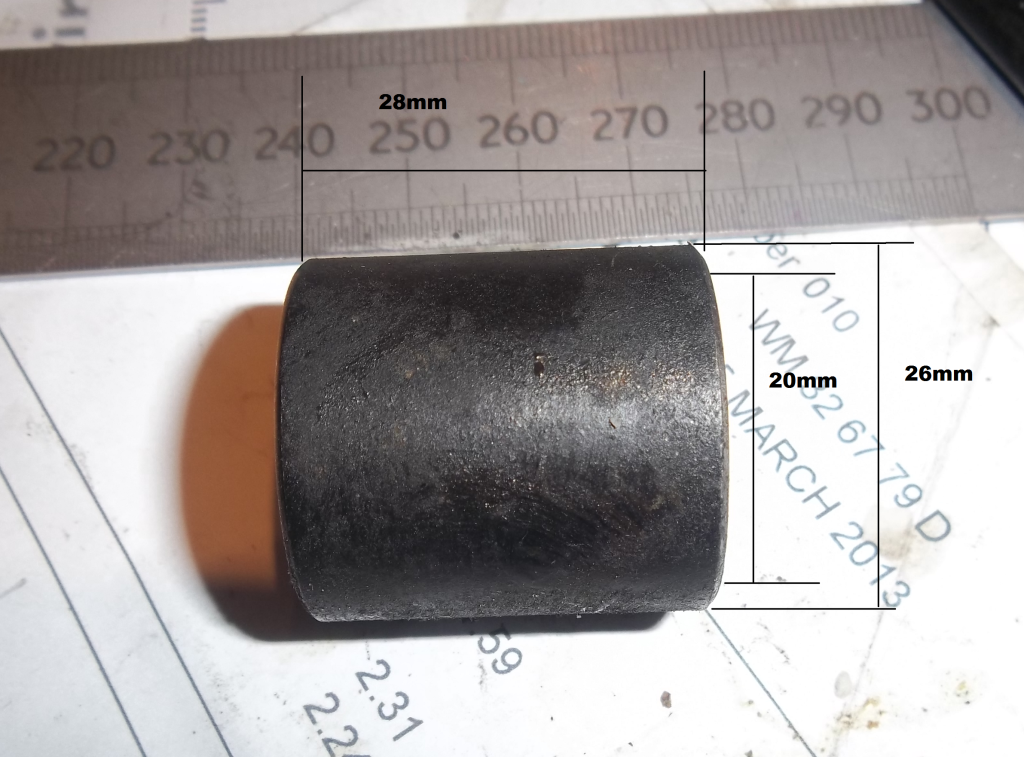 I forgot about the fourth choice, try and source a used one, which I am pursuing, The space between the forks is 160mm, and the total including the forks is 230mm, therefore 35mm per leg, The front wheel is approximately 110mm, it's a guess because I have yet to fit the bearings, So theoretically, the spindle should need a 25mm spacer on one side and the raised section of the spindle should be into the space between the wheel by 25mm, Though as that would account for only 60mm instead of the 66mm of the convert spindle, it seems that the spacer is 3mm longer and the spindle is 6mm longer on the convert, As it's the spacer that dictates where the spindle sits, you slide the spindle through the Stanchion, through the wheel bearings, then through the spacer and other Stanchion until it's solid, then nip up the station bolts and tighten the spindle, it sticking out 6mm won't effect anything, And if I end up making one out of stainless I was planning on it sticking out further anyhow! I will confirm the distance between the convert forks tomorrow! |
|
|
|
Post by HRHpenfold on Jan 29, 2015 16:03:53 GMT
Someone on the guzzi forum, has a spindle, it's not the correct dimensions, but if I make a couple of spacers around 25mm I can get it to work, but I thought I would have a go at making one, as I had some 30mm stainless bar handy, so I figured that I would have a go at doing the threads first, if it turned out carp, I could always start again, so I fitted the bar to the lathe, and pared the end down to 16mm, the thread being M16x1.5mm, 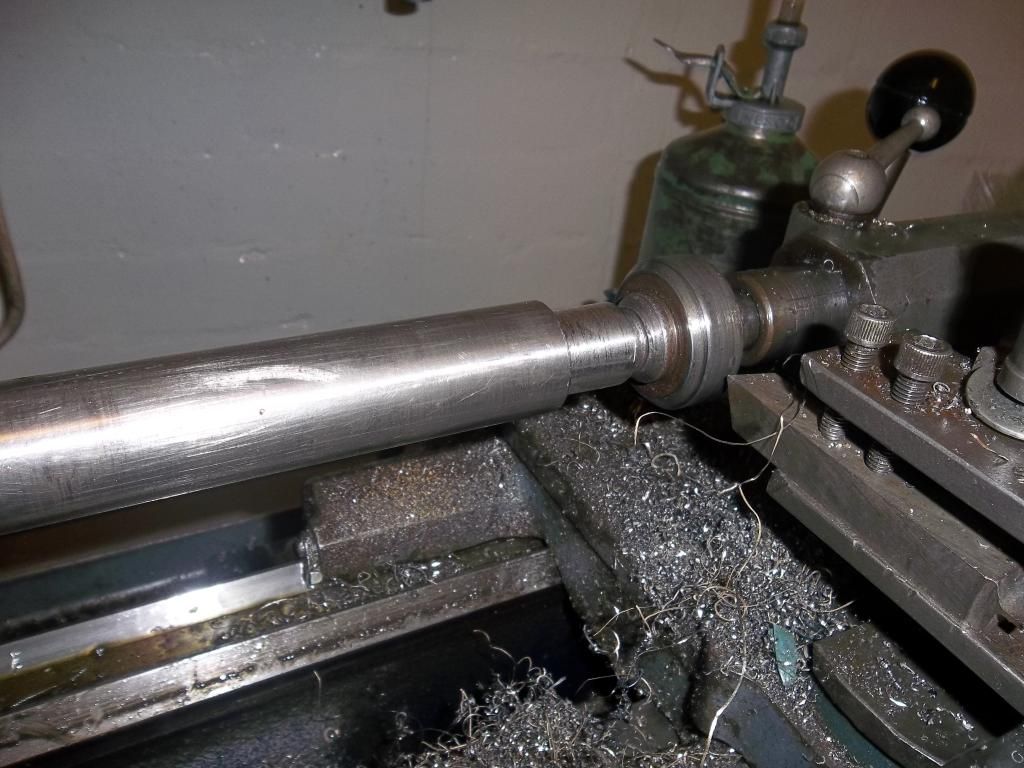 I didn't have a thread cutter, so I ground a tool down, then had a go, I managed to get the nut to thread on reasonably well, but the thread has not formed well enough to use, so I pared more at 16mm, and will source a Die thread cutter to form a better thread, then cut off the threads formed on the lathe, 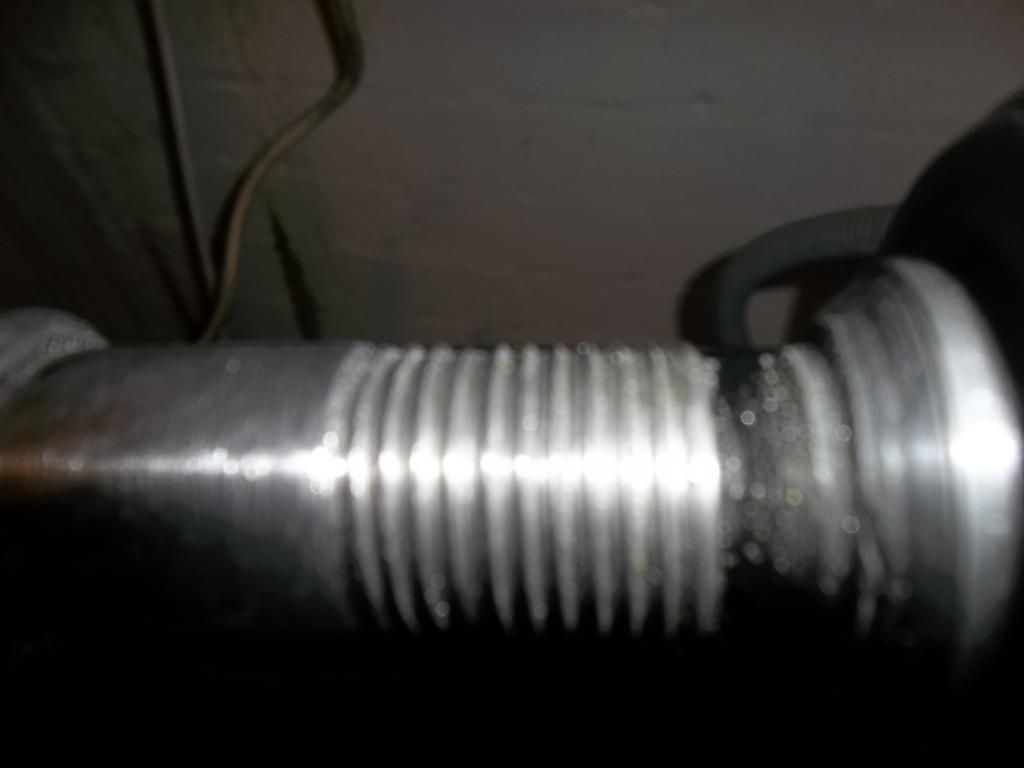 so I then pared the bar down to slightly over 25mm over a length of 290mm, including the damaged thread bit, and then leaving the 25mm part at 90mm long pared down the rest to just over 20mm, normally when these are made, they are turned down, then a surface grinder finishes them to the exact measurement, as the spindle goes through a 20mm bearing, it needs to be a clearance but not loose fit, without a surface grinder, your forced to use the lathe, and 60 grit sandpaper, this takes a great deal of time, I used one of the old bearings for the fit, 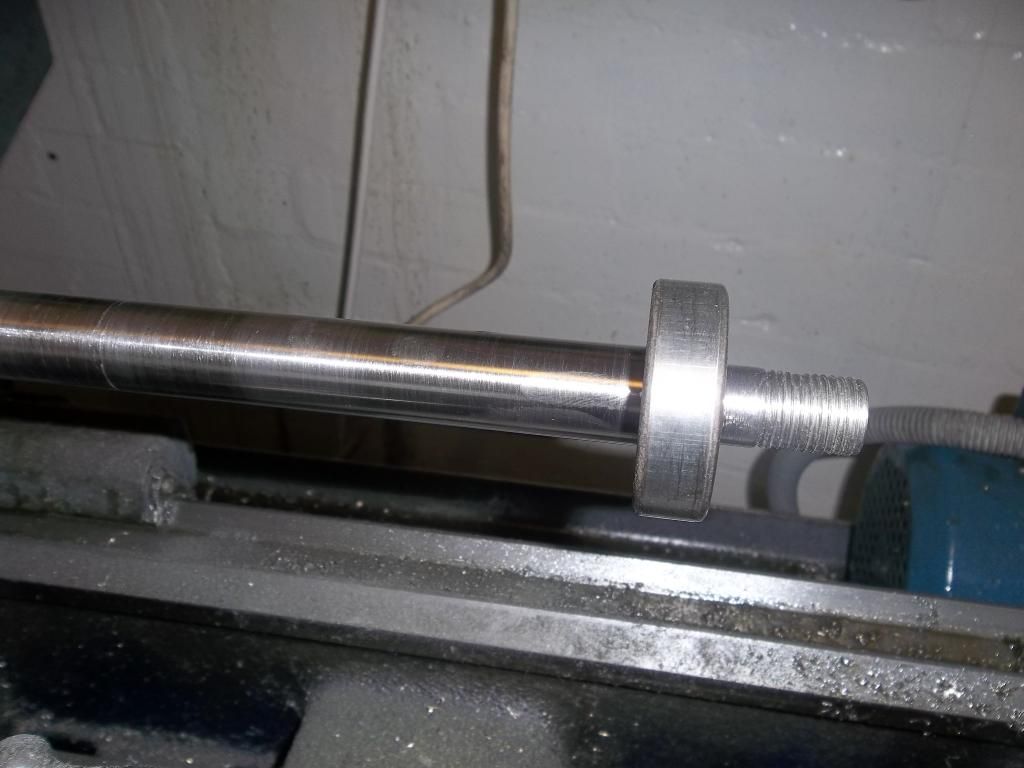 and the spindle ended up at 19.83mm, before it was a sliding fit on the bearing! 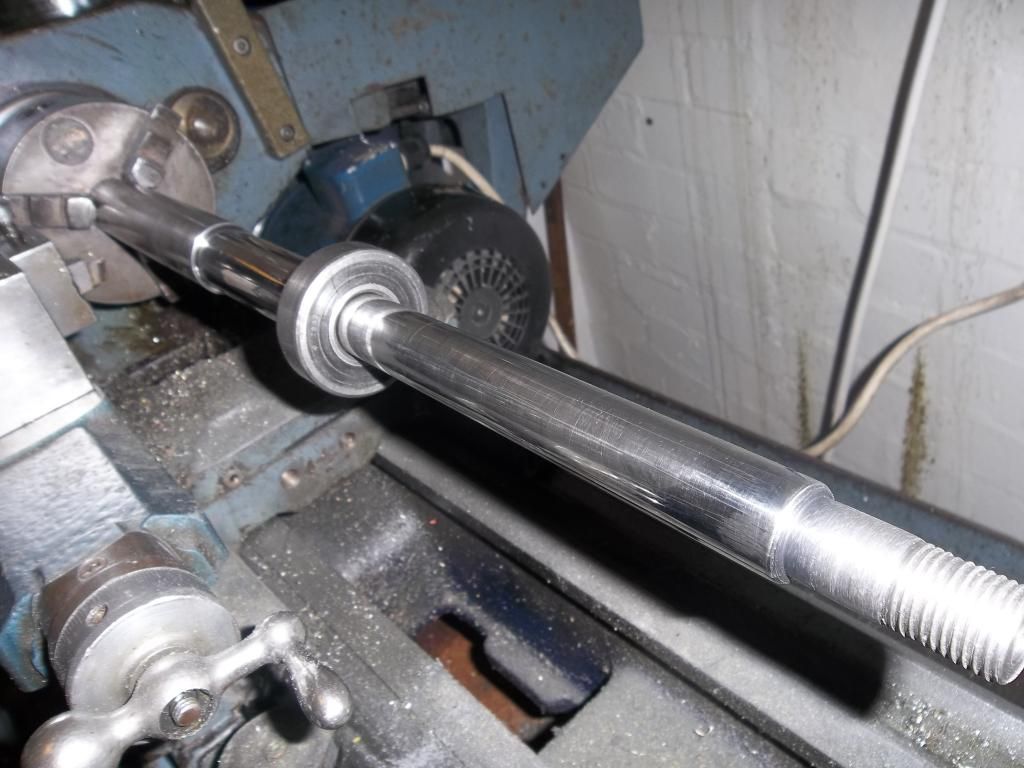 the 25mm section, was sanded down to 24.85, though my initial calculation said that the 25mm section should be 60mm long, I made it 85mm, as I intend drilling a hole in the end, in order to pull out using a screwdriver! it took ages though, and not viable to make normally! |
|
|
|
Post by HRHpenfold on Jan 30, 2015 15:52:26 GMT
Mechanic decided he liked the handle bars from my R80RT, it's going to get the fairing removed anyhow, so today it was removed, 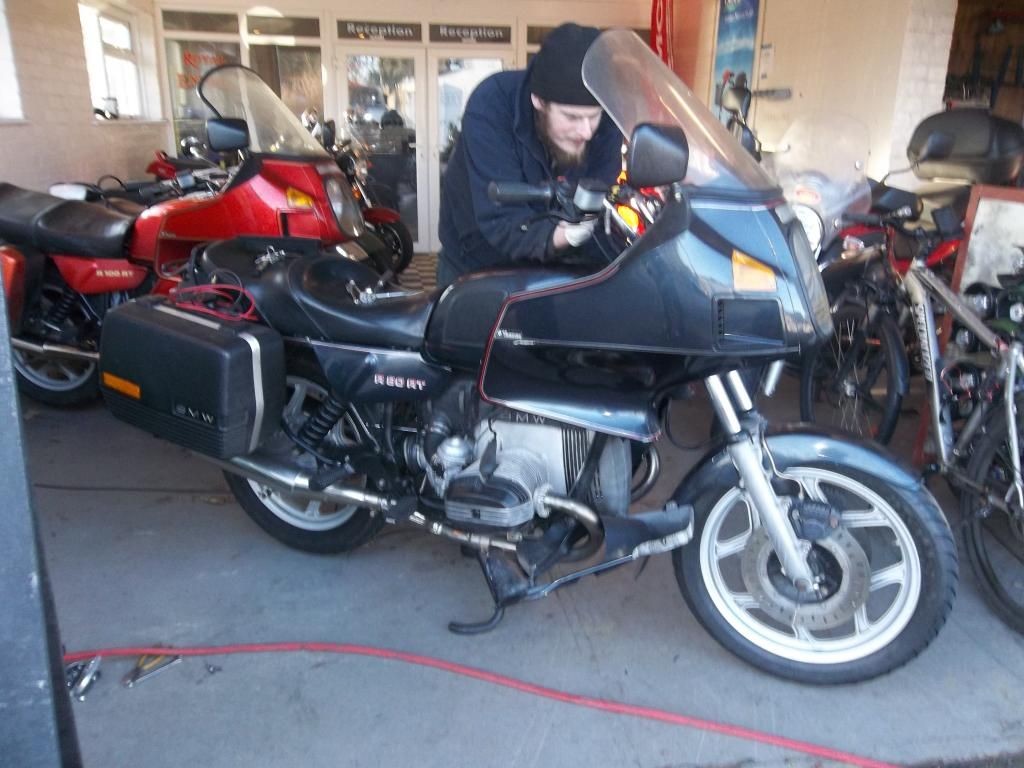 bottoms first! 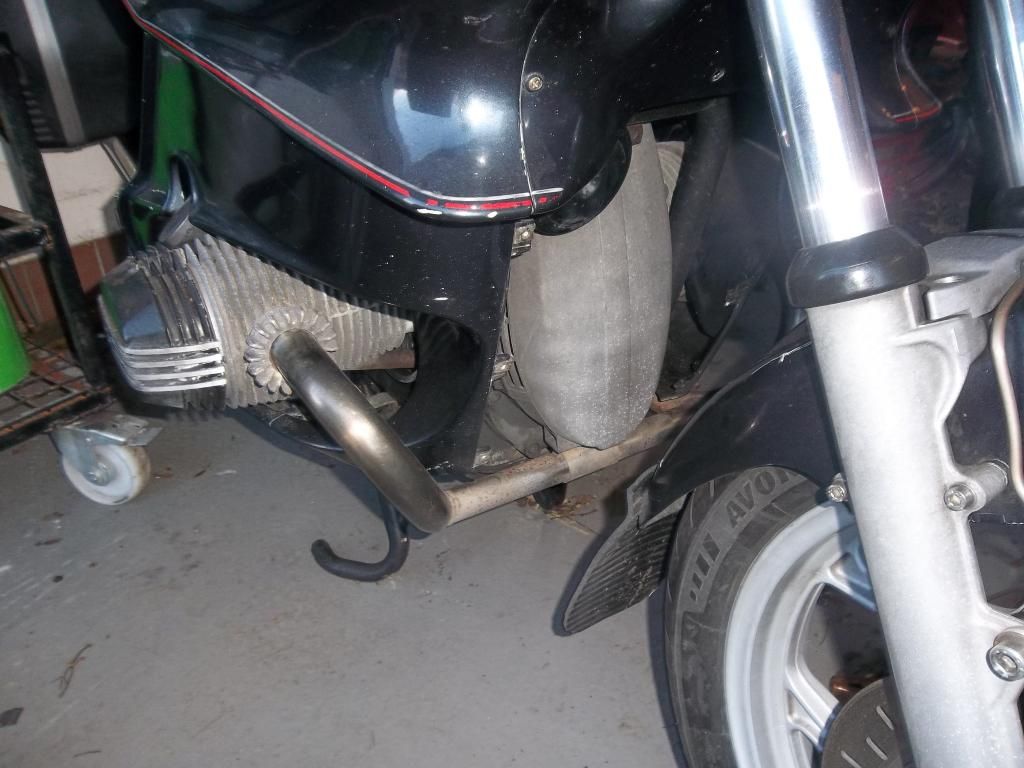 then the top fairing!  I guess that means I have started on the project 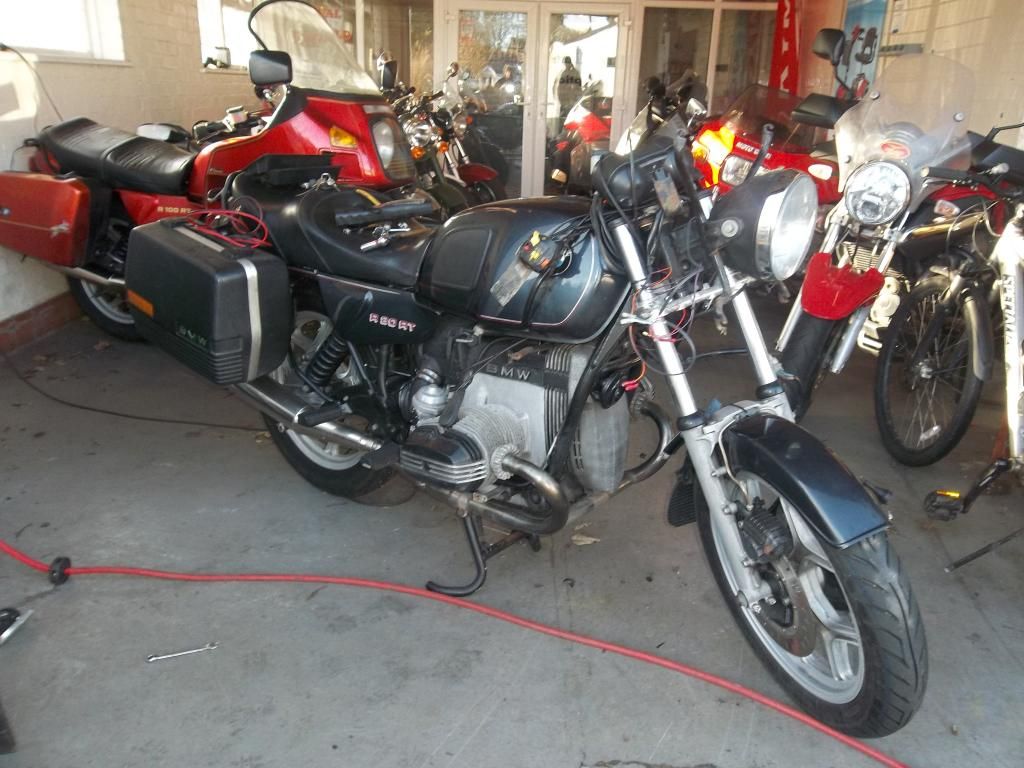 then of course as the brake lines and wires to the handle bar were not long enough, he never used them! |
|
|
|
Post by HRHpenfold on Feb 2, 2015 15:36:27 GMT
I got round to turning the thread today! 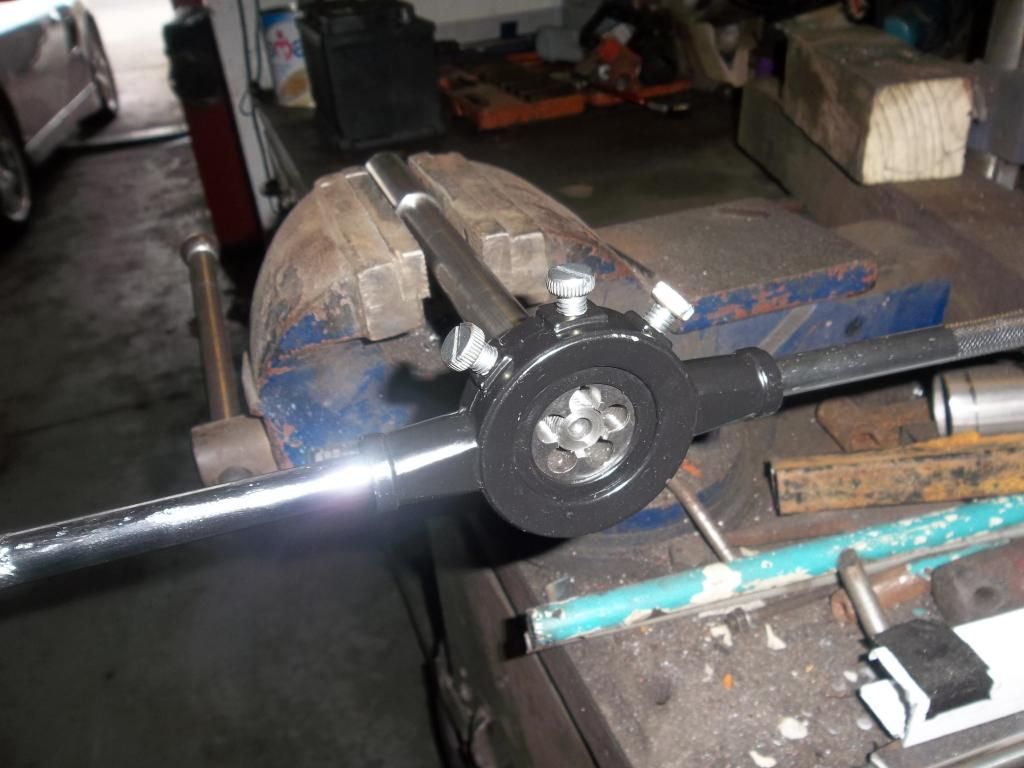 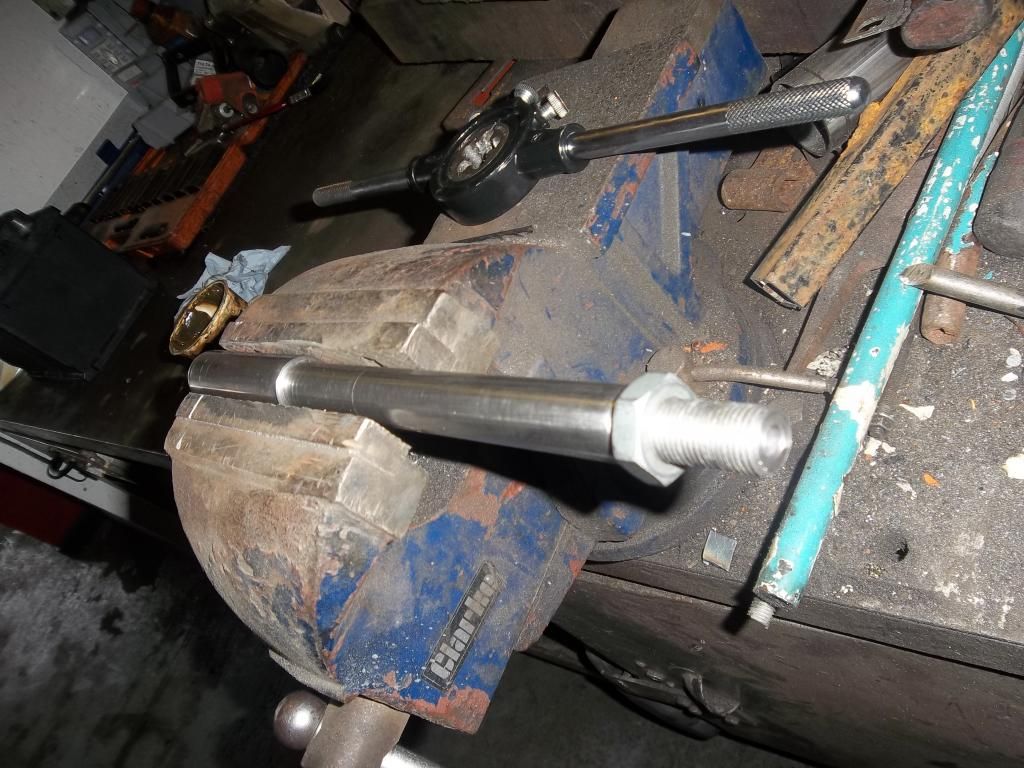 then I cut a spacer out of stainless thick walled tube, 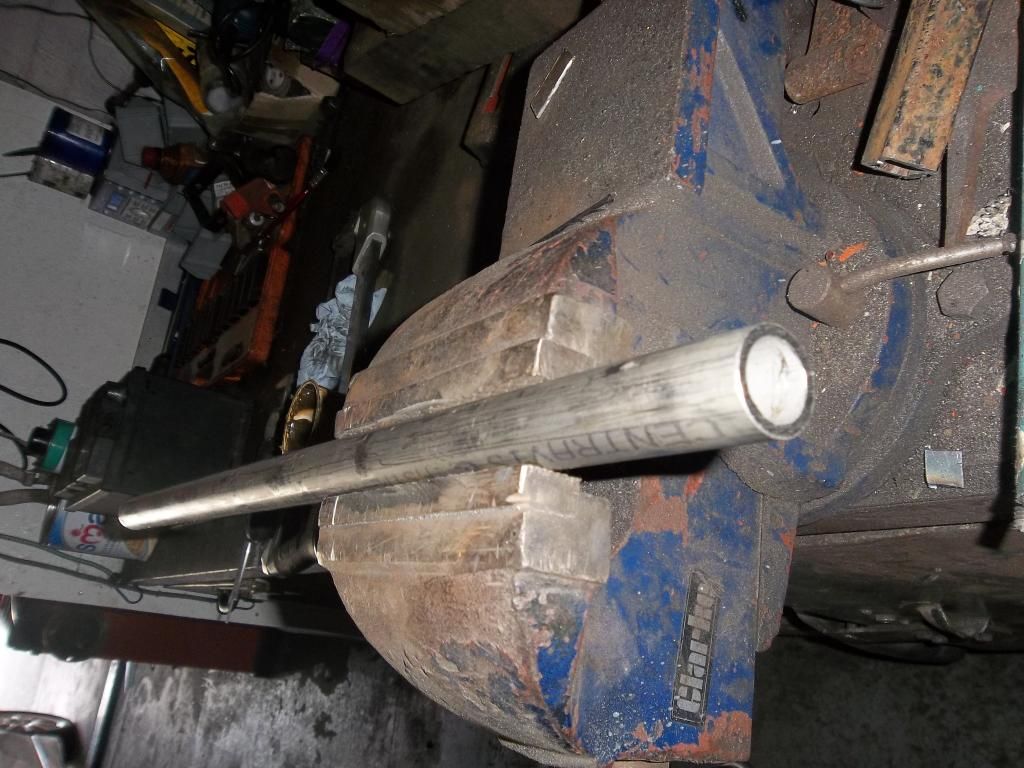 I had to turn the inside to fit the spindle and square the ends on the lathe, and trim the length of the threaded section, the finished spindle, complete with stainless nut and washers! 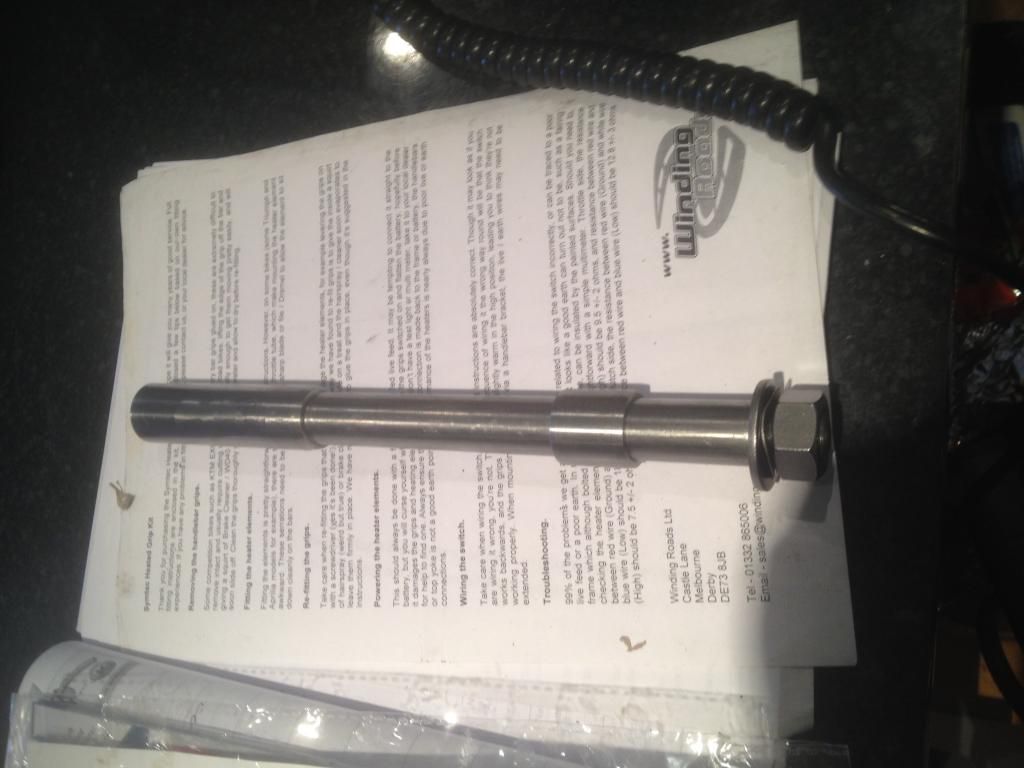 |
|
|
|
Post by HRHpenfold on Feb 3, 2015 11:03:29 GMT
Today I brought the wheel back down to work, last night, I found out that the bearings originally intended to fit the alloy wheels are a different size on the spoke wheels, the front bearings on the alloy wheels are smaller than the rear wheel bearings, and the spoke wheels use the same rear bearings, so I brought the 2 rear bearings to work and ordered a new pair, job for the day was to manufacture the spacer that is fitted between the wheel bearings, that serve the purpose of supporting the inner part of the bearing as the spindle is tightened up, so I needed to measure the distance between the bearing races, so first I had to heat the wheel centre up and put the bearing in the freezer, then used a suitable sized socket to drift in the first bearing, 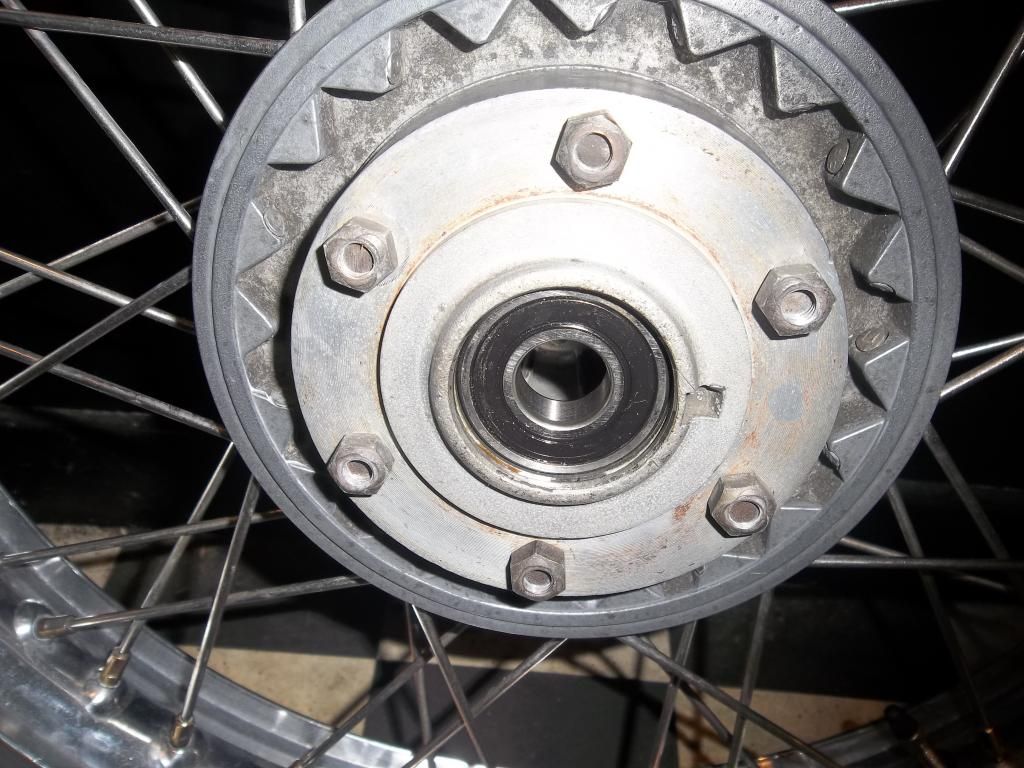 then using a vernier caliper, I measured the distance, which was a little difficult due to the design of the wheel, but it looked close enough to 70mm, so I made a spacer 70mm long and bored it out, so the spindle would fit, 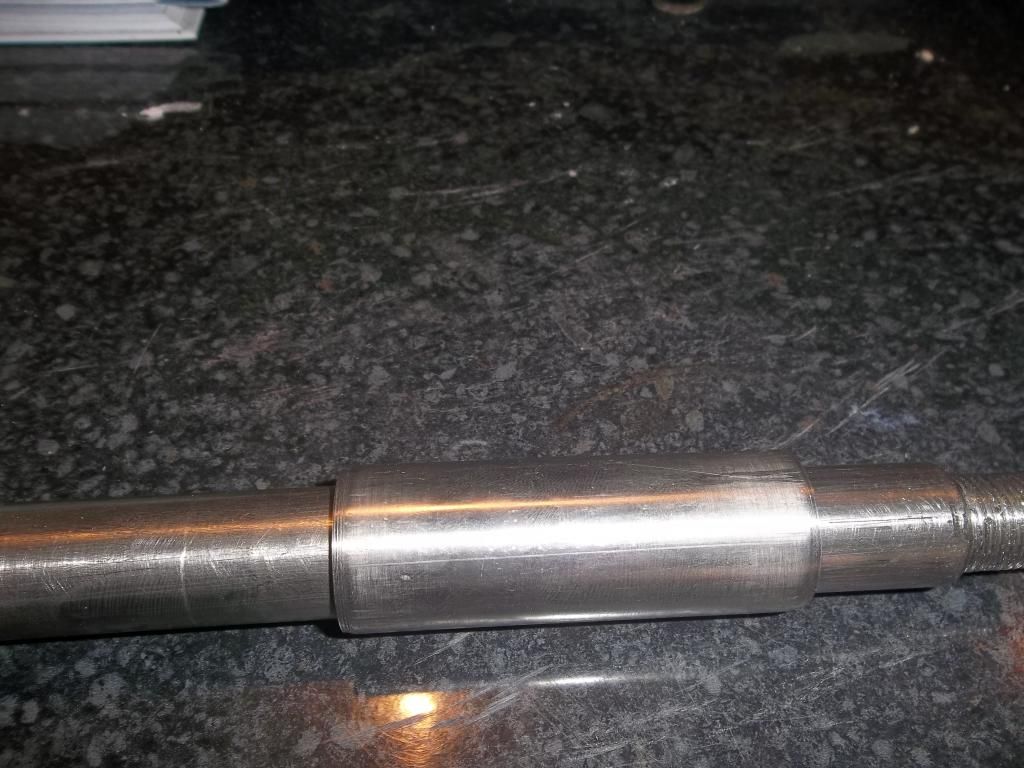 then fitted the spacer and the other bearing, 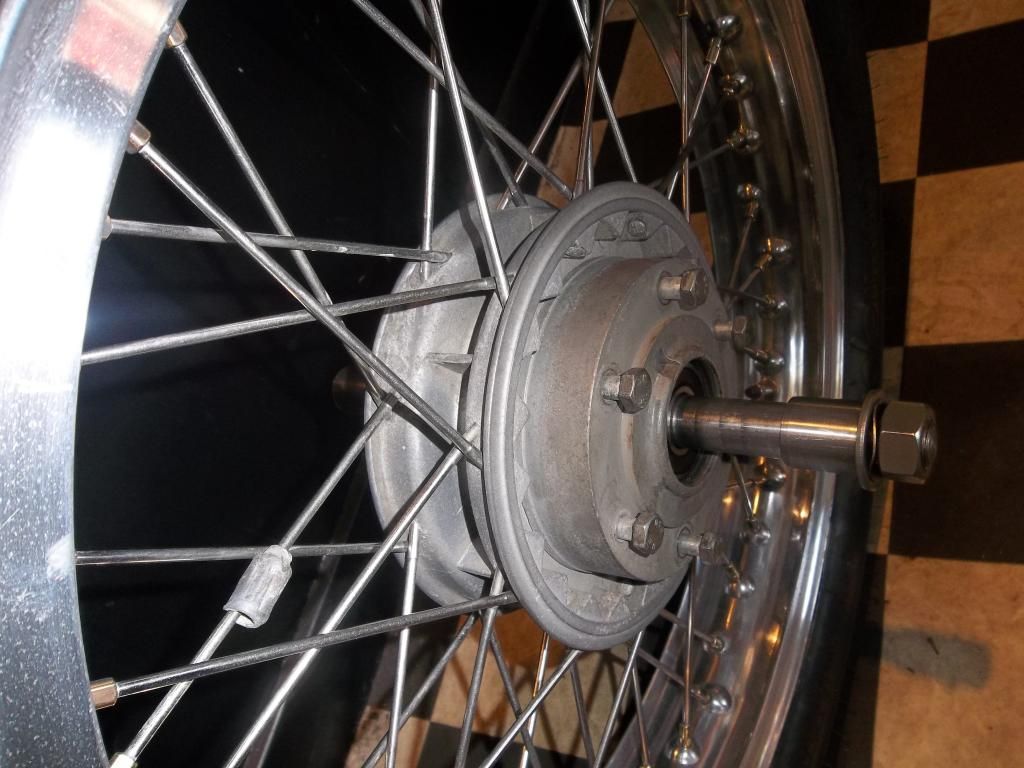 now I need to fit the wheel into the forks and using the 25mm spacer, check that the wheel lies central to the forks, any discrepancy needs halved and either added or subtracted to that 25mm spacer, once that is done, then it's a case of fitting the discs and that should be the front wheel finished, hopefully the rear wheel should be easier to sort, though I am not banking on it! |
|
|
|
Post by HRHpenfold on Feb 4, 2015 11:42:16 GMT
So I offered the wheel up into the forks, then using a ruler it looked like the spacer was about 5mm short, so I had a little think about it, I had measured the distance between the forks to be 160mm, I had made a 70mm spacer and the 2 bearings are 14mm wide each, which comes to 98mm leaving 62mm so I figured that I would make the spacer 31mm and the wheel should sit centrally in the forks, if you look at the wheel centre, where the bearings fit, there is a space for a large circlip on each side, I did buy new circlips, but I can't for the life of me understand the function of the circlips, especially as the alloy wheel version doesn't have the circlips, no other manufacturer fits them, and the spindle and spacers hold everything in the correct place, I mention this, because I am thinking of omitting the circlips and fitting oil seals in their place, I suspect that the circlips are belt and brace efforts, to stop the bearings from disintegrating if they seize, so I made a new spacer 31mm long, I then decided to make a nice washer for the end, so I had to cut down some stainless bar,  then drill the centre out, and turn the washer, the hopefully complete spindle, with custom made washer and a hole drilled,  |
|
|
|
Post by bev on Feb 4, 2015 12:23:44 GMT
A decent thread. Do you ever do any real work ? |
|
|
|
Post by HRHpenfold on Feb 4, 2015 13:02:39 GMT
A decent thread. Do you ever do any real work ? only when I am caught!  |
|
|
|
Post by HRHpenfold on Feb 4, 2015 15:54:03 GMT
Of course my own vain ness meant I had to stamp it with my initials, 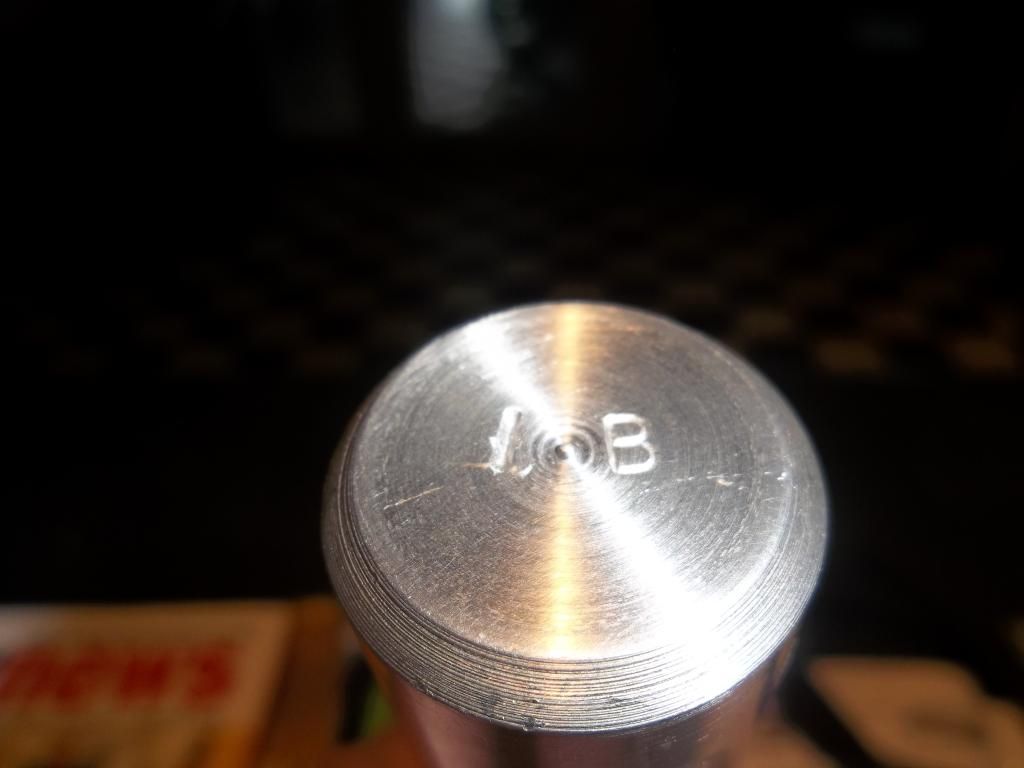 |
|
|
|
Post by teejayexc on Feb 4, 2015 16:21:32 GMT
LB ? Short for Lady Boy  |
|
|
|
Post by HRHpenfold on Feb 4, 2015 16:28:16 GMT
LB ? Short for Lady Boy correct! but I think it's an I and just the light, but it matters not!  |
|
|
|
Post by m40man on Feb 4, 2015 16:33:15 GMT
but I think it's an I and just the light, but it matters not! There's a lot of things you should notify your insurance company about . |
|
|
|
Post by bev on Feb 4, 2015 16:40:55 GMT
Cross eyed git has got the initials out of alignment. All that work and he screws up stamping his initials. |
|


 'That Penfold bloke's a genius, took a BMW and turned it into a Guzzi.'