|
|
Post by satnav on Feb 16, 2015 23:06:47 GMT
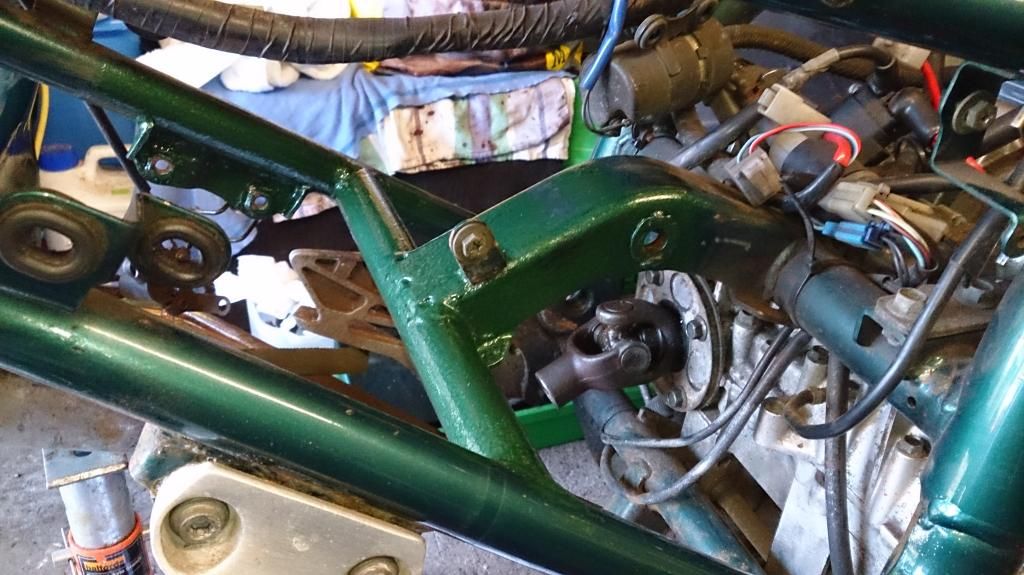
What started out as a simple refurb of the final drive unit now looks like this

So far
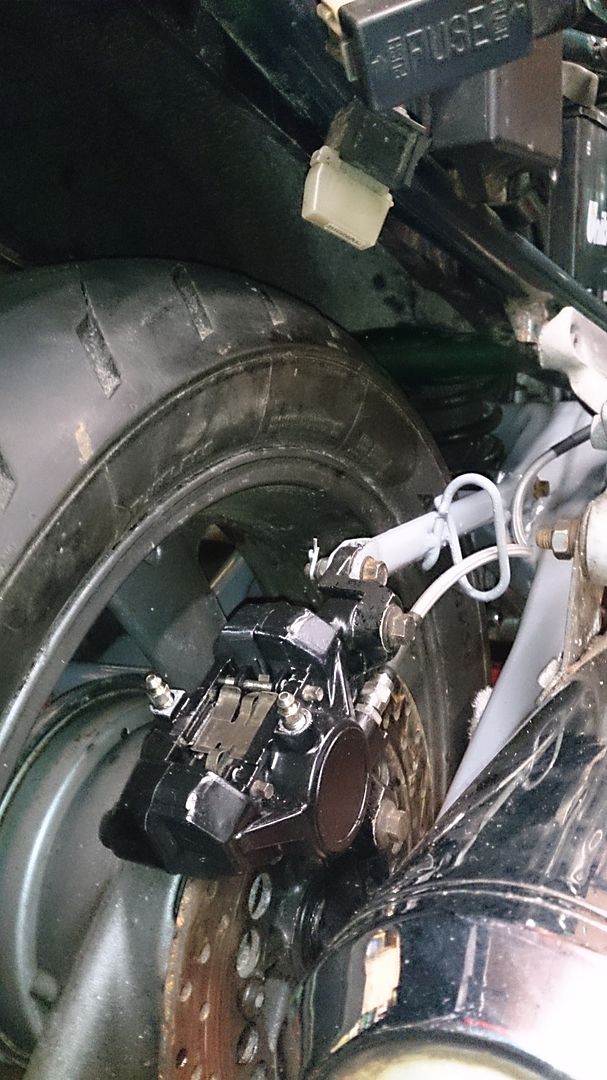
The rear calliper has been refurbed
Rear wheel bearings replaced
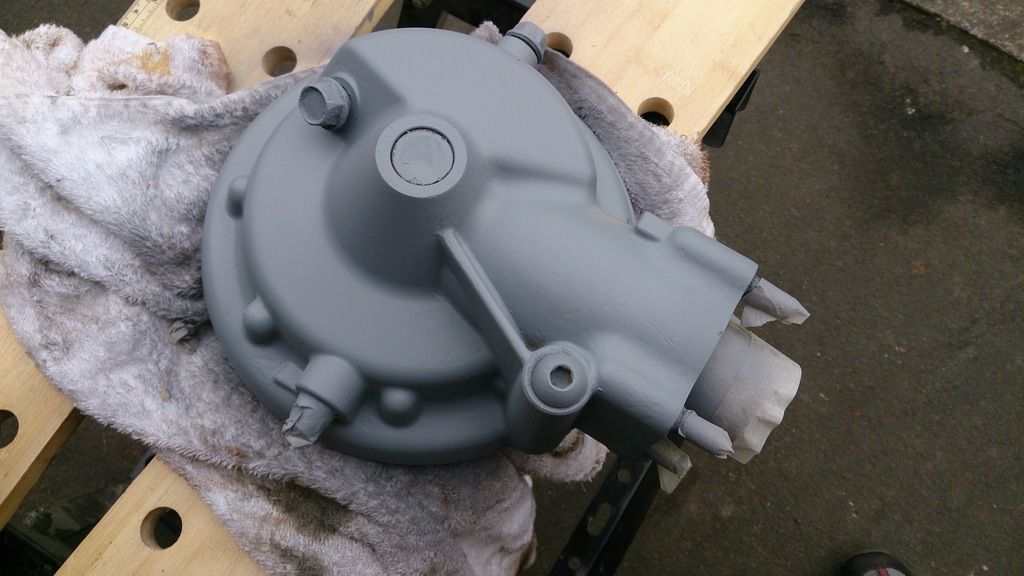
Final drive refurbed
Swing arm bearings replaced
Repaint swing arm
Now I thought I would attend to what looked like a little bit of rust on the frame. Again that spot of rust required this.

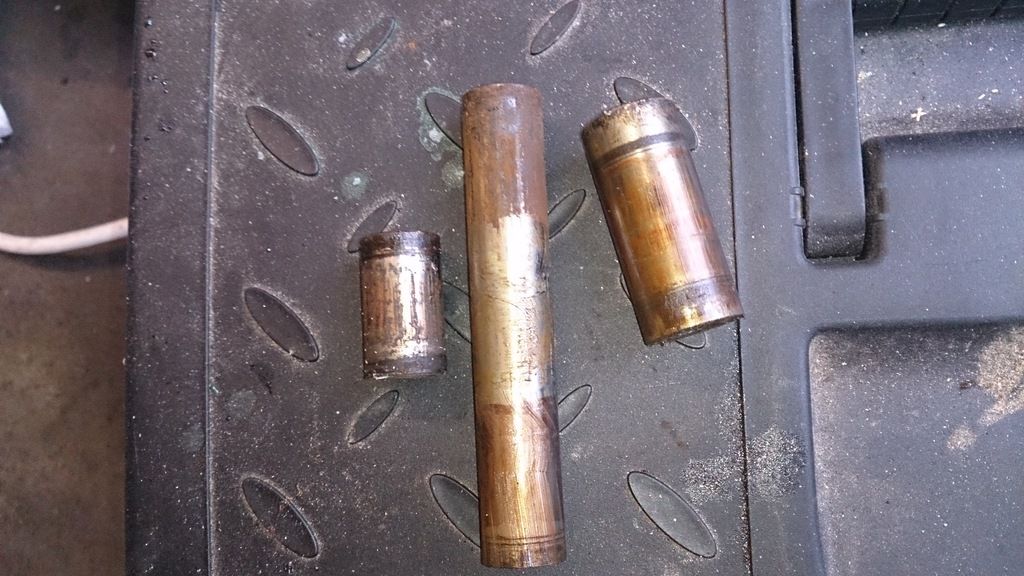
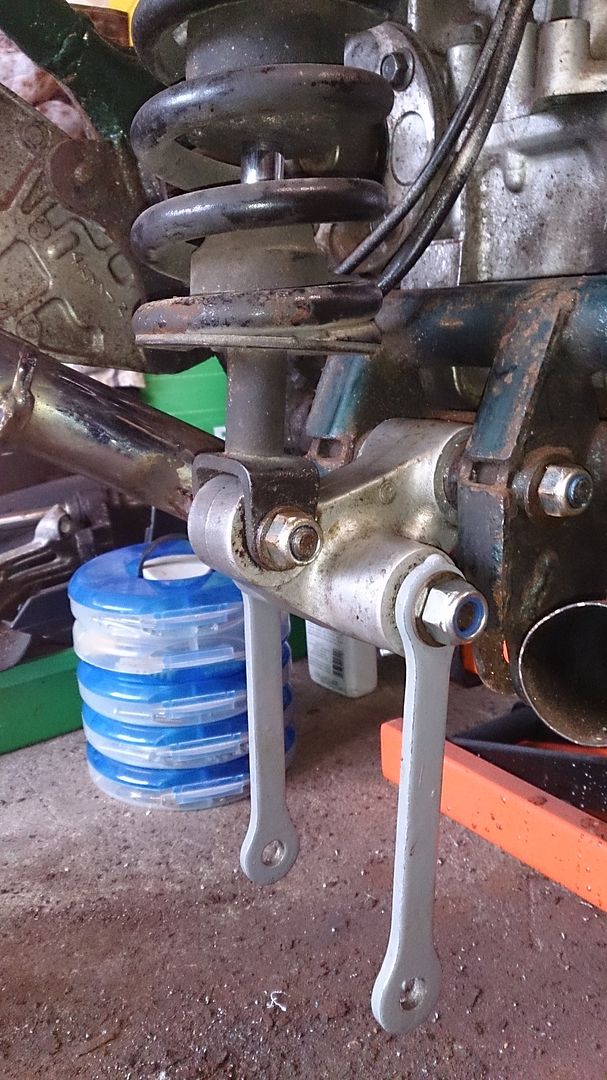
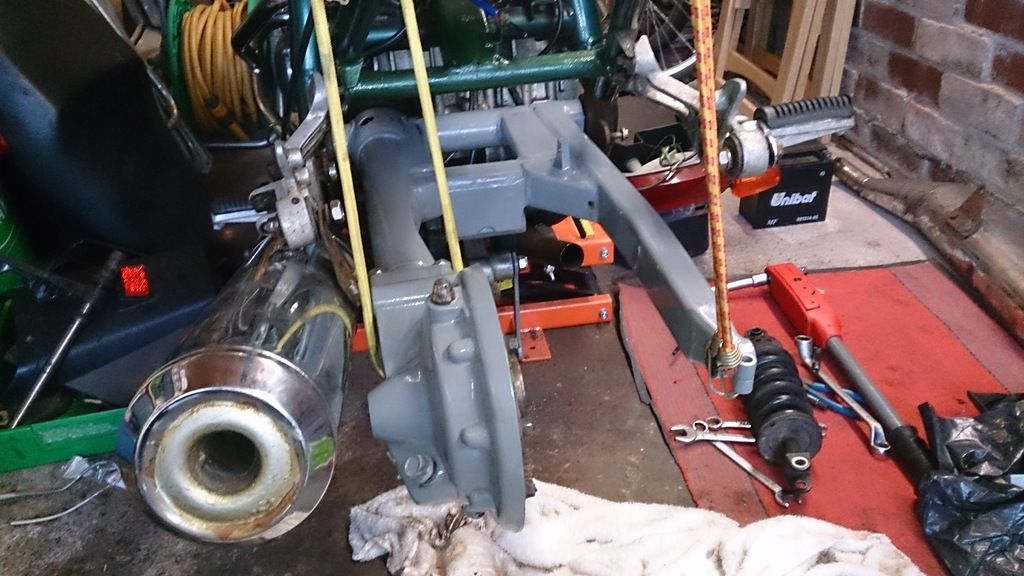
The problem I now have is that the top bolt for the suspension unit is rusted into it. I have tried drilling it out, but so far have only managed to knacker 8 drill bits and this

So unless anyone has any better ideas I am going to have to take an angle grinder to the suspension unit so I can get to the bolt from underneath. Mind if the bolt is that badly rusted into the unit it is probably goosed anyway.
|
|
davy
Harley Rider
 AKA BEVY!
Posts: 78
|
Post by davy on Feb 17, 2015 7:48:43 GMT
Oh the memories  I had the same issue with mine. Method of removal was to cut both ends off the bolt with a Dremel then using a grinder on the dremel remove as much material from the bolt at one end whilst avoiding the frame. Eventualy you should be able to twist the shock absorber out. The remainder of the bolt was left in my shock so I fitted a replacement from a Fazer. Random Picture |
|
|
|
Post by grumps on Feb 17, 2015 9:04:30 GMT
yep....you would regret starting!
|
|
|
|
Post by HRHpenfold on Feb 17, 2015 9:46:07 GMT
order a carbide drill,
plenty of oil, then drill out,
it needs to be a genuine carbide drill,
not one of the cheap drills off ebay that mention carbide coating!
|
|
|
|
Post by satnav on Feb 18, 2015 12:31:33 GMT
Oh the memories I had the same issue with mine. Method of removal was to cut both ends off the bolt with a Dremel then using a grinder on the dremel remove as much material from the bolt at one end whilst avoiding the frame. Eventualy you should be able to twist the shock absorber out. The remainder of the bolt was left in my shock so I fitted a replacement from a Fazer. Random PictureYep that is where I started but I have been on it for 4 hours now and I am concerned that I will damage the hole. Dremmel is a marvellous tool though, wouldn't be without it. Have ordered new unit so it will be more drastic surgery from here on in. Nice to know mine isn't the only rusty one out there. For now I am going to just paint the frame with green Hamerite as it is not visible under normal circumstances. |
|
davy
Harley Rider
AKA BEVY!
Posts: 78
|
Post by davy on Feb 19, 2015 7:56:26 GMT
You've gone this far you might aswell strip the whole bike and get the frame powder coated. I got mine done for £70  |
|
|
|
Post by satnav on Feb 19, 2015 13:17:27 GMT
You've gone this far you might aswell strip the whole bike and get the frame powder coated. I got mine done for £70 Hi Davy, Yes I would agree but I need the bike on the road as my daily commuter so I can get the winter hack sold (just a Worx 125). I have two weeks extra holiday next year with which I intend to embark on just such a project. |
|
|
|
Post by satnav on Feb 19, 2015 13:29:32 GMT
|
|
davy
Harley Rider
AKA BEVY!
Posts: 78
|
Post by davy on Feb 20, 2015 7:30:17 GMT
How does the frame look at the top shock mount after the grinder attack? Your first picture is focused on your shelves and although there is a space next to the carb and throttle cleaner I dont know whats missing |
|
|
|
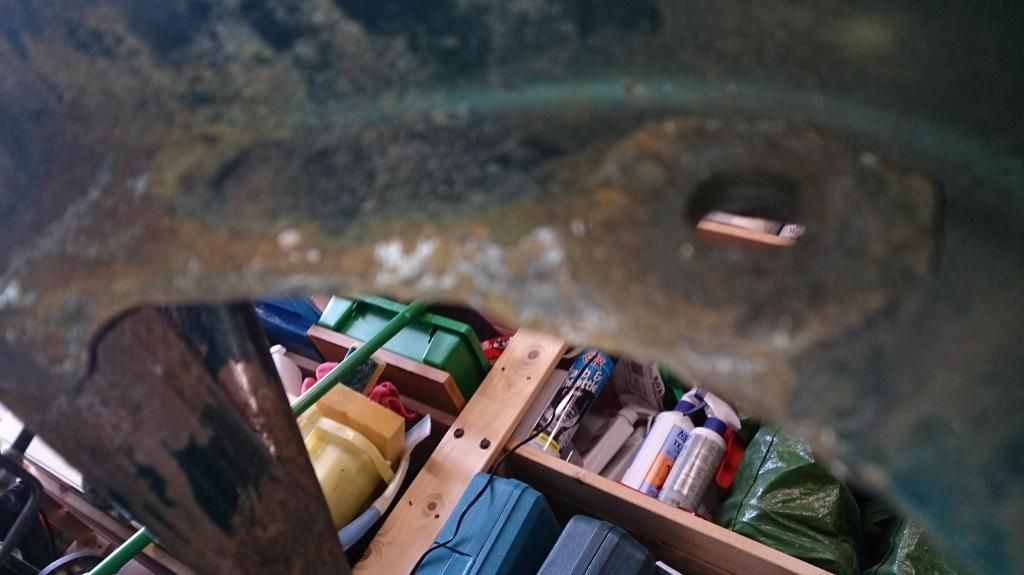
Post by satnav on Feb 20, 2015 10:28:42 GMT
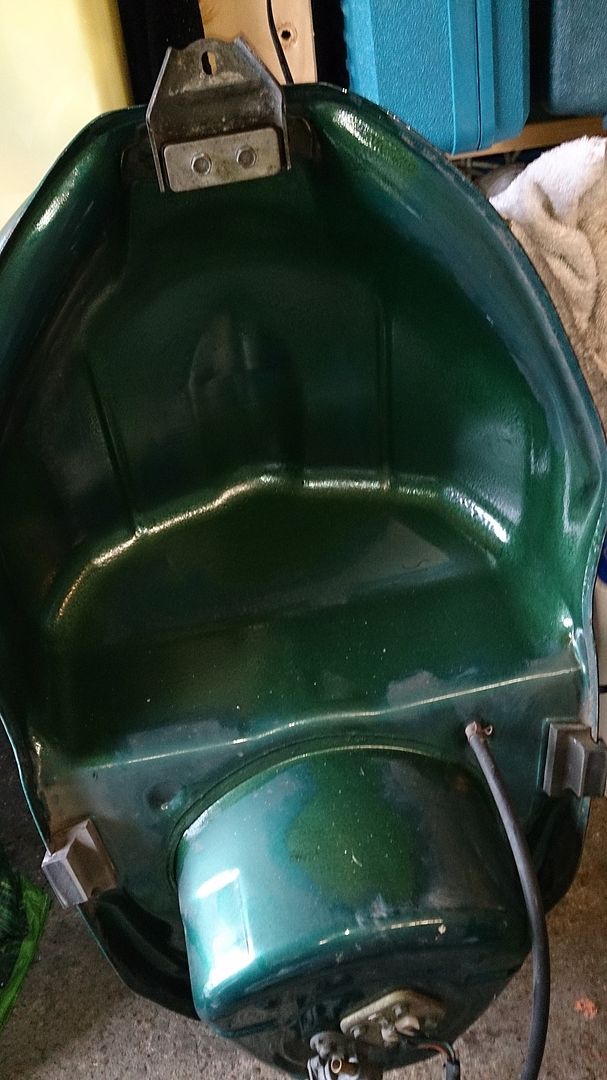
How does the frame look at the top shock mount after the grinder attack? Your first picture is focused on your shelves and although there is a space next to the carb and throttle cleaner I dont know whats missing There is remarkably good access, so the frame is largely unscathed as you can see from the first photo if you look at the big soft focus green thing in front of the shelves. The thing missing off the shelf is the WD40, so you have failed there. |
|
|
|
Post by satnav on Feb 20, 2015 10:41:44 GMT
BTW attacking the shock with the angle grinder immensely satisfying. Very therapeutic.
|
|
|
|
Post by satnav on Mar 3, 2015 13:49:27 GMT
So, work commitments, waiting for spares and a bout of man flu have held things up a bit. But today things are happening again.
The rusty parts of the frame have been properly prepped and have received two coats of green Hammerite. Luckily this will be largely unseen, but the colour isn't a bad match......in a dim light.......from a distance..........whilst squinting. I seem to have used similar arguments re some of the dates I had as a lad.
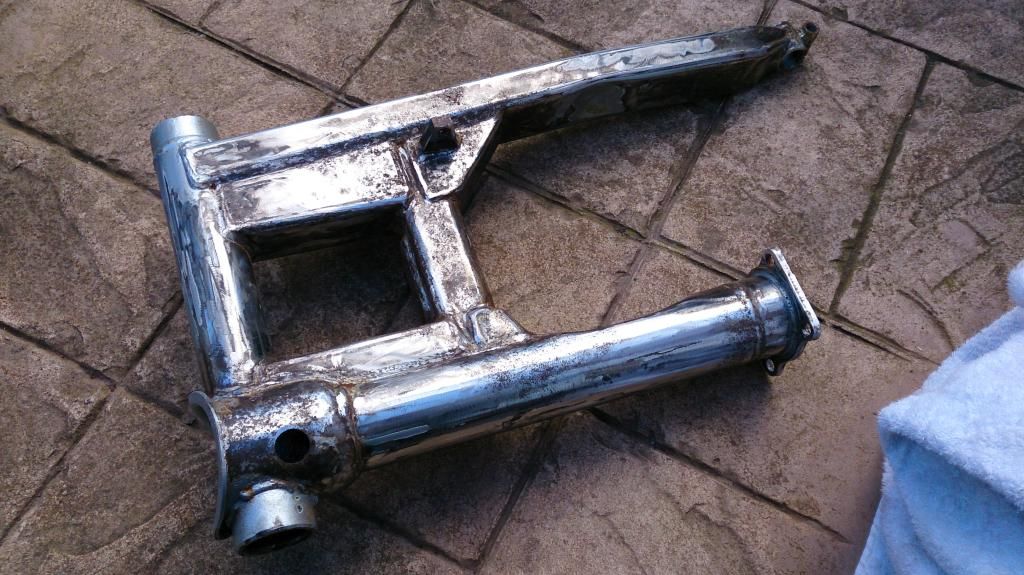
However the swing arm will require some tlc before it goes back in. It looked nice and silvery when I bought the bike, but a week on the North East's salt laden roads and it now looks like this
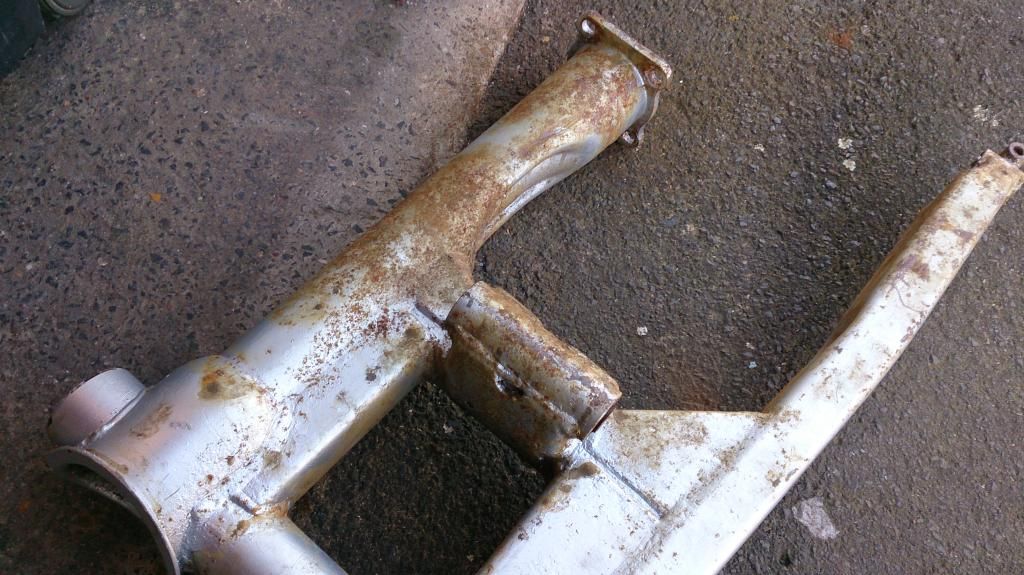

Yeah I know I could powder coat it but I am fed up of waiting for stuff to come back from being refurbed. So I am going to try this stuff.
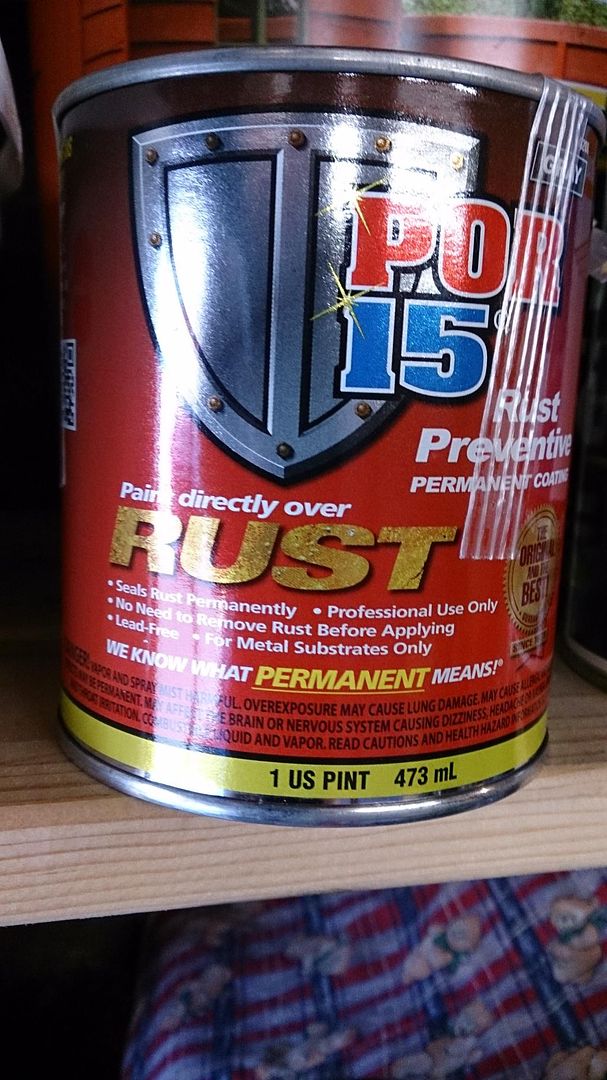
It comes highly recommended by a contact in the car restoration game. Will let you know how it fairs.
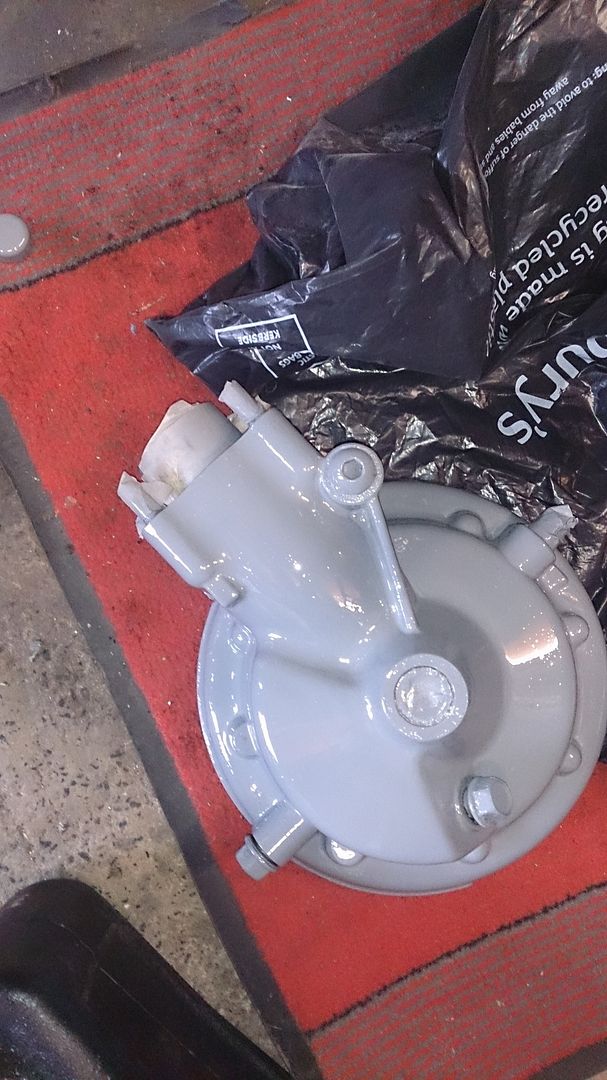
On the subject of refurbs, the rear calliper came back from Glovers in Sutton in Ashfield, and pretty fine it looks too.
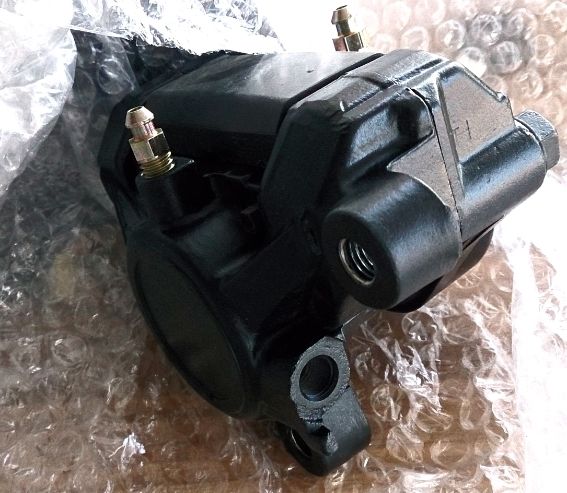
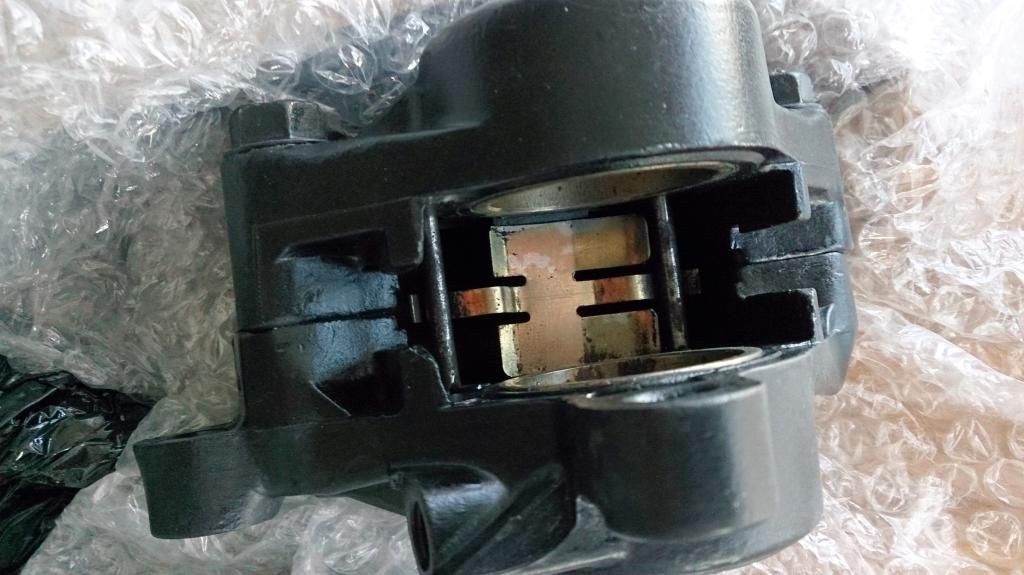
All fully refurbed for £50. As we used to say in the People's Metropolitan Republic of South Yorkshire: Looks just like a bought 'un.
|
|
davy
Harley Rider
AKA BEVY!
Posts: 78
|
Post by davy on Mar 4, 2015 12:29:07 GMT
I would use a flap wheel on that swingarm and spray with etching primer before painting. I cant help but think your chosen coating is a bit of a bodge/shortcut  |
|
|
|
Post by satnav on Mar 4, 2015 12:51:56 GMT
I would use a flap wheel on that swingarm and spray with etching primer before painting. I cant help but think your chosen coating is a bit of a bodge/shortcut
The paint better not be a bodge, it's £25.00 a tin. As I said a contact in the classic car business swears by it, and he turns out some good work.
I'll let you all know how it fairs. I have mentioned before that the plan is to strip the whole bike next year when I have some more time, and money.
This arm is fairly pitted anyway. I am thinking that I will get another one off fleabay later in the year and refurb that ready to go on.
|
|
|
|
Post by satnav on Mar 10, 2015 21:47:08 GMT
Finally I am at the stage where things are going back on the bike. Only managed to get the 'new' shock on, literally 10 mins and that is all I had time for.

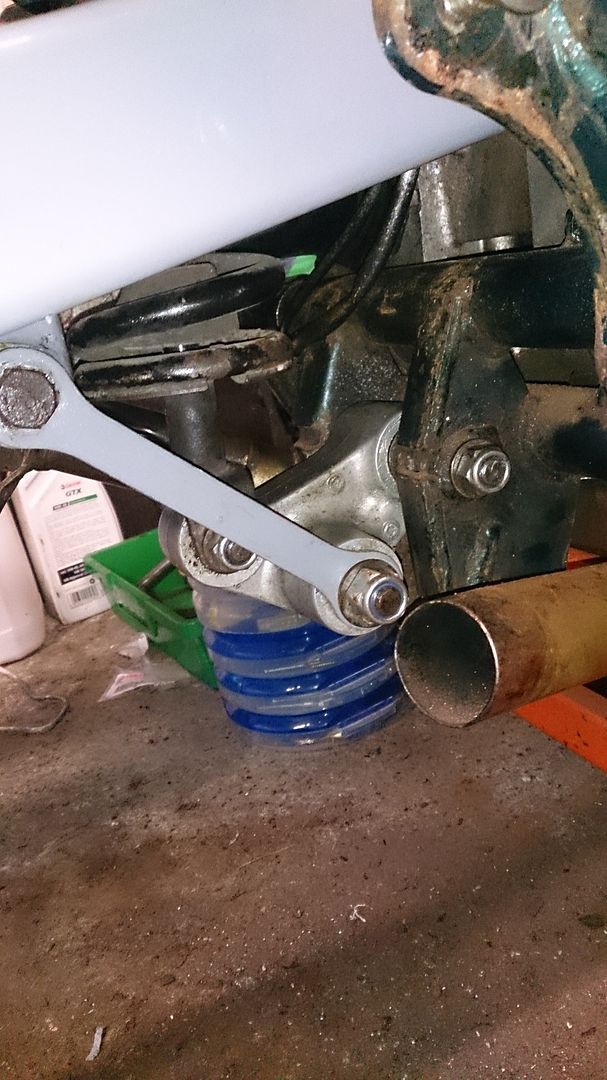
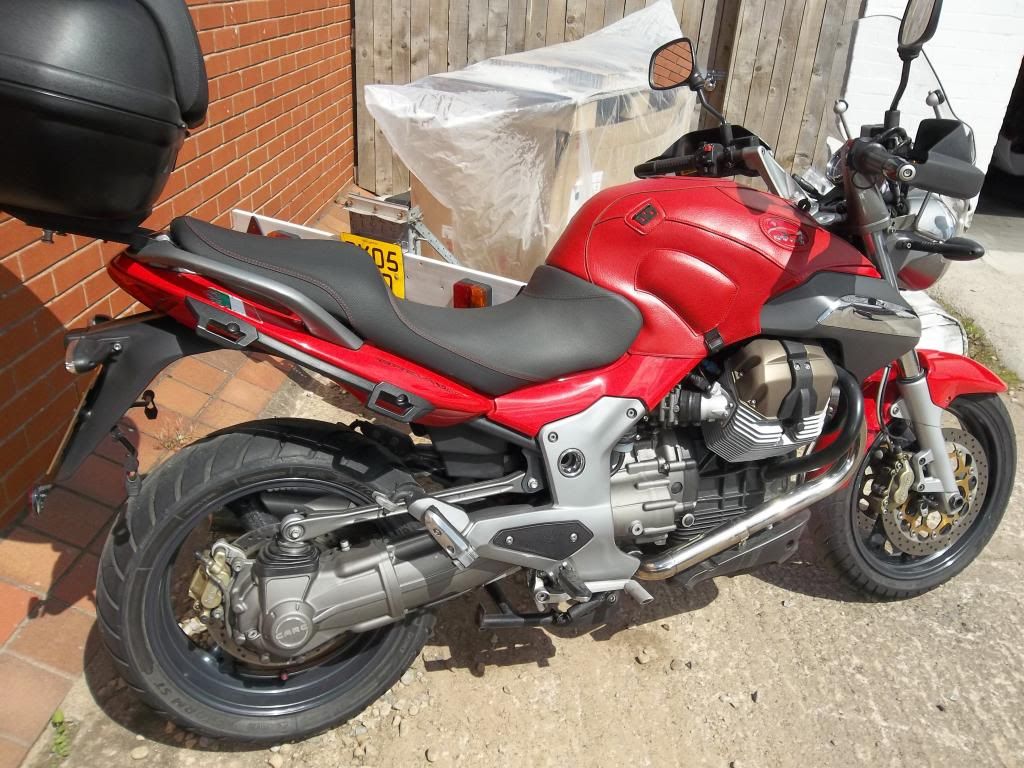
Quite simply, the rear brake on my 125 Worx began sticking this morning, and as this is currently my daily transport it required immediate attention. The problem was traced to the brake pedal bush being gunged up. So a simple strip, clean and regrease sorted it.
Picture of offending bike below.

|
|
davy
Harley Rider
AKA BEVY!
Posts: 78
|
Post by davy on Mar 11, 2015 12:25:50 GMT
Hows the swingarm looking?
|
|
|
|
Post by satnav on Mar 11, 2015 19:37:42 GMT
Hows the swingarm looking? It's away having new bearings in the lower bush. I couldn't get the old ones out. Hopefully will pick it up tomorrow when the etch primer will go on. Have already tried the paint out on something else. The finish is rock hard. Apparently someone was telling me that they use something similar on the rigs in the North Sea. |
|
|
|
Post by GAv on Mar 11, 2015 21:58:07 GMT
When I worked as a deck hand on ships Red Lead was mainly used as a base, and on tankers after using air pressure driven chipping hammers.
|
|
|
|
Post by GAv on Mar 11, 2015 22:00:25 GMT
Ps you are doing a great job, and I have oft times used Hammerite, but it does have a tendency to flake off, but not for some considerable time.
|
|
|
|
Post by satnav on Mar 12, 2015 14:38:47 GMT
Hows the swingarm looking? It's away having new bearings in the lower bush. I couldn't get the old ones out. Hopefully will pick it up tomorrow when the etch primer will go on. Have already tried the paint out on something else. The finish is rock hard. Apparently someone was telling me that they use something similar on the rigs in the North Sea.
I have also twisted the cap off the vent at the top as this is the only way you can check that the very small vent hole isn't blocked. It is only spot welded on, but not having one of those I will use a small dab of epoxy to put it back on (if ever you want proof there is a God, I just refer people to Araldite)
Anyway just one thing I wanted to mention: A while back the missus bought some paint brush cleaner from Aldi (or was it Lidl?). Anyhow it's this stuff

and it's fantastic stuff. Not just as a brush cleaner, but also as a degreaser for paint prep. It smells a bit like cellulose thinner, but I am sure it is more than that; and of course coming from Aldi/Lidl it doesn't cost a king's ransom.
I half suspected it would be ok by the number of orange warning squares on the side - don't breathe the fumes, pour down the drain, make contact with the skin, kind of thing.
I don't know about you guys, but I find that if something will kill a herd of stampeding buffalo at 50 paces just by taking the cap off, then it will generally do the job. Eco friendly usually means lots of elbow grease.
|
|
|
|
Post by satnav on Mar 13, 2015 14:31:50 GMT
Before I start on today's work I forgot to mention about the relay arm, otherwise known as that big lump of aluminium that sits below the swing arm.
Looking at the state of the pins and the bearings I was fully expecting to pay out another £100 to replace everything.

However I was amazed how everything cleaned up. With a bit of effort with some paraffin and WD40 all the bearings freed up and worked smoothly. A bit of emery paper on the pins and job done.
Today the underside of the fuel tank received a coat of Hammerite. It was only surface rust, but it all helps to keep things in check.
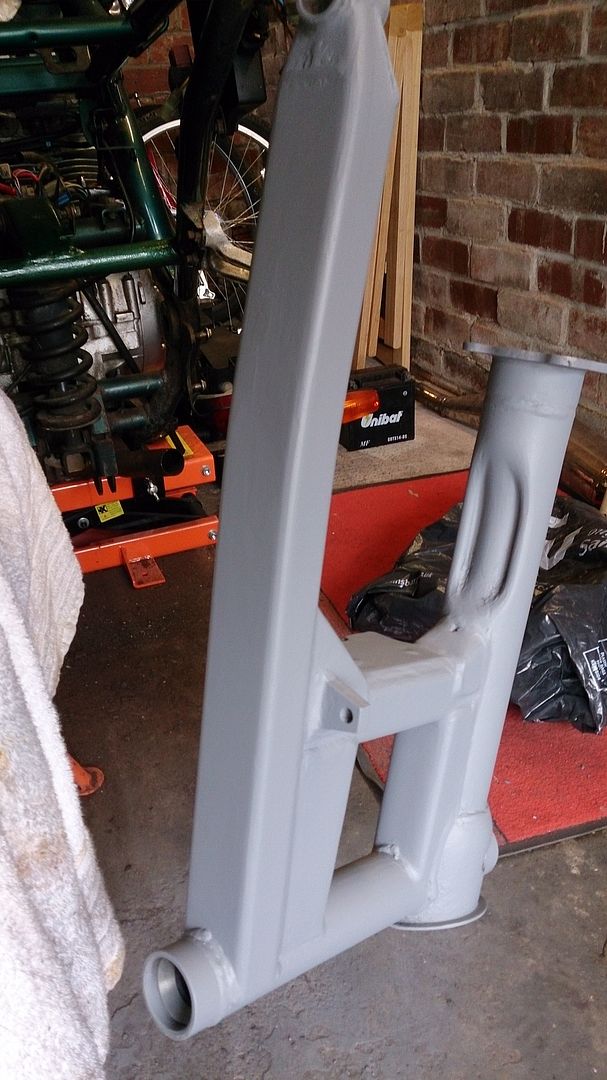
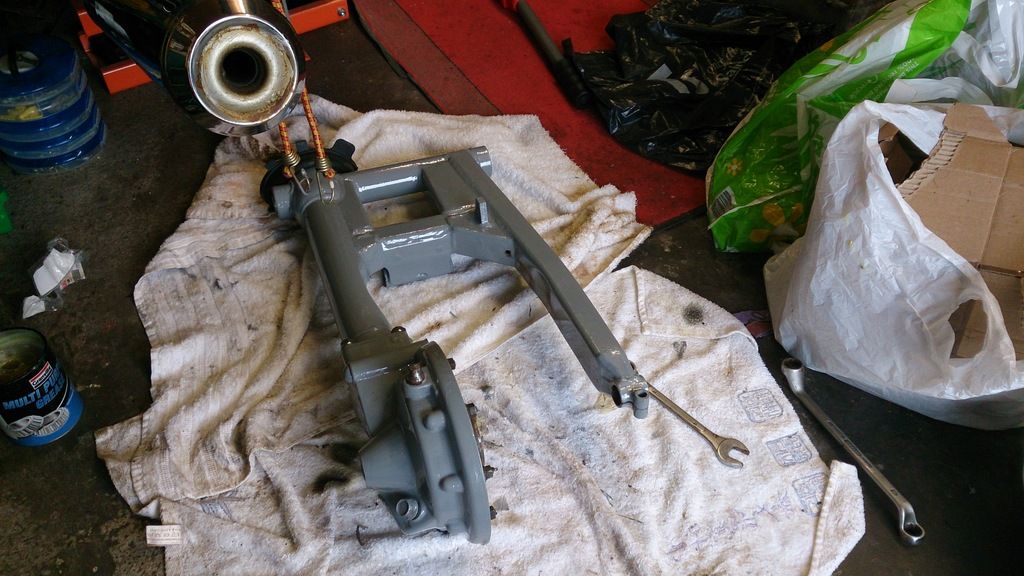
The swing arm and final drive have received their first coat of POR 15.
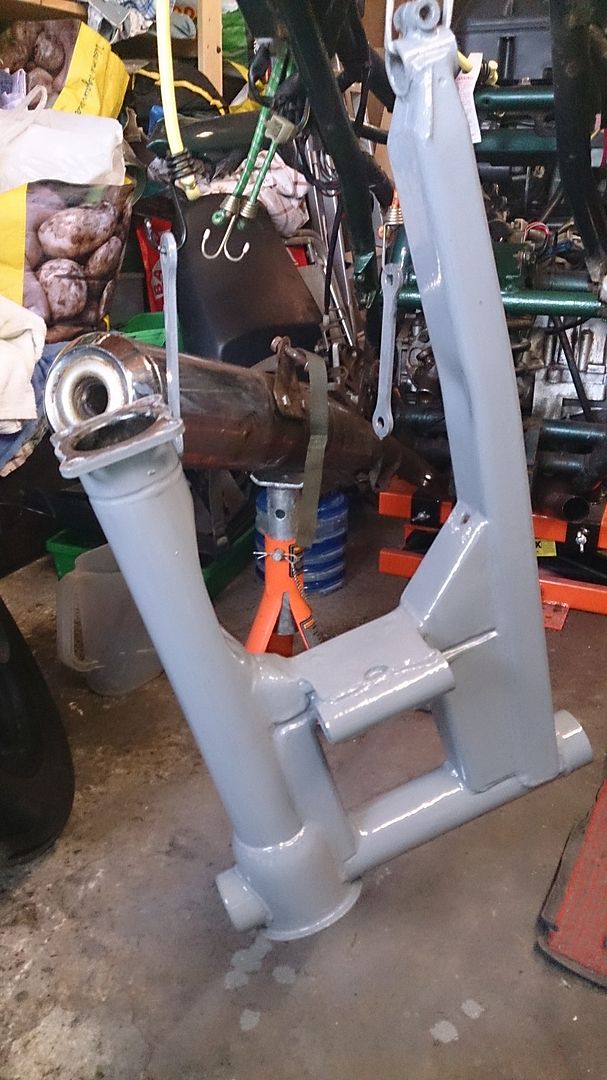
And before anyone makes any wisecracks about it still being in primer, that is the final colour. The clue is that it's shiny.
The only colours I could get were black, grey or white. So I figured the grey would be the best option. They don't do a silver.
|
|
|
|
Post by satnav on Mar 13, 2015 21:51:28 GMT
When I worked as a deck hand on ships Red Lead was mainly used as a base, and on tankers after using air pressure driven chipping hammers. Good stuff red lead. Trouble is I don't think it's available anymore due to something about it being dangerous Health and safety gone mad if you ask me. |
|
|
|
Post by satnav on Mar 17, 2015 21:24:43 GMT
These finally arrived today.
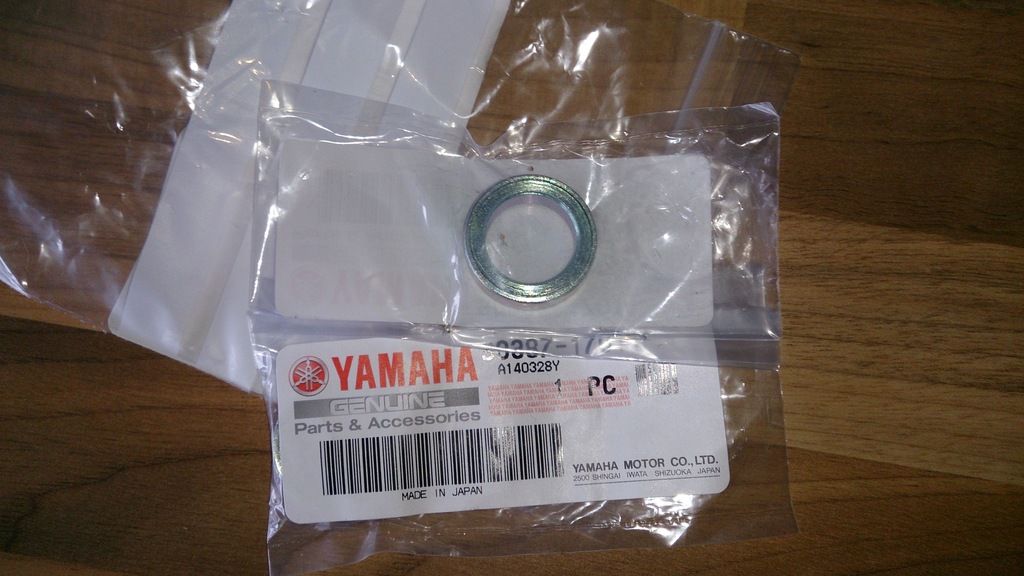
They are the collars which fit between the swing arm bolts and the bearings. They are crucial because it is these that fit against the bearing seals keeping the water out. They were missing from my bike, which might explain why the bearings were in such a mess. They only cost £12, but have taken a month to arrive.
Whilst I was waiting for these, and in my haste to get on with the job, I thought I would crack on with putting the relay arm in.
Now can any one spot my deliberate mistake here?......
Yes. How the hell do I get the swing arm on when the shock passes through it? Doh!! So having taken the shock and relay arm off the bike, the swing arm was ready for fitting. As you can see I elected to fit the final drive and drive shaft first. I was told this is easier than fitting the drive shaft and final drive after the swing arm is in place.
In order to get the correct set up on the bearings you arm supposed to torque the right hand bolt to 0.7 Kg M. But as my wrench can't handle such delicate figures I have just set it all up by feel - removing all the play whilst still having free movement of the arm.
The bungy cords were to take the weight of the arm whist I wrestled it into place. Another body would have been useful, but I didn’t have one of those.
Obviously the new bearings have been well packed with grease, and the old oil seal had to be cut off the drive shaft and a new one fitted.
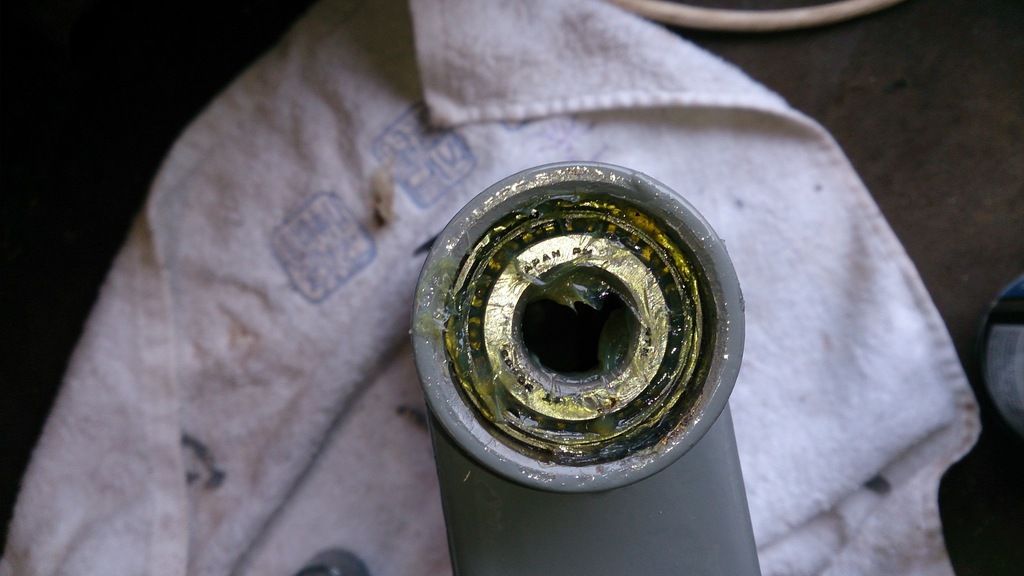
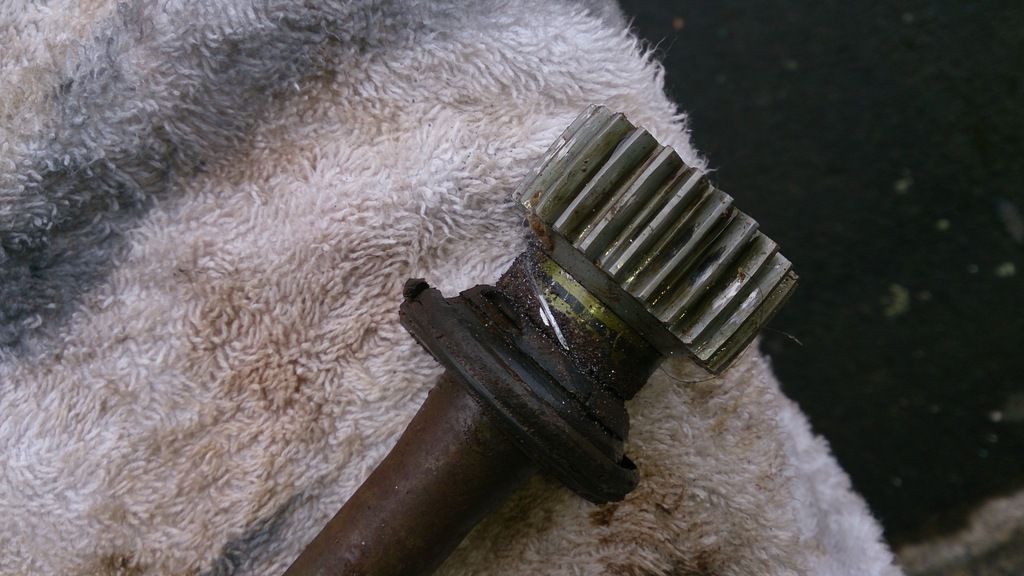
There is a bit of wear on the shaft teeth, but nothing serious, and probably caused by the broken final drive.
It took a little while to get the shaft to engage with the UJ on the gearbox. I could get the shaft into the UJ, but it wouldn't engage fully. After 20 minutes of pushing, cajoling, cussing and generally sweating like Vanessa Feltz in a wet suit, it just simply slid home. Job done.
I initially put the rubber seal which covers the gap between the gearbox and the swing arm onto the arm. But I found it kept getting in the way. It is easier to fit it to the gearbox first and the pull it over the swing arm once it is in place.
Anyway, finally got the relay arm and shock back in place to finish the job off.
Or as my partner observed, "I see you've got the big grey bit back in then?" If only it were that simple.
|
|
|
|
Post by m40man on Mar 17, 2015 21:46:41 GMT
... as my partner observed, "I see you've got the big grey bit back in then?" I'd worry about it being grey, but it's always great when a lady notices  . |
|
|
|
Post by satnav on Mar 17, 2015 23:14:13 GMT
... as my partner observed, "I see you've got the big grey bit back in then?" I'd worry about it being grey, but it's always great when a lady notices . 
Colour wise I didn't have a lot of choice: Grey, black or white. Grey is the lesser of the evils. I think? |
|
|
|
Post by bev on Mar 18, 2015 7:45:29 GMT
I'd worry about it being grey, but it's always great when a lady notices .
Colour wise I didn't have a lot of choice: Grey, black or white. Grey is the lesser of the evils. I think? You could have used a different paint. I've seen one done in black and it looked quite good. |
|
|
|
Post by satnav on Mar 18, 2015 10:27:05 GMT
So you'll hate it when I have the frame done in Silver whilst keeping the tank and fairing green.
|
|
|
|
Post by satnav on Mar 18, 2015 10:32:27 GMT
... as my partner observed, "I see you've got the big grey bit back in then?" I'd worry about it being grey, but it's always great when a lady notices . I've just thought. You were talking about the swing arm, yes? |
|
|
|
Post by m40man on Mar 18, 2015 11:01:15 GMT
I've just thought. You were talking about the swing arm, yes? Oh yes, certainly, of course . |
|
|
|
Post by satnav on Mar 18, 2015 22:51:19 GMT
Well a big push today and it's all back together and working fine.
Only a couple of photos of the refurbed calliper and the swing arm in place.
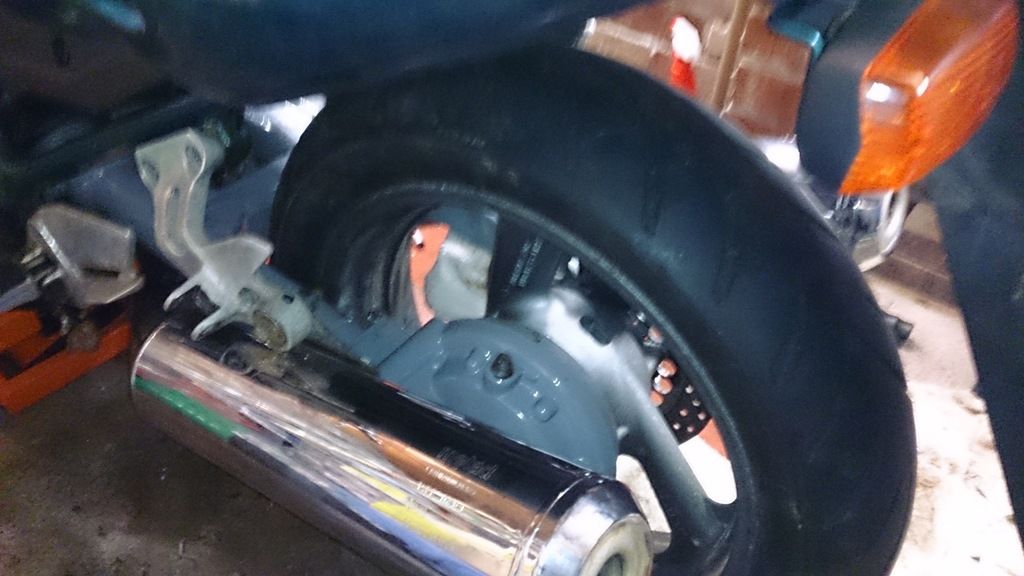
It was too dark to take photos of the whole bike.
The only issue is the rear brake. Despite the calliper refurb and new braided hose, it is still not as firm as I think it should be. There does not appear to be any air in the system and the master cylinder is fine.
Needs some further investigation.
|
|


 I had the same issue with mine. Method of removal was to cut both ends off the bolt with a Dremel then using a grinder on the dremel remove as much material from the bolt at one end whilst avoiding the frame. Eventualy you should be able to twist the shock absorber out. The remainder of the bolt was left in my shock so I fitted a replacement from a Fazer.


 .
.