|
|
Post by amorti on Jun 11, 2014 23:06:55 GMT
There's Waldo!  Of all things, the engine bolt hiding in the box with the carbs. That'll teach me to pretend they're not there. You can see the type of thick sh*tty grease which the whole bike was covered with. Only really looking for the top shock bolt (which might have fallen out if it was left loose in the shock, since I have the nut), and the length of fuel pipe from the filter to the pump now. I think I might have to find those by other means, I doubt they'll be found now. |
|
|
|
Post by amorti on Jun 12, 2014 18:59:08 GMT
Full triumph street triple brake set for £33+£8 P&P?That'll do nicely; it's a 14mm master cylinder, in black with a (straight) silver lever, a mirror mount, front hose mounting, switch included and all that. I'll see if I can use the hoses, then sell the calipers on, probably for about what I've paid for the lot. Chuffed 
|
|
|
|
Post by amorti on Jun 15, 2014 23:59:50 GMT
Decided to put a battery on it today, and see what works ad what doesn't. Issues: No oil light - I hadn't connected the bullet plug for the oil level sensor, Found that 2/3 of the speedo backlights bulbs are out (maybe due to the blue/green on the blue wire) Back right indicator had 12v in, continuity right through and back to earth, but refused to light. Turned out to be a female connector with blue/green on it The indicator relay was goosed, tested by bridging it. Fixed by running an extra earth and using a 3-pin relay I had from fitting an LED relay to the fireblade. Horn doesn't work, didn't test it much and the battery is charging now. Basically any plugs I hadn't taken apart to clean came back to bite me. I also accidentally leaned on the starter button, so now I know that works. And well, here's the rest! (Clicky-linky video, can't figure out how to embed it without uploading to YouTube)  In somewhat less happy news, it turns out both fork seals leak. Hadn't really intended to do that, but there you go. |
|
|
|
Post by amorti on Jun 19, 2014 16:48:05 GMT
Muthfucka... I got the indicators working last time, but while testing the horn I thought I'd try the indicators again and would you believe it the relay is popped. Again.
What can cause a bike to eat indicator relays? It has aftermarket indicators on it, but they all appear to work fine.
|
|
|
|
Post by amorti on Jun 19, 2014 16:49:05 GMT
At dadmorti's insistence that it could be the indicators themselves causing high resistance = high drain = melted relay (no, but I cleaned the plugs on them), I opened them up. 2/4 looked ok, but 2/4 looked a bit like this...   Oh well, into the vinegar, overnight they go, along with the connectors off the front loom.  Again, something electrical I didn't clean bites me in the arse. |
|
|
|
Post by amorti on Jun 19, 2014 16:49:43 GMT
Does anyone have an indicator relay lying about which they would accept postage and gratitude for? Maybe you fitted LED indicators and changed the relay or just have something spare lying about?
Any plug, doesn't need to be a Divvy one. Don't care 2/3 pin, just needs to suit 4x21w bulbs please.
This is also a test of whether I'm talking to myself in this thread.
|
|
|
|
Post by neilmud Lord Protector on Jun 19, 2014 23:04:12 GMT
This is also a test of whether I'm talking to myself in this thread. Yes we are! Amorti's inner voice  |
|
|
|
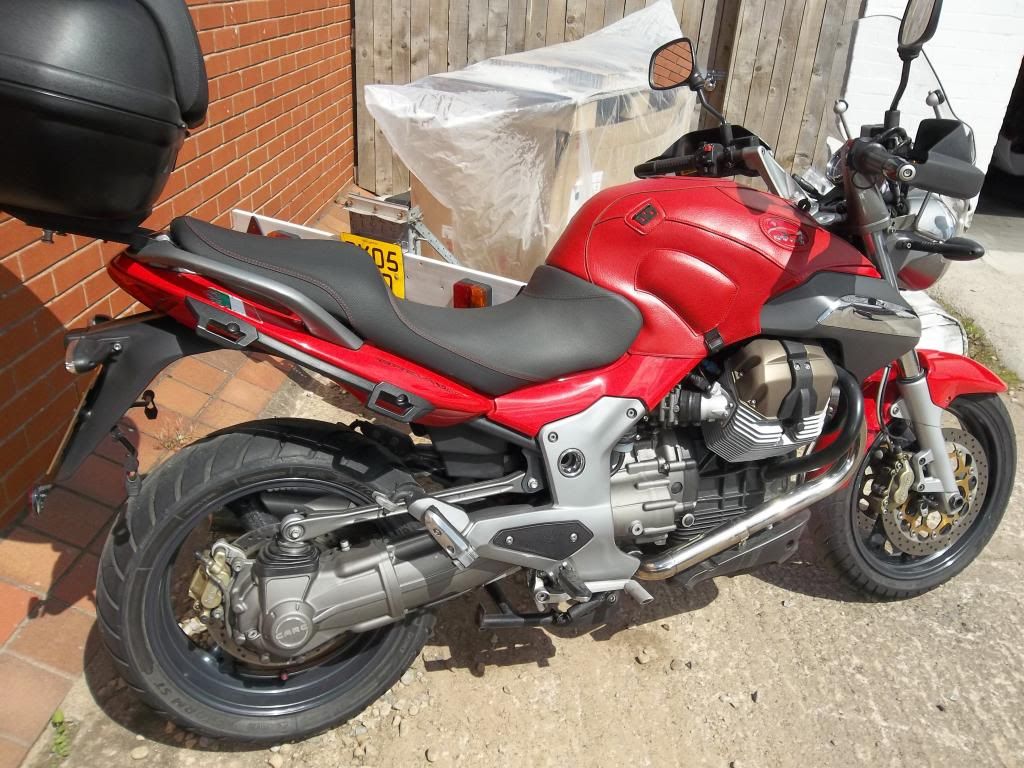
Post by amorti on Jun 26, 2014 20:43:06 GMT
And here we go... Add one bolt for the rear suspension. Turns out it even still has damping! The XJ owner's board says the new Diversion rear shock is a direct swap and whether or not better, would certainly be newer. Keep an eye out for bargains there... if I keep it.  LHS chain adjuster before/during...  and after. I kinda wanted to use two shiny nuts but by using two new ones and two old ones I have a 12mm and a 13mm nut each side, which means the tools I have will be enough - I don't have 2x12mm nor 2x13mm open spanners.  RHS chain adjuster before/during...  and after.  Exhaust studs: done, doing, and didn't do yet. I also tapped the nuts. They were all stiff to get off, and the tap squeaked like a beast in the nuts... but they all wound back on smoothly without tools.  8mm fuel hose. It should be a pre-formed U-bend, but it ain't £4 a metre, so instead it's a straight bit of hose with a clip in the middle to help it not kink.  Just right to not touch the block.  Oil cooler washers! Of course after measuring (with a ruler, I don't have a vernier) at 1/2", they turn out to be (much cheaper) 12mm washers. Still, it'll seal.  Oil filter fitted, and I could add some oil. Naturally I had forgotten to put the sump plug washer on, so I will simply hope the red sealant holds til I next do the oil - which might be never.  Lights! I will know what it's doing in the dark.  The rev counter then started doing a little dance up and down to 3200-ish rpm, which turns out to probably mean the TPS isn't setup right. Sure enough, in diagnostic mode (unplug TPS, switch on ignition but not motor, plug in TPS) whereas it should settle to 5000-5500 rpm on the dial, it settles around 1100rpm. So I'll need a security torx bit to adjust that. Also I don't know if the lights are behaving right. I have filled it to "plenty" of oil... alright, a bit too much. I figured better than finding it sucks a pint into the filter and the clutch thrust bearing is run dry. Plus I wasn't paying enough attention. Anyway, it used to be that the oil light was on when you turned the key but now it's not. Is that normal? It does light the oil light when you pres the starter button. IDK if it'll go out when the engine starts, I was just testing the safety circuits (all fine) and revelling in it doing something pumping some oil round the engine. Next stop, although I won't be able to fit the airbox tightly, is to try and start it. What's the best way to rig up a free or very cheap temporary fuel tank? |
|
|
|
Post by HRHpenfold on Jun 26, 2014 20:53:52 GMT
Old washing up bottle with a bit of hose on the end, hole in the bottom of the bottle to fill with fuel, bit of string through the sides near the top to hang from the bars!
Actually an old scottoiler bottle is a ready made one!
|
|
|
|
Post by m40man on Jun 26, 2014 20:58:02 GMT
What's the best way to rig up a free or very cheap temporary fuel tank? I doubt I'd win any health 'n safety awards, but a pop bottle did OK for me when pressing life into a motor that hadn't run for a few years .... 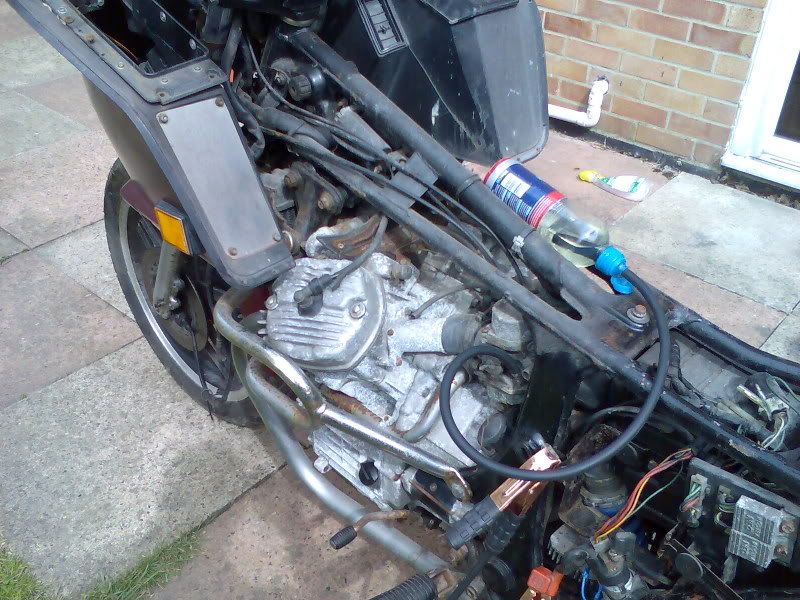 |
|
|
|
Post by neilmud Lord Protector on Jun 26, 2014 20:58:19 GMT
I thought if you press start with stop switch to stop warning lights light but am probably wrong .
neil
|
|
|
|
Post by neilmud Lord Protector on Jun 26, 2014 21:01:23 GMT
Old washing up bottle with a bit of hose on the end, hole in the bottom of the bottle to fill with fuel, bit of string through the sides near the top to hang from the bars! Don't give Martin ideas that sounds a bit like too much of a permanent fix  Neil |
|
|
|
Post by amorti on Jun 26, 2014 21:27:51 GMT
Cheers M40! Not looking for healthy or safe, just a way to get it going without fitting the tank!
That way I can lift fuel above the carbs to be sure the fuel pump isn't playing silly buggers.
I've got a spare length of hose, so the pop bottle looks like a winner!
Do you remember what brand you used? Looks like the hose fits reasonably tightly through the mouthpiece opening.
|
|
|
|
Post by teejayexc on Jun 26, 2014 21:45:10 GMT
|
|
|
|
Post by amorti on Jun 27, 2014 7:02:30 GMT
|
|
|
|
Post by amorti on Jul 6, 2014 14:28:21 GMT
Gotcha!  Unfortunately locknuts didn't help get the stump out. So tempting to give it a go with mole grips but instead I'll bring it to work and ask a colleague to weld a nut on.   |
|
|
|
Post by amorti on Jul 7, 2014 5:19:46 GMT
Of course, even with a nice pop bottle full of fuel, it doesn't start. Fuel pishing out of seals #34  I reckon I am going to buy this kit: litetek.co/Carb_Kit_Yamaha_Seca_II.htmlas some member on the CB-1 board have had good experiences with his stuff and £26 for a set of seals has to be better than a used set of carbs (starting around £50 on the Bay) that might also leak. |
|
|
|
Post by amorti on Jul 9, 2014 18:25:25 GMT
Vince at work did the nut-welding trick a treat, so I was able to clean the thread and fit the master cylinder. Then I could bleed the fluid to get one piston out and tidied and then again for the next. Then tidy it all up, and bleed a third and final time. I have a back brake! Admittedly with a really worn out disc but that can wait. Pictures to follow, my internet connection is on a go slow.
I heard you can use brake cleaner as starting fluid. Any special trick? I need to hear this f****** thing fire and it isn't going to do it on petrol with most of that dripping on the floor.
I also met Sonya, the wife of the previous owner, who has sorted me out with a receipt for change of ownership. Apparently they put nearly all the bike's 85000km on it two-up between 2005-8, then it broke down and sat in their garage for about 5 years after that before my mate Vesa took it off their hands before he gave it to me. Part of why they gave the bike away was how long it was standing, but also it had developed a petrol smell, which made it a Moto non gratia in the communal garage. Now the leaky carb seals are explained!
Apparently the rear shock was also getting progressively worse. I'm hoping against hope that it came down to the seizing swingarm pivot. Cos I'm an optimist like that.
Project POS is getting there.
It'll have to get thrown back together and put in the garage soon though as the carbs won't be fixed before we move out of this place. Won't take long just need to fit the fairings and silencers, which are off as it won't go through the house with them on.
[/waffle]
|
|
|
|
Post by CD on Jul 30, 2014 17:29:35 GMT
Not had chance to see what you've done about the bodywork. But anyway.
Cracks - file/dremel them out and fill with plumbers plastic pipe gap filling cement. Leave to set for a week.
Fill grooves with painters body putty. Waft over with primer to show any marks then wrap it with car wrap stuff.
How about a blue urban camo?
|
|
|
|
Post by amorti on Jul 30, 2014 19:42:27 GMT
Forgot to put the last update on here with the excitement of moving house.... it's from 13th July. Today project POS got thrown back together and put in the garage under the building where in a few days I will no longer live. It is incontinent in terms both of fuel and fork oil (which has leaked on the discs) and is generally just a bit sad looking. Still. It was free. You'll just have to believe when I say the pictures are generous.      The left exhaust went together ok - expected since it had the less rust. The right hand one however took a lot of wiggling and swearing before finally taking the downpipe off and fitting the silencer then tightening the lot up from the manifold nuts. Here's hoping it seals. Turns out the mirrors I have are reversible so if I had a left one the same I could use it on the right side. Doesn't look like an original mirror though and since the bike has been down both sides that would fit. Anyone recognise them? There seem to be too many sections and threads for me to think they're cheapies but anything is possible. It's just occured to me the thread on the main stem might be M10, which would doofer if so. Probably only show elbows but never mind. Also occurs I am just being tight and could get a new set of less-ugly mirrors from China for £6.50, or a thread adaptor for not much more than £3. But nothing until it's bloody running! |
|
|
|
Post by amorti on Jul 30, 2014 19:44:07 GMT
I have the wintergreen oil now, and a "while you were out" notification arrived today for a parcel that's probably my carb seals. Sadly though, that lot will have to wait another week as I am away to sunny UK to celebrate mrs_morti's 30th.
To be honest, between trying to decorate and replumb the kitchen, and build a new bathroom, I have had very little time to even think of this bike.
|
|
|
|
Post by amorti on Jul 30, 2014 19:45:40 GMT
Not had chance to see what you've done about the bodywork. But anyway. Cracks - file/dremel them out and fill with plumbers plastic pipe gap filling cement. Leave to set for a week. Fill grooves with painters body putty. Waft over with primer to show any marks then wrap it with car wrap stuff. How about a blue urban camo? As far as bodywork goes, it is what it is, as shown in the post above! I might leave it like that to be honest, since it will spend its whole life being shoved into tightly packed bike bays, and will be living outside. The best it'll get is a swift T-cut (you can't really see how dull the panels are in the pictures), but if I really get carried away (not likely) then I might key it and spray some white spraycan on there. |
|
|
|
Post by Doom on Aug 3, 2014 20:19:05 GMT
Is the mirror a TDM item? It has that sort of elbow.
|
|
|
|
Post by amorti on Oct 3, 2014 19:57:00 GMT
So I finally got round to fitting the carb rebuild kit. I can only praise the kit from LiteTek as well as the customer service. All seals are made in-house in Viton rubber which is superior to the original plain rubber seals. Excellent stuff and service, thank you Blair! I would note that the fuel link between carbs 1+2 and 3+4 should be - according to the fiche - a tube with a seal each end. In my bike it's a bonded seal/tube assembly, so I had to scrape and rub down a bit. Still, the assembly goes back in with the new seals on. See pics below. More pics, as I know you lot don't read words Float bowls  Needle valve seal  Throttle shaft seals are included, but I couldn't get the damn butterfly disc out. Still I put the shiny stainless screws in. Pic of me nearly fking up a carb...  Air screw stainless washer and seal (the old seals were well flattened on mine)  And these are the ones I really really needed... fuel T and joint seals. Pics/1k words...   The new ones have some flashing from the molding process but it won't affect the seal.   Bonded together, but not in the fiche.  So we apply a knife blade...  And a fine nail file (perfect size and grit for the job!)  I also boiled the airbox trumpets in WinterGreen oil.  I let them simmer for about an hour with 50ml of oil and about 3 litres of water. The rubbers have gone from nearly wooden, to soft and supple. The surface has gone a little funny in some places, but you can definitely now reuse the rubbers, which you could not before. They literally would not fit over the carbs before, no matter how hard you tried. I think they had not only gone hard but shrunk too, where now they have swollen to where you can fit them easily. I'm well pleased, even though the house still kind of smells like medicine. |
|